,

Natural Ginger Ale

Katie Wells Avatar

Reading Time: 3 minutes

This post contains affiliate links.

Read my affiliate policy.

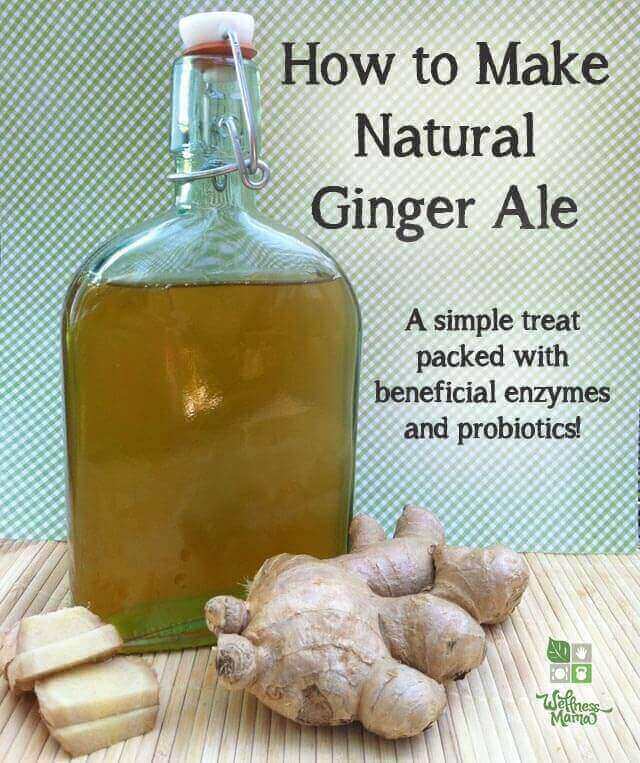
How to make natural ginger ale- a healthy and delicious treat full of probiotics and enzymes
Wellness Mama » Blog » Recipes » Drink Recipes » Natural Ginger Ale

It turns out that soda hasn’t always been the high fructose corn syrup and artificial flavor concoction in an aluminum can that we know today.

For hundreds of years (and probably much longer) cultures around the world have made various forms of naturally fermented “sodas” from sweetened herbal teas or fruit juice mixes. These natural fermented drinks contained beneficial enzymes and probiotics to boost health and were a far cry from the unhealthy versions we have today.

This version uses a fermented ginger culture to create a naturally fizzy soda! Ginger is a delicious herb that has been used in many cultures for its health-boosting properties. From my herb profile of ginger:

Ginger has been used in Chinese Medicine for thousands of years and is said to help:

  • Soothe digestive disturbances
  • Alleviate nausea (great in early pregnancy)
  • Reduce fever
  • Calm coughing and respiratory troubles
  • Stimulate the circulatory system
  • Help relieve muscle aches and pain
  • Can help get rid of dandruff
  • Emerging evidence shows it helps lower cholesterol
  • Japanese research has found ginger is effective in lowering blood pressure and cancer risk

This natural recipe for ginger ale uses fresh ginger and a cultured ginger mixture (called a ginger bug) to create a naturally fermented and naturally fizzy ginger ale. Though this mixture can contain a small amount of alcohol if left to ferment at room temperature for weeks, we use the short brew method to create a fizzy soda without the alcohol.

Delicious Ginger Ale

Homemade ginger ale is soothing for digestive disturbances and contains probiotics and enzymes. As with any fermented product, I’d suggest starting with a small amount (4 ounce or so) and working up, as all the probiotics and enzymes can cause an upset stomach in those who aren’t used to consuming fermented products. I found small amounts of this mixture helpful in early pregnancy and any time one of us has an upset stomach, to ward off nausea. It also just tastes great!

This recipe makes 2 quarts of natural ginger ale, though the recipe can be adjusted up or down by using a ratio of ¼ cup sugar and ¼ cup ginger bug starter per 1 quart of water.

How to make natural ginger ale- a healthy and delicious treat full of probiotics and enzymes

Homemade Ginger Ale Recipe

A naturally fermented old-fashioned ginger ale (also once called ginger beer) that contains beneficial probiotics and enzymes.
Cook Time 7 minutes
Total Time 2 days 7 minutes
Calories 53kcal
Author Katie Wells

Servings

2 quarts

Ingredients

Instructions

  • Make a “wort” for your ginger ale by placing 3 cups of the water, minced ginger root, sugar, molasses if needed, and salt in a saucepan and bringing to a boil.
  • Simmer the mixture for about five minutes until sugar is dissolved and mixture starts to smell like ginger.
  • Remove from heat and add additional water. This should cool it but if not, allow it to cool to room temperature before moving to the next step.
  • Add fresh lemon or lime juice and ginger bug or whey.
  • Transfer to a 2 quart glass mason jar with an air-tight lid. Stir well and put lid on.
  • Leave on the counter for 2-3 days until carbonated. Watch this step carefully. Using whey will cause it to ferment more quickly. It should be bubble and should “hiss” like a soda when the lid is removed. This is very temperature dependent and the mixture may need to be burped or stirred during this fermentation time on the counter.
  • Transfer to refrigerator where it will last indefinitely.
  • Strain before drinking.
  • Enjoy!

Nutrition

Nutrition Facts
Homemade Ginger Ale Recipe
Amount Per Serving (1 cup)
Calories 53
% Daily Value*
Sodium 159mg7%
Carbohydrates 14g5%
Fiber 0.1g0%
Sugar 13.7g15%
Protein 0.2g0%
* Percent Daily Values are based on a 2000 calorie diet.

Notes

As with any traditional fermented drink, this is more of an art than a science. The outcome depends greatly on the strength of your culture, the temperature of your house, and the sugar used. The final mixture should smell of ginger and slightly of yeast/fermentation and should be fizzy. Watch carefully that it doesn’t become too carbonated as this will cause too much pressure and may result in an exploding jar! 
The mixture can be strained and transferred to Grolsch style bottles before putting in the refrigerator. 

Like this recipe? Check out my new cookbook, or get all my recipes (over 500!) in a personalized weekly meal planner here!

Have you ever made a naturally fermented drink like ginger ale, kombucha, or water kefir? What is your favorite? Share below!

Sources

Become a VIP member!

Get access to my VIP newsletter with health tips, special deals, my free ebook on Seven Small Easy Habits and so much more!

Easy Habits ebook on ipad

Katie Wells Avatar

About Katie Wells

Katie Wells, CTNC, MCHC, Founder of Wellness Mama and Co-founder of Wellnesse, has a background in research, journalism, and nutrition. As a mom of six, she turned to research and took health into her own hands to find answers to her health problems. WellnessMama.com is the culmination of her thousands of hours of research and all posts are medically reviewed and verified by the Wellness Mama research team. Katie is also the author of the bestselling books The Wellness Mama Cookbook and The Wellness Mama 5-Step Lifestyle Detox.

Comments

443 responses to “Natural Ginger Ale”

  1. Melissa Avatar

    I tried this and our bug worked, I think. I put the ingredients into a big glass water dispenser that we have and left it for 2.5 days. I am not finding it fizzy at all so I left it a day longer and there was a white film of mold on top so I strained it through a cheesecloth and put it in the fridge with a lid on it. I want to make sure that this does not get us sick because of the mold. It actually tasted pretty good! The ginger burned the back of our throats just nicely like gingerale. Any advice on the white film and whether it was ok for me to strain it and put it in the fridge?

  2. Kathi Avatar

    Is this a one to two inch piece of ginger or one half inch piece of ginger? Thank you.

  3. Marina Avatar

    tried it once, fed the bug 8 days with 1 spoon of ginger and sugar, then tried making the ale, but on the 2-3rd day it started getting mouldy and didnt work, so much ginger went to waste… maybe ill try it again but it wont be soon

  4. Niki Neck Avatar

    I am at the counter top stage. I doubled the recipie and have 3 x 1L bottles doing their carbonation thing. Bug did its thing and frothed a bit each day was happy with it. I strained the mix as I bottled it into lever style glass bottles and left on the kitchen bench overnight. Today I noticed there is a light froth layer on the top and there is a sediment at the bottom. should I re filter /decant the mix into clean bottles after the 3day cabonation stage?

    1. Tom S Avatar

      I use a sieve to filter out the ginger before I transfer to bottles. Even without the ginger, after a few days in the bottles (I use plastic) there is a great amount of pressure. First time she tasted it, my daughter said it was “way fizzy”. But she likes it.

  5. corrie Avatar

    I made is definetely delicious ginger beer however there was a chmpagne– toast dramatic explotion when I uncapped the flip top bottle and I am a bit terrified now of opening the rest. Do you know of any way to reduce the carbonation? The problem I know is that I just added all of my ginger bug which was more than the recipe called for.

    1. Tom S Avatar

      5 stars
      I’ve made several delicious batches of this ginger ale and there is one thing I can’t recommend strongly enough – USE PLASTIC BOTTLES, at least for your first few brews. First, in case of overpressure there might be a mess (as with glass bottles), but there will not be broken pieces of glass all over the place. Second, you can squeeze the bottle to get an idea of the carbonation level which you cannot do with a glass bottle. Finally, you can slowly open the cap to release pressure little by little, rather than popping the top and letting it all out at once.

      However, as to finishing your current bottles… The best you could do is chill it as cold as possible without freezing it. Cold carbonated beverages foam upon opening much less than warm carbonated beverages.

      Best wishes!

      Tom

      1. Tom S Avatar

        BTW, I make batches of 6 liters at a time (multiplied the ingredients). I reuse 4 x 1.5L plastic water bottles for the first stage, releasing pressure once daily. After a few days in the 1.5L bottles, I add one tbsp of white sugar each to 12 x 500mL water bottles then fill to about 1.5″ from the top. Then let those bottles sit for 5 days (squeezing to check for pressure daily but not releasing pressure unless the bottle feels like a rock) before transferring to the fridge. Before use, I sanitize all bottles with a bleach/water mix, then rinse with warm water. As I said above, my wife, daughter and I all love the results.

        1. Tom S Avatar

          Sorry, forgot to mention that when transferring from the 1.5L bottles to the 500mL bottles I use a sieve to remove the ginger. Even without the minced ginger, a phenomenal amount of pressure develops in the 500mL bottles.

  6. Tom Avatar

    5 stars
    Using your recipe, I’ve made several batches of ginger ale for my wife and daughter – and they LOVE it – thanks! One thing worth mentioning, though, is the benefit of using plastic bottles for beginners. First, if it over-carbonates there could be a mess, but there won’t be broken glass from an exploding bottle all over the place. Second, you can squeeze the bottles to gauge the carbonation level. I reuse 500mL plastic water bottles after washing them and sanitizing with bleach/water followed by rinsing with warm water.

    Thanks again. This is a great addition to my homebrewed beer!

  7. Jason Avatar

    I’ve made ginger beer with forced carbonation before and instead of making the wort as described above, I ran ginger through a juicer (skin and all), strained it, then mixed that with water, sugar, citrus, etc. Can I use this same method and add the ginger bug or is making the wort necessary? Thanks for the help!

  8. Jake Avatar

    Can dried ginger root replace the fresh ginger root? If so, how much?
    I’ve been successfully making real root beer for a year. I want to try ginger ale.
    Thanks!
    Great post!

  9. Elisheva Avatar

    I made the ginger ale true to the recepie and enjoyed it greatly. I recently had a baby and had to take a course of antibiotics. I wanted the ginger ale in my system in order to boost my probiotics and my sons (he is nursing).
    Do you think it is safe to drink while nursing?
    Thank you!

  10. Pasha Avatar

    Alright, so now that I can achieve carbonation, the next challenge is to maintain carbonation until consumption. Like many of you, after burping my bottles and transferring them to the fridge I was quite disappointed to find my ale only a tiny bit fizzy or completely flat.
    I suspect, that ginger ale behaves pretty much like beer, that’s why it’s also called ginger beer. When the beer mixture is transferred to bottles and sealed for the fermentation period it is never burped right? Once you open the beer it will release it’s carbonation and will not get carbonated again if you store it in the fridge. So I figured that you need to burp your mixture only the first time just to get a hang of the process, to test how strong your bug is and how long you can keep your ale on the counter without exploding. Once you have build up some experience and confidence and you know how long you can leave the ale on the counter you can eliminate burping altogether. Again this is just my theory which I am currently testing, experiment on your own risk 🙂 This is my third batch, the trick I used to ensure a clean kitchen is that I used only one plastic bottle. The rest of the ale I transferred to glass bottles. This time I left the ale to ferment on the counter without burping. I used the plastic bottle to feel how much pressure is building up. When I thought it was enough (roughly in 3 days) I transferred it to the fridge. So far so good. I am also planning to let it stay in the fridge for some time. From my last batch I discovered that the taste was much much better after it stayed in the fridge for a few days.
    I post again with my results later.
    Good luck!

  11. Emily Avatar

    3 stars
    I’m not sure if its been asked yet, but is homemade ginger ale safe to drink during pregnancy? I know that unpasteurized foods and beverages are not recommended, but I wasn’t sure about this. Thank you!

  12. Christian Avatar
    Christian

    You wouldn’t happen to know of a similar recipe for a fermented cola type soda? I want to kick the sugar, but I’m a soda addict. particularly Dr pepper. I was hoping I could make something like a cherry cola ish but better for me? Too good to be true?

    1. Lez Avatar

      We have a drink in South Africa called “Rock Shandy”. Often people who have stopped drinking alcohol for whatever reason crave a drink that “seems ” alcoholic, as they don’t want a sweet taste. It is simply Soda water with a few drops of “bitters”. It is normally served with the glass rim dipped in sugar but you don’t have to do this. It is refreshing with a “dry” taste. Hope that helps!

  13. kaiya Avatar

    Well I’ve been going only for a month or so now and i’m thinking about restarting. It’s confusing, I haven’t changed a thing, and my bug is still all bubbly as can be, but my last four batches in a row have all totally failed to carbonate even slightly. I’d love to know how to properly skim out the old ginger or renew the bug because that’s the only thing I can think of that i’ve done that might have changed things, I skimmed out all the ginger that had built up.

  14. Kaiya Avatar

    I want to check on how to clear out the bug of old ginger. I skimmed ginger off the top without taking liquid, but I am pretty sure my bug is much weaker or even dying now.

    I also am curious if it is possible to keep the culture going using ginger juice instead of pieces, in order to avoid having the issue of clearing out old ginger in the first place.

    Finally, do I need to change/clean the jar from time to time? The sediment in the very bottom of the jar appears to be kind of dirty and maybe going “bad”, just from the look/feel of it. Should I dump it all into a new jar from time to time?

  15. Pasha Avatar

    5 stars
    Hi Katie, thanks for putting this recipe online and getting us all hooked up on this fermentation frenzy :))
    Like many other enthusiasts here I have failed to achieve carbonation at the second stage of the process on my first attempt. My ginger bug was all bubbly and yeasty but after I added it to the mix and transfered to bottles it just wouldn’t carbonate no matter how long I levt it stay on the counter.
    I suspected the problem was in the contact of the brew with the metal before transferring it to bottles. As it was pointed out, the metal will disturb bacteria and I am guessing it completely stops fermentation and carbonation. On my first attempt I was using a metal pan for the wort and a metal strainer to separate the bug from the ginger pieces. I added the bug to the wort while it was in the metal pan and stirred it, which I think messed it all up.
    On my second attempt I used a piece of medical bandage as a strainer and I first transferred the cooled off wort to a glass container before adding the bug. That did the trick for me and my ale started to carbonate like crazy. I used plastic bottles so I could feel how the pressure started to build up, but it was not until I opened the bottle the next morning that I felt to be one of the happiest guys on the planet to solve this mystery and make my own natural ginger ale.
    Hope this will help some of you guys who may have this problem too, just avoid metal, it’s evil 🙂

    1. Rick Avatar

      This must be it. I’ve been having a hard time with carbonation myself but I’ve been doing it like you have – using a metal pot and straining it with a fine mesh (metal) strainer. Next time I’m going to cook the wort as normal in a metal pot but transfer to a plastic carbouy before adding the ginger bug. Ok, gotta remember. No bug contact with metal…

      I must say that even with little or no carbonation this homemade ginger ale has ruined me for all of the other sugary fructose artificial ginger ales. They taste like garbage in comparison.

    2. Rick Avatar

      5 stars
      Great point Pasha. I’ve been having trouble getting any carbonation myself but now that you mention it, I’ve been stirring in the bug right in the metal pot, and then straining through a mesh metal strainer. The only mention of metal was not to use a metal stirring instrument when making the bug, which I don’t – but hadn’t considered all the other metal surfaces. Next time I’m going to pour the wort into a plastic carboy before adding the bug, then after it’s carbonated, straining it into bottle using a plastic mesh strainer. We’ll see how that turns out.

      Even without the carbonation, this recipe has ruined me on the sugary, fructose, artificial crud in a can. I can never go back to that, even if I don’t get the carbonation to work.

      1. Pasha Avatar

        Rick,
        I’m glad to hear my lessons learned could help someone with a similar problem. I hope you process adjustments will result in a very carbonated ale. Please do reply with your results. I am very curious.

  16. Kaiya Avatar

    My bug jar is getting full up to the top with ginger pieces. I am worried about taking them out they may take my bug along with them. Should I try to get the pieces from the top or the bottom?

    This issue leads me to wonder, can I continue my bug by adding fresh squeezed ginger juice instead of adding the whole pieces? It would make the process smoother but I am not sure if that will sustain the bug.

  17. Charlotte Avatar

    Seems to be as trick to it, that I havent figured out either. Ive only ever had 1 bottle really fizzy and the rest either semi fizzy and lose fizz as soon as opened or not fizzy enough, even from same batch. I dont like the taste, tastes like beer to me which I dont like so when theres no fizz I just cant drink it. Kids still like it tho.
    Im wondering if its the bottles cuz I dont know why else 1 would fizz and the rest didnt. Either way, as soon as they hit the fridge fizz8ng starts to dissappear.

    1. Kaiya Avatar

      Yes I’ve heard claims that kombucha like GT dave’s for example does not use artificial carbonation, but I can’t believe it. I just left a bottle for three days, and when I opened it, I had to do so very slowly, to stop it exploding, just letting out some gas, then resealing it, repeating this process over and over about five minutes, before I could open it without exploding everywhere. The whole bottle meantime was just infinite bubbles, it looked like it would pour out and be pure fizz and nothing else. But yet again, on pouring and drinking, I’d describe it as fizzless. : (

  18. Kaiya Avatar

    Maybe nobody else is reading this anymore, too bad! I am really confused about the fizz. If enough C02 has built up that I need to “burp” my bottle or risk exploding, should I just put it in the fridge? If I burp it, then leave it another day, and burp it, and leave it another day, what is the point? Don’t I lose all my fizz each time I burp? I am trying to figure out how to get the fizziest results! Thanks.

      1. kaiya Avatar

        I was about to ask that too. I thought I had tons of fizz because I could barely open the bottle, so I thought it was ready to go in the fridge. The next morning I opened it and it was totally flat : ( It seems capturing fizz is a fine art form.

4.23 from 136 votes (69 ratings without comment)

Leave a Reply

Your email address will not be published. Required fields are marked *

Recipe Rating