• Skip to main content
  • Skip to header right navigation
  • Skip to after header navigation
  • Skip to site footer
Wellness Mama script logo

Wellness Mama®

Simple Answers for Healthier Families

  • About
  • Favorites
  • Podcast
  • Blog
  • Shop
  • Health
  • Natural Home
  • Motherhood
  • Mindset
  • Natural Remedies
  • Beauty
  • Organization
  • Travel
  • Reviews
  • Recipes
How to make homemade reusable snack bags
  • Natural Home

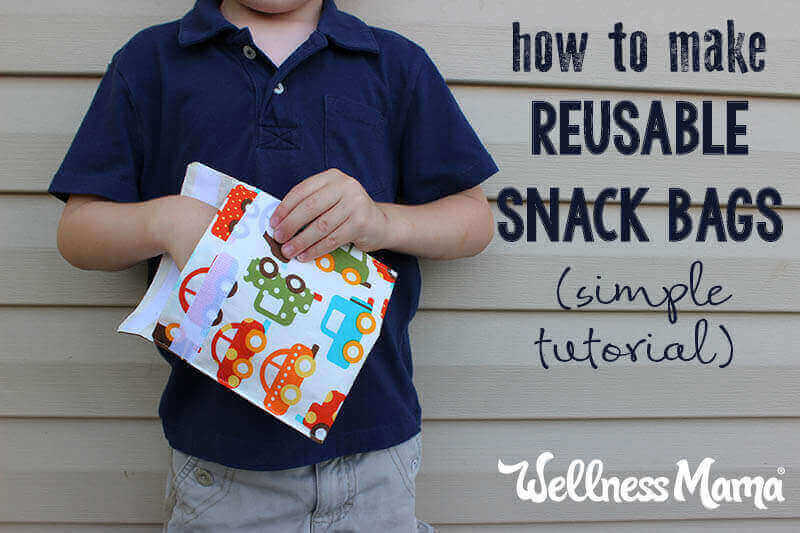
How to Make Your Own Reusable Snack Bags

Katie WellsJul 25, 2016Updated: Jul 30, 2019
Reading Time: 4 min

This post contains affiliate links.
Click here to read my affiliate policy.

Wellness Mama » Blog » Natural Home » How to Make Your Own Reusable Snack Bags

I try to avoid using plastic in our home as much as possible, but I understand the convenience of plastic baggies for snacks on the go. When I am out and about with the kids I like to keep some healthy snacks in my purse for when hunger strikes.

There are a lot of great options for reducing plastic in your home and I love to use stainless steel lunch containers to pack healthy lunches for my kids when we go on field trips. But stainless steel and glass are not always practical for quick trips and tend to get quite heavy in my purse.

DIY Cloth Snack Bags

The simple answer for snacks on the go is to use cloth snack bags. Etsy is overflowing with beautiful options for reusable snack bags, most of them handmade by stay-at-home-moms.

If you have even a basic knowledge of sewing, you also have the option to make some yourself.

A few weeks ago I made a few baby bibs for a friend’s baby and I decided to make some coordinating reusable snack bags to go with the bibs.

We use these for popcorn, energy bars, Magic Spoon cereal, and more!

Fabric

Since I was coordinating the bags to the bibs I previously made, I used this organic cotton print (dyed with low-impact dyes) for the outer fabric and an organic cotton muslin for the inside lining. (I used this fabric for the bibs.)

Cotton is easy to work with, it is easily washable, and there are a lot of cute prints to choose from. The only drawback is that cotton snack bags are better suited to dry snacks such as trail mix, homemade jerky, wellness energy bars, and grain-free crackers, just to name a few.

A thicker fabric such as canvas or home decorator fabric would offer a thicker bag that would be good for foods like sliced carrots, grapes, or snap peas, but it still won’t be waterproof.

Supplies:

  • sewing machine
  • fabric
  • 3/4″ wide hook and loop
  • thread
  • sewing pins
  • ruler or measuring tape
  • iron

Directions:

Use 1/4″ seam allowances. Finished bag will be 6″ w by 5.5″ h.

  1. Cut one rectangle 13.5″ by 6.5″ from both the outer fabric and the lining fabric. If you have a one way print you will want the long measurement to parallel the direction of the print.
  2. Pin the two pieces together with right sides together.
  3. Leave a 3″ opening on one of the short ends so that you can turn the pieces right side out.
  4. Start on one of the short ends about 1.5″ from the corner. Sew toward that corner and continue all the way around the rectangle, stopping 1.5″ after the last corner. This will leave the 3″ opening.
  5. Clip the 4 corners.
  6. Turn the bag right side out by pulling it through the opening.
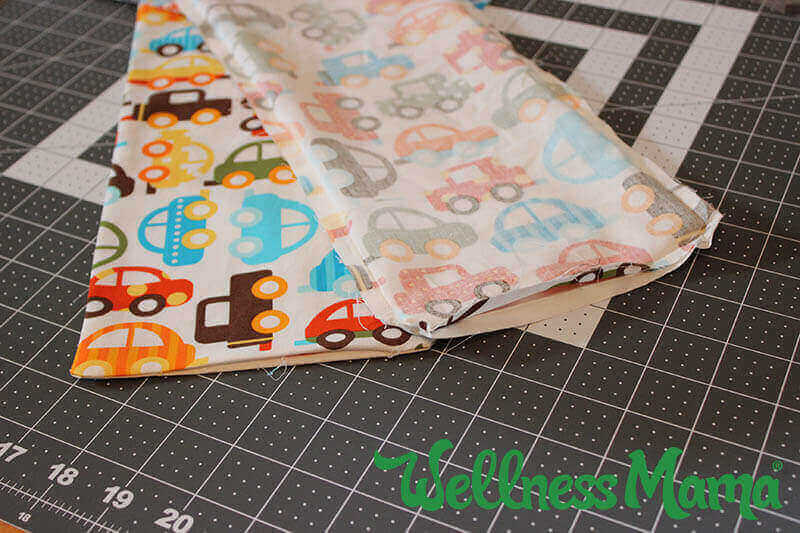
Stitching homemade snack bags

  1. Press seems flat around the edge, making sure to press the open section as well. That section will be closed when you top stitch.
  2. Measure across the narrower width of the bag and cut both sides of the hook and loop to this measurement. Mine was about 5.75″ long.
  3. Lay the bag down on the table, outside fabric down. Take the short end that does not have the opening and fold it up about 5.5″
  4. Lay one side of the hook and loop (it doesn’t matter which side) 3/8″ down from the top of the bag (on the lining side). Lay the other side 5/8″ down from the edge you folded up (on the printed side). Pin both pieces in place.
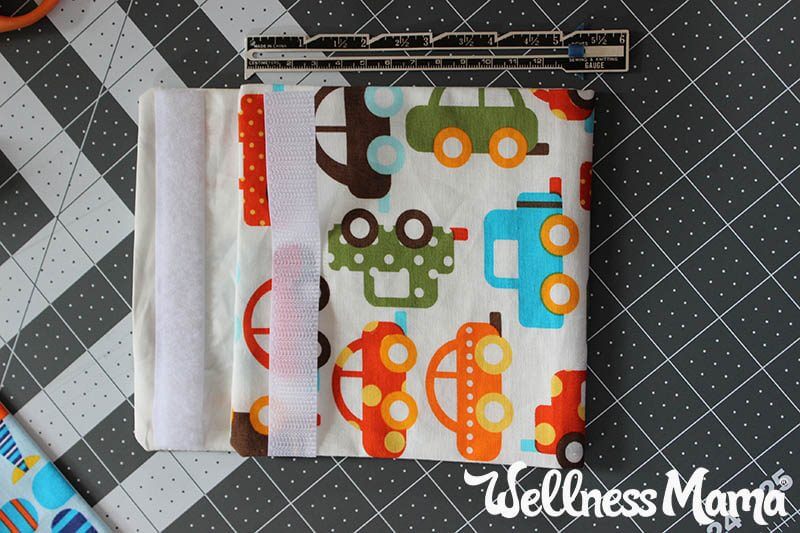
Pinning homemade snack bags

  1. Unfold the bag and sew the hook and loop to the bag by stitching along the long edges of each strip.
  2. Refold the bag like you did in step 9. Pin it in place.
  3. Beginning at one bottom corner, stitch up the side of the bag a scant 1/8″ from the edge.
  4. Sew all the way to the top corner, pivot at the corner, and continue across the top. This will give a nice top stitch and also close the opening.
  5. Pivot at the other corner and sew down the third side. It is not necessary to sew along the bottom edge but you could if you want the look of the top stitching.
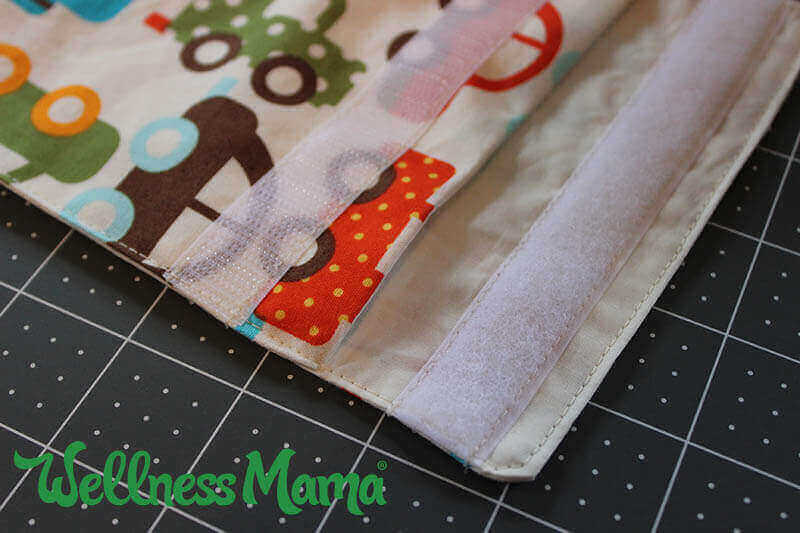
Finishing homemade snack bags

If you enjoy making these bags, check out my tutorial for making your own produce bags!

Do you use reusable snack bags? Will you try to make your own?

Category: Natural Home

Share this article

FacebookTweetPinLinkedIn
Print / PDF / Email

About Katie Wells

Katie Wells, CTNC, MCHC, Founder of Wellness Mama and Wellnesse, has a background in research, journalism, and nutrition. As a wife and mom of six, she turned to research and took health into her own hands to find answers to her health problems. WellnessMama.com is the culmination of her thousands of hours of research and all posts are medically reviewed and verified by the Wellness Mama research team. Katie is also the author of the bestselling books The Wellness Mama Cookbook and The Wellness Mama 5-Step Lifestyle Detox.

  • All Posts

You may also enjoy these posts…

How to make your own plastic free produce bags

How to Make Your Own Produce Bags

How to Make Reusable Gift Bags to reduce waste this year

How to Make Reusable Cloth Gift Bags

natural sanitizing spray cleaner

How to Make Your Own Natural Disinfectant Spray

DIY liver supplements

How (& Why!) to Make Your Own Liver Capsules

How to Make Your Own Cloth Baby Bibs

homemade vapor rub

How to Make Your Own Natural Vapor Rub

Reader Interactions

Discussion (10 Comments)

  1. Sarah

    June 5, 2019 at 7:30 AM

    If I’m using a good safe liner does the outside fabric still need to be organic? Thanks!

    Reply
  2. Alli

    October 11, 2018 at 2:09 PM

    Is ripstop nylon fold safe? I think it would create a waterproof liner.

    Reply
  3. Janet Miller

    February 24, 2017 at 12:08 PM

    I love this idea but like others would like it to be waterproof. What can I use to make that happen? I’ve seen some good ideas here but wondering where to get some of those materials. I. E. Canvas in particular.

    Reply
  4. Kerry

    September 23, 2016 at 6:40 AM

    So could you use waterproof fabric, the stuff used for swim bag linings. Or is this fabric due to being polyester not safe for food??

    Reply
  5. Dorothy Eddins

    July 31, 2016 at 8:05 PM

    A few years ago, I bought some potatoes and onions in plastic mesh bags. I’m a crazy thrifter, so I saved the bags. I put my produce in the bags when I shop, and loosely loop the end. The cashier can see the labels to scan, I put the bags in my tote, go home and unload, and repeat the process the next week.

    Reply
  6. Cari

    July 28, 2016 at 2:28 PM

    Sorry to be stickler for detail, but I’m sure these would get SO messy in my family! The beeswax tip is good, does anyone have any other tips (good snacks to use/ washing/ misc other?!)

    Reply
    • MCJam

      July 31, 2016 at 6:00 AM

      I agree! Moist foods would leak through and dry would not stay fresh. I can just imagine soggy crackers or pretzels and damp bags with carrots and cucumbers….and stains difficult to wash out….

      Reply
  7. Rachael

    July 26, 2016 at 12:56 PM

    I use old make-up pouches I find at thrift shops. They’re water proof, some have Velcro some have zippers. They come in all shapes and sizes and cost under a buck each! I throw them in the washer or dishwasher! These are super cute! Great diy and wonderful way to use up old material laying around. Also cloth bags are easier to sneak into movies 🙂 no crinkling!

    Reply
    • Lisa

      July 28, 2016 at 7:55 PM

      The only thing about using old makeup bags us that they are probably not made with food grade material. Also, for some people making the bags has two functions: to reduce waste and exposure to plastics.

      Reply
  8. Johanna

    July 25, 2016 at 12:43 PM

    You can make the bags water resistant by rubbing some beeswax on the cotton lining. I do this to my canvas shoes.

    Reply

Join the Conversation... Cancel reply

Your email address will not be published. Please read the comment policy.

Recipe Rating


The information on this website has not been evaluated by the FDA and is not intended to diagnose, treat, prevent, or cure any disease. By accessing or using this website, you agree to abide by the Terms of Service, Full Disclaimer, Privacy Policy, Affiliate Disclosure, and Comment Policy. Content may not be reproduced in any form. Ads provided by CafeMedia Family & Parenting Network. Displayed ads do not constitute endorsement or recommendation by Wellness Mama.


Content

  • Home
  • About
  • Blog
  • Podcast
  • Favorites
  • Wellnesse

Support

  • Newsletter
  • Podcast Application
  • Medical Review Board
  • My Books
  • Sitemap
  • Contact

Policies

  • Privacy Policy
  • Terms of Service
  • Full Disclaimer
  • Affiliate Disclosure
  • Promo Guidelines
  • Comment Policy

Join the
Wellness Mama Tribe!


Copyright © 2023 · Wellness Mama® · All Rights Reserved · Powered by BizBudding