• Skip to main content
  • Skip to header right navigation
  • Skip to after header navigation
  • Skip to site footer
Wellness Mama script logo

Wellness Mama®

Simple Answers for Healthier Families

  • About
  • Favorites
  • Podcast
  • Blog
  • Shop
  • Health
  • Natural Home
  • Motherhood
  • Mindset
  • Natural Remedies
  • Beauty
  • Organization
  • Travel
  • Reviews
  • Recipes
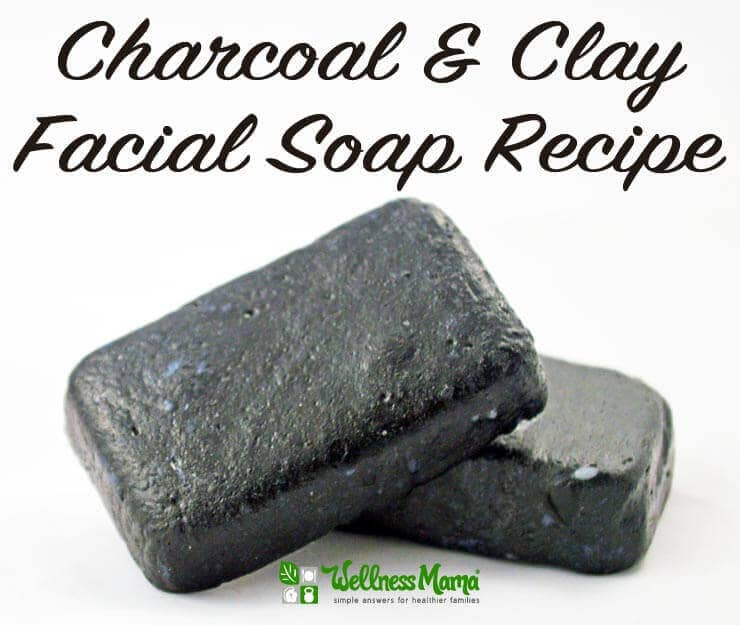
Charcoal and Clay Facial Soap Recipe
  • Natural Home

Charcoal & Clay Facial Soap Recipe

Katie WellsJan 2, 2015Updated: Apr 7, 2022
Reading Time: 6 min

This post contains affiliate links.
Click here to read my affiliate policy.

Wellness Mama » Blog » Natural Home » Charcoal & Clay Facial Soap Recipe
Table of Contents[Hide][Show]
  • Hot vs. Cold Process Soap+−
    • Is Lye Dangerous?
  • Clay and Charcoal?+−
    • Calculating Percentages
  • Charcoal Soap Ingredients:
  • How to Make Charcoal Soap

I’ve been making my own soap for a long time, both by cold process and hot process in a crock pot. It can seem really intimidating to begin making your own soap, but everyone I know who actually tries it is amazed at how simple it is.

Hot vs. Cold Process Soap

As I explained before, both methods of soap making use water, lye and a combination of oils. The additional step of heating the mixture with hot process soap speeds the saponification process and results in a faster soap making process.

There are advantages and disadvantages to each type of soap. Hot process creates a faster soap, and cold process often creates a smoother soap, though I’ve found both work great on my skin.

A third option I’ve only experimented with slightly is using a melt and pour soap base (like this cocoa butter soap base or this goats milk soap base). This option does not require any Lye and is faster and easier for those who don’t want to deal with the chemistry of soap making. Essential oils, clays, salts and other natural ingredients can still be added with melt and pour soap, but I prefer to use the hot or cold process method so I can control the oil ratios in the soap.

Melt and pour soap can be a gateway into regular soap-making for those still a little hesitant to use Lye, but I’ve found that the most cost-effective and natural option is to start from scratch.

Is Lye Dangerous?

As I explained in my original soap recipe:

When Lye is used in soap-making, it is what is called a reagent, meaning it is used in a chemical reaction to create other substances. In soap making, a carefully measured water/lye mixture is blended with natural oils in a process called saponification. Lye is simply an agent used to create soap from oils and water.

There is no unreacted Lye remaining in properly made soap. If you’re considering making soap, definitely use extreme caution with unreacted lye and use a soap calculator to make sure you are using the correct ratio of water/lye/oils but don’t be afraid of this age old process.

Where to Find Lye: Some hardware stores carry Lye (sodium hydroxide) though many have stopped carrying it. I wasn’t able to find it at any of our four local hardware stores so I ordered this one online. If you have a local (not big brand) hardware store they might also be able to special order it for you.

I now feel safe using Lye for soap making, I just take precautions and don’t use it when my children or around. It is also very important to remember to add lye to the water and NOT water to the Lye (which can cause an explosion).

Clay and Charcoal?

Why add clay and charcoal to soap? When I first started experimenting with adding these to my soap recipes, I was a little unsure how they would turn out. After all, these are both great for face masks and whitening teeth, but wouldn’t they leave residue on skin?

I found that they absolutely do not leave a residue on skin, and that they are absolutely perfect for oily or acne prone skin since they are naturally anti-bacterial and toxin removing.

In fact, I made these as a body soap (and they can definitely be used that way) but I fell in love with them as a gentle facial soap that works incredibly well. I still use the oil cleansing method but for other times when I need to wash my face, I use this gentle cleansing soap.

I add activated charcoal powder and bentonite clay to this recipe. I’ve found that this also extends the life of the soap.

Calculating Percentages

I used SoapCalc.net to calculate the ratios for this soap, and I highly recommend it, especially if you are new to soap making. I wanted to use a mixture of coconut oil, olive oil and castor oil so I entered these into the soap calculator and got these percentages:
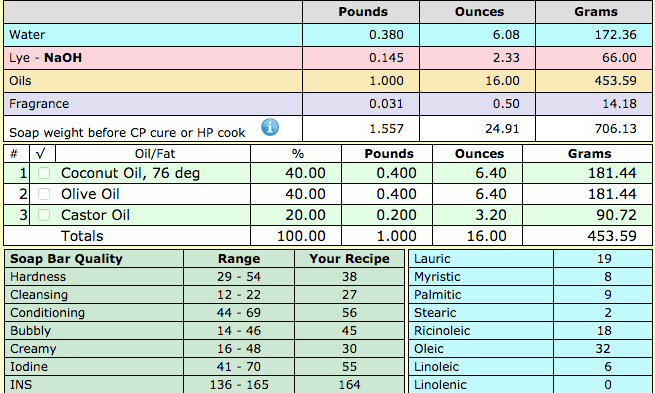
Charcoal Soap Recipe

With soap making, it is very important to measure the weight. I use a digital scale and measure by grams to be most precise. This ensures that there is no remaining Lye in the recipe and that the oils fully saponify. I also keep the following tools and supplies on hand for soap making:

  • A slow-cooker (I got an older one at a thrift store)
  • A digital scale (this is important for making a soap that is not too harsh or too oily)
  • Glass jars and bowls
  • A stick blender 
  • plastic cups (optional)
  • A metal spoon
  • A wooden spoon
  • A spatula
  • Soap molds (or an old cardboard box lined with parchment paper). I have green flower molds, red silicon rose molds and basic bar soap molds.
  • Gloves and sunglasses or eyewear
  • A large bottle of white vinegar for neutralizing the lye mixture if it spills on anything.

Charcoal Soap Ingredients:

  • 172.36 grams (6.08 ounces) of filtered water
  • 66 grams (2.33 ounces) Lye
  • 181.44 grams (6.4 ounces) Coconut Oil
  • 181.44 grams (6.4 ounces) Olive Oil
  • 90.72 grams (3.2 ounces) Castor Oil
  • 1 tablespoon activated charcoal powder
  • 1 tablespoon bentonite clay powder
  • 1 ounce of essential oil of choice (or blend) I used lavender and tea tree

How to Make Charcoal Soap

  1. Make sure that your work area is clean, ventilated and that there are no children nearby. This is not a good recipe to let children help with since Lye is caustic until mixed with water and oils.
  2. Measure the oils in liquid form (by weight) and pour into the slow cooker. Turn on high just until oils heat up and then reduce to low heat. At this time, Add the clay and charcoal and use a stick blender to incorporate fully.
  3. While oils are heating, carefully measure the lye and water separately. TIP: This is the only thing I ever use disposable plastic cups for. They don’t weigh anything on the scale so they make measuring easy and I keep three separate cups labeled:
  4. Water, Lye and Oil to use for this purpose only. I reuse them each time so they aren’t wasted and I don’t worry about anyone drinking out of them since we don’t usually use these types of cups.
  5. Carefully take the cups with the water and the lye outside or to a well ventilated area. Pour the water into a quart size or larger glass jar. With gloves and eye protection, slowly add the lye to the water. DO NOT ADD THE WATER TO THE LYE (this is really important). Stir carefully with a metal spoon, making sure not to let the liquid come in contact with your body directly.
  6. As you stir, this will create a cloudy white mixture that gets really hot. Let this mixture set for about 10 minutes to cool. It should become clear and not cloudy when it has cooled.
  7. When the oils in the crockpot have heated (to about 120-130 degrees F), slowly pour in the water and lye mixture and stir.
  8. Quickly rinse the container used for the water and lye mixture out in the sink. I rinse well and then re-rinse with white vinegar to make sure all Lye has been neutralized.
  9. Use the metal or wooden spoon to stir the lye/water mixture into the oil mixture in the crockpot. Once it is evenly mixed, use the stick blender to blend for about 4-5 minutes or until it is opaque and starting to thicken.
  10. Cover and keep on low heat to thicken. I set a timer for 15 minutes and check it every 15 minutes until it is ready. It will start to boil and bubble on the sides first. After about 35-55 minutes (depending on crock pot) it will thicken enough that the entire surface is bubbly and the sides have collapsed in.
  11. At this point, turn the heat off and remove the crock. If you are going to use essential oils for scent, add them now. I added lavender and orange.
  12. Quickly and carefully spoon into molds. I’ve often heard of people using empty Pringles containers but haven’t tried it. I have used empty boxes lined with parchment paper.
  13. Cover the molds with parchment paper and set in a cool, dry place.
    After 24 hours, pop the soap out of the molds. It can be used right away, but I prefer to let it set for a few more days so that it lasts longer.

This soap will leave a little bit of residue in the bottom of the shower over time, but I’ve found that this is easy to clean with a quick microfiber wipe down each day.

Ever made your own soap? How did it go?
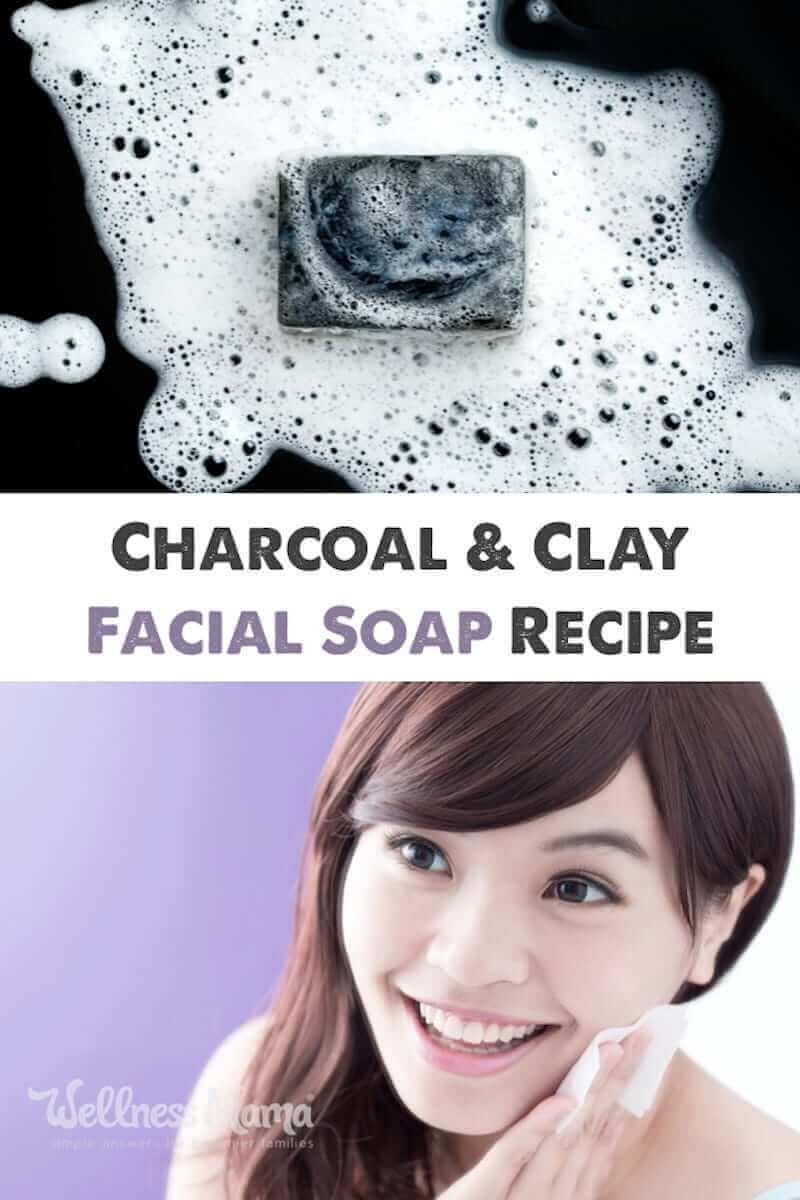
This facial soap recipe uses activated charcoal and bentonite clay with a base of coconut oil, olive oil, castor oil and essential oils.
Category: Natural Home

Share this article

FacebookTweetPinLinkedIn
Print / PDF / Email

About Katie Wells

Katie Wells, CTNC, MCHC, Founder of Wellness Mama and Wellnesse, has a background in research, journalism, and nutrition. As a wife and mom of six, she turned to research and took health into her own hands to find answers to her health problems. WellnessMama.com is the culmination of her thousands of hours of research and all posts are medically reviewed and verified by the Wellness Mama research team. Katie is also the author of the bestselling books The Wellness Mama Cookbook and The Wellness Mama 5-Step Lifestyle Detox.

  • All Posts

You may also enjoy these posts…

How to add clay to homemade soap

How to Make Homemade Clay Soap

Slowcooker Crockpot Basic Soap Recipe with coconut oil and olive oil

Basic Slow Cooker Soap Recipe

Homemade Liquid Hand Soap

Liquid Hand Soap Recipe

Activated Charcoal Gummies Recipe (for Upset Tummies)

Soap Nuts Shampoo Recipe- easy and natural

Soap Nuts Shampoo

Homemade natural shave soap recipes

Homemade Shaving Soap Recipe

Reader Interactions

Discussion (135 Comments)

  1. Rachel

    January 3, 2015 at 4:01 PM

    What a great idea for additives to soap!
    I make and sell thousands of hot process soaps each year.
    I wanted to let you know to be careful what kind of metal spoon and utensils you use. NEVER use aluminum- it will react with lye! Always use stainless steel. Also another pointer for lye spills- just douse with water. The more water than lye dilutes it and takes its burning caustic effects away. Vinegar does not actually work well…don’t ask me how I know but the burns are bad. :/
    I quit making soap for fun since I make so much now for my business but I may just whip up a little batch and try this out! Thanks Katie!!!

    Reply
    • Mary

      August 3, 2019 at 9:03 AM

      Can I make this as a CP soap and just let it cure for 6 weeks? I don’t want to wreck my crock pot. Thanks!?

      Reply
  2. Lindsey

    January 3, 2015 at 1:19 PM

    So I’ve read the instructions a couple of times, since soap making is on my to-do list this year, and I’ve been wanting to try charcoal face soap. I think I’m missing at what point in the process the charcoal and clay go in? Do you put them in when the essential oils are added?

    Reply
    • Katie - Wellness Mama

      January 3, 2015 at 11:32 PM

      I put them in with the oils at the beginning. From the instructions: Measure the oils in liquid form (by weight) and pour into the slow cooker. Turn on high just until oils heat up and then reduce to low heat. At this time, Add the clay and charcoal and use a stick blender to incorporate fully.”

      Reply
  3. Heather

    January 3, 2015 at 12:36 PM

    I love making soap. This recipe sounds great! I’ve added bentonite clay to some facial soap, but not the charcoal. I’ll be adding this to my list. Thanks!

    Reply
  4. Kassandra

    January 3, 2015 at 11:51 AM

    Good morning, Do I have to use LYE?? what would be the difference if I don’t?
    Please let me know
    Thank you!!

    Reply
    • Katie - Wellness Mama

      January 3, 2015 at 11:34 PM

      Yes. Lye is not dangerous when used in soap making (just use precautions when handling it.) Lye is what saponifies the oils and turns them into soap. Without it, this would not be soap, but a mix of oils and clay.

      Reply
  5. Lorna Tobiasson

    January 3, 2015 at 10:24 AM

    I have been making soap for about 2 years now. My favorite hobby. I only use soap bases that I get at Hobby Lobby, Michaels, or on line. So easy and so much fun. Don’t forget to look for coupons. I have added tea, oatmeal, turmeric, coffee, charcoal, chai seeds, etc. My favorite is using Lemongrass essential oil in clear glycerin base with a bit of green mica powder for color then place a couple of fresh lemongrass circles on top for looks. I also use a little Vitamin E oil for added moisture and as a preservative. Don’t waste your money on molds. There are hundreds of food containers that work well…just clean them out well with distilled vinegar.

    Reply
    • Joyce Barnes

      January 3, 2015 at 9:29 PM

      Hello , I’ ve been interested in making soap lately and just ordered a soap making book on amazon, just wondering what you met by getting your soap base at the stores you mentioned . What is a soap base ? Sorry , I’ m just learning about the art and science of making soap . Thanks , Joyce

      Reply
      • Lorna Tobiasson

        January 4, 2015 at 8:34 AM

        Another name for soap bases is Melt and Pour. Ck out Bramble Berry.com and click onMelt and Pour soap bases. No mess no fuss. Except for the melting of the bases in the microwave, this is fun for kids too. I have made soaps that look like layered cakes, cup cakes, and the like but have now stayed with plain soaps filled with natural added ingredients. Pinterest and utube are great websites to get ideas. Learning what the different essential oils are good for is a must for soap making. Important for what type of skin one is cleaning.

        Reply
      • Lesa

        January 4, 2015 at 1:45 PM

        In hobby lobby, go to the section where there is candle making and soap making supplies. You should see A soap section that will have molds, scents, colors, and additives for soaps. Among these, usually on a lower shelf, you will see rectangular plastic containers with indentations on the bottom of the containers. They are around the size of a sheet of paper but around 1.5 inches thick. The container has either clear (glycerin) or white (olive, coconut, or Shea) soap base in it. To use, you cut out the amount of soap base you desire, melt in microwave, then add the extra oils, petals, scents or clay. Pour in mold, cool to harden and use. These are melt and pour soaps. You can use them right away. Lye has already been added and the chemical reaction has been completed prior to them being packaged and sold. So there is no cooking (hot process) or waiting ( cold process).

        Warning…soap making is addicting. Enjoy

        Reply
        • Natasha

          April 17, 2022 at 4:10 PM

          Hi! Just made this recipe and placed in a cool dry place. After it was bubly in the crock, I stared it and put into a mold. It Seemed kinda lumpy, not very smooth texture to it at all. Is this normal? My hubby followed along and it seems that we followed the recipe as stated.

          Reply
    • ruth

      January 5, 2015 at 9:42 AM

      So, instead of the lye, do you use the same ratio of soap bases or “pourable” soap? I don’t want to get into using lye……..

      Reply
      • Lorna Tobiasson

        January 5, 2015 at 7:00 PM

        A Melt and Pour soap base looks like a big square chunk of soap or it comes in a square tub. Melt it and add what you want. The lye is already in it.

        Reply
  6. Ty

    January 3, 2015 at 9:50 AM

    Hi Katie, I’m from Nigeria. I love the lesson. Could you put me through more natural soap recipes pls? I’m thinking of starting my own soap business in a little way. Thanks.

    Reply
    • John Masciarelli

      July 20, 2015 at 2:34 AM

      Check out soap queen

      Reply
  7. Ashley

    January 2, 2015 at 8:30 PM

    Is there a way to make soap without the Lye? Being pregnant and having a toddler around me all the time makes me terrified I’ll get it wrong. Thanks! ????

    Reply
    • Katie - Wellness Mama

      January 3, 2015 at 11:38 PM

      I’d have someone else mix the lye and water for you, but without the lye, these will just be oils and clay.

      Reply
    • Pavlos

      January 8, 2015 at 4:12 AM

      Ashley, there is no soap without using lye in the process. What you can do is use an organic melt and pour base, which is essentially what Katie said, having someone else handling the lye for you, and is mentioned in her post as well. What you do in the “melt and pour” method is melt the soap base then add and mix to it any additive such as the charcoal, clay and essential oils, and pour into molds.

      Although you won’t come into contact with lye in this method, still you will be handling hot melted soap, so you will have to be careful.

      It is also quite hard to find a pure organic M&P base, so be meticulous with checking ingredients. Have fun!

      Katie, I really like this recipe, and did a CP batch with it. I’m sure a lot of people will enjoy it, thank you for sharing!

      Reply
      • Amanda cettina

        July 17, 2016 at 6:48 AM

        If I used a mix and pour base how much do I use to keep to this recipe?

        Reply
  8. Erin

    January 2, 2015 at 7:23 PM

    Hi Katie! Thank you so much for being such an inspiration! I was wondering if you needed to add the essential oils in the calculations? Thank you!

    Reply
    • Katie - Wellness Mama

      January 3, 2015 at 11:39 PM

      I don’t since they are such a small amount.

      Reply
      • Ayah

        August 11, 2016 at 11:52 AM

        Just a concern I have, soap needs to cure for 2-6 weeks in order to fully saponify the lye.. Why are you telling people you can use it right away?

        Reply
        • Wellness Mama

          September 12, 2016 at 8:04 PM

          This recipe is written as a hot process soap, and the heat speeds up this process. Cold process soaps do need this amount of time.

          Reply
          • Siham

            January 21, 2021 at 4:45 PM

            Hi.. thank you for the recipe.. but can i make it on stove.. i dont have a crockpot..

  9. Michelle

    January 2, 2015 at 5:31 PM

    I will save this for my soap-making endeavors this year, Katie. I am still intimidated by the thought but you make it sound interesting and so worth it. Thank you very much for being generous with your knowledge.

    Reply
    • Chelsea

      January 5, 2015 at 3:44 PM

      I was nervous too but tried her crock pot soap recipe over Christmas and it turned out great! I’m so excited to keep trying these out and making soap for a small fraction of what it costs to buy it 🙂

      Reply
    • John Masciarelli

      July 20, 2015 at 2:32 AM

      There some great soap making videos online. Soap Queen offers a great toturial. That’s how I learned and u started my own line. Wants u make one batch you’re gonna wanna make more.

      Reply
  10. Celina Williams

    January 2, 2015 at 4:44 PM

    Since making this soap is too far above my head, I was wondering if I could purchase this from you. Thank you, Celina

    Reply
    • Becky

      March 2, 2015 at 5:39 PM

      Try the Fresh Face charcoal soap at Bombshellbath.com only $4 per bar!

      Reply
    • Nora

      May 25, 2016 at 4:28 PM

      I used this charcoal soap I found on Amazon by Destiny Boutique: https://www.amazon.com/Destiny-Boutique-895858002432-Charcoal-Facial/dp/B0161RXFBG/ref=as_li_ss_tl?ie=UTF8&linkCode=ll1&tag=wellnessmama-20&linkId=2f2608d220e7564b1988130f0fc9123c&language=en_US

      Reply
Newer Comments »

Join the Conversation... Cancel reply

Your email address will not be published. Please read the comment policy.

Recipe Rating


The information on this website has not been evaluated by the FDA and is not intended to diagnose, treat, prevent, or cure any disease. By accessing or using this website, you agree to abide by the Terms of Service, Full Disclaimer, Privacy Policy, Affiliate Disclosure, and Comment Policy. Content may not be reproduced in any form. Ads provided by CafeMedia Family & Parenting Network. Displayed ads do not constitute endorsement or recommendation by Wellness Mama.


Content

  • Home
  • About
  • Blog
  • Podcast
  • Favorites
  • Wellnesse

Support

  • Newsletter
  • Podcast Application
  • Medical Review Board
  • My Books
  • Sitemap
  • Contact

Policies

  • Privacy Policy
  • Terms of Service
  • Full Disclaimer
  • Affiliate Disclosure
  • Promo Guidelines
  • Comment Policy

Join the
Wellness Mama Tribe!


Copyright © 2023 · Wellness Mama® · All Rights Reserved · Powered by BizBudding