• Skip to main content
  • Skip to header right navigation
  • Skip to after header navigation
  • Skip to site footer
Wellness Mama script logo

Wellness Mama®

Simple Answers for Healthier Families

  • About
  • Favorites
  • Podcast
  • Blog
  • Shop
  • Health
  • Natural Home
  • Motherhood
  • Mindset
  • Natural Remedies
  • Beauty
  • Organization
  • Travel
  • Reviews
  • Recipes
bath bombs recipe
  • Beauty

Homemade Bath Bomb Recipe (Great DIY Gift!)

Katie WellsJul 6, 2022
Reading Time: 6 min

This post contains affiliate links.
Click here to read my affiliate policy.

Jump to Recipe
Wellness Mama » Blog » Beauty » Homemade Bath Bombs Recipe (Great DIY Gift!)
Table of Contents[Hide][Show]
  • DIY Bath Bomb Recipe
  • How to Make a Natural Bath Bomb Recipe+−
    • Baking Soda
    • Citric Acid
    • Corn Starch or Arrowroot
    • Liquid Ingredients
    • Scents and Colors
    • The Best Essential Oils for Bath Bombs
    • Herbs for Bath Bombs
    • Homemade Bath Bomb Recipe Equipment
  • DIY Bath Bomb Tutorial+−
    • Non-Toxic Pre-Made Bath Bombs
  • DIY Bath Bomb Recipe
  • Bath Bomb Troubleshooting
  • More Natural Bath Recipes

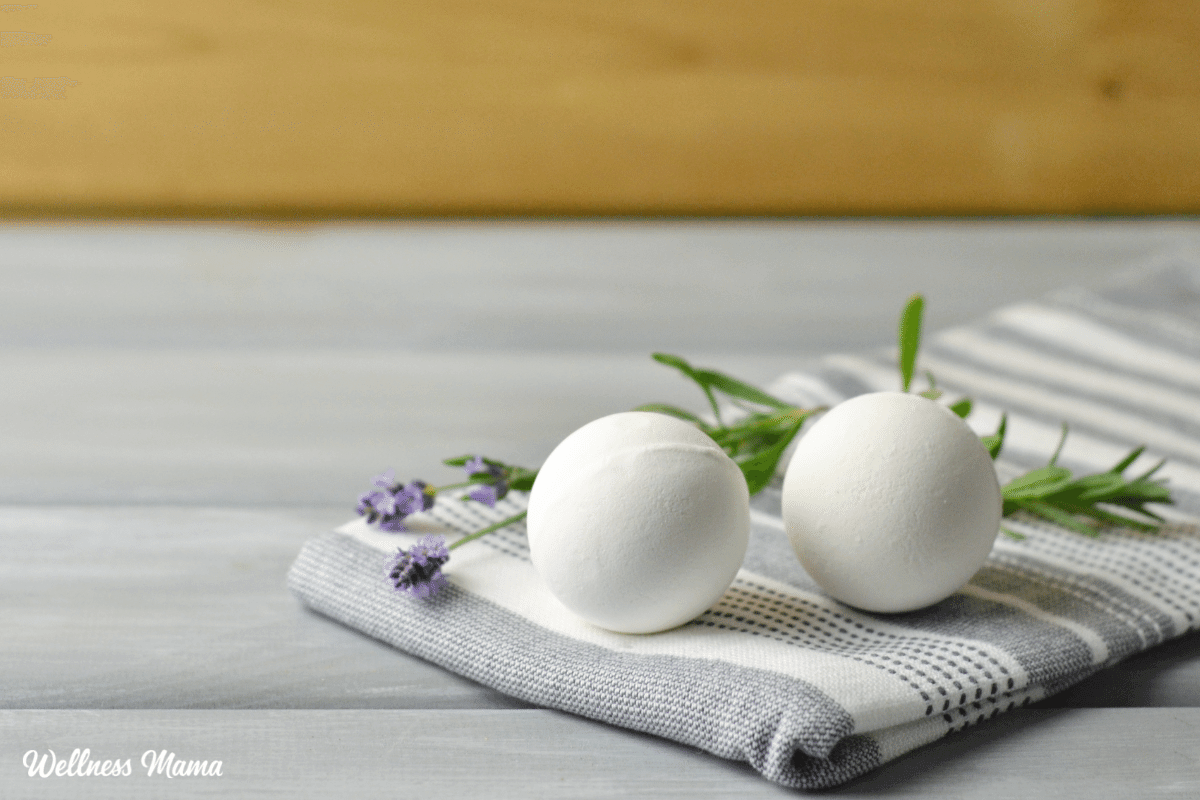
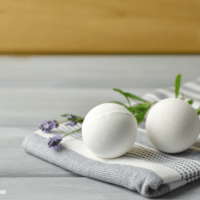
There’s something incredibly relaxing about a warm bath, and this homemade bath bomb recipe makes it even better! There are thousands of bath bomb options available, but it’s easy to make your own with natural ingredients. Kids and adults alike love them and they make a great gift.

While they can cost up to $9 each to buy, you can make a whole batch for just a few dollars!

DIY Bath Bomb Recipe

When I was younger, I loved bath bombs. I’ve avoided them as I’ve gotten older though because store-bought versions often use artificial ingredients, dyes, and fragrances. For a while, I just used bath salts in my bath water when I wanted to unwind, but I missed having a bath bomb.

These homemade bath fizzies are a great solution! They’re made with nourishing sea salt or Epsom salts, alkalizing baking soda, and fizzing citric acid with a nourishing oil base. I’ll add different essential oils or even dried herbs depending on my mood. Peppermint, eucalyptus, or lavender essential oils are a few ideas.

If you need a gift idea for an Easter basket, Mother’s Day, Christmas, or even a birthday, then DIY bath bombs are a great option.

How to Make a Natural Bath Bomb Recipe

Bath bombs only take seconds to make, so it’s important to have the ingredients on hand and measured before you start. Once the water hits the citric acid they start to fizz and you’ll need to work fast. Most of the ingredients are pantry staples in many homes, but make sure you have these on hand:

Baking Soda

The backbone of this recipe is alkalizing baking soda. It complements the acidic citric acid and helps with the fizzing reaction. It’s a frequent ingredient in my detox baths and can even help soothe sunburn.

Citric Acid

You might not have citric acid sitting on your pantry shelf, but you’ll need it for this recipe. Citric acid is what gives us the fizzing reaction that makes bath bombs feel like bathing in champagne.

Corn Starch or Arrowroot

Corn starch provides the silky feel that we all love from bath bombs. I usually use organic cornstarch in this recipe (and my natural deodorant). Arrowroot also works but doesn’t provide quite as silky of a finished product.

Liquid Ingredients

These are all very versatile and you can pick any combination you have on hand. You’ll need some kind of:

  • Oil: Pick a simple oil like olive oil, almond oil, or coconut oil. If you’re feeling fancy use sea buckthorn, argan, or apricot oil. You could also create your own blend with several different oils.
  • Salt: Stick to basic sea salt or kick it up a notch with Epsom salt or your favorite salt for this bath bomb recipe.
  • Liquid: Basic water will work, but I also love using organic witch hazel for some extra skin-soothing. Some people find that the bath bombs stick together better with witch hazel.

Scents and Colors

There are so many options here. Use your favorite essential oils, add dried herbs and flowers, or make them scent-free. Some options include:

  • Lavender and Vanilla or Rose and Ylang-Ylang… or just use your imagination!
  • Kids love the fizzy action of bath bombs! I’m pretty cautious with essential oils around young kids so I use kid-safe blends when making them as gifts for my kids.
  • You can even add some natural food coloring to change the color.

The Best Essential Oils for Bath Bombs

While there are a lot of different oils that smell good, not every essential oil is the best option here. Some essential oils are more irritating to… ahem… sensitive tissues. Oils like cinnamon, clove, ginger, and lemongrass are more prone to irritating skin.

The recipe below uses a .5% dilution of essential oils (that’s 1/2 percent, NOT 5 percent), which shouldn’t cause problems for most people. And of course, if you tend to be more sensitive, then dried herbs are a gentler option. Here are some gentle, skin-friendly essential oils that also smell great!

  • Lavender
  • Rose
  • Amyris
  • Ylang Ylang
  • Patchouli
  • Roman chamomile
  • Neroli
  • Blood orange or sweet orange
  • Geranium
  • Eucalyptus
  • Frankincense
  • Green mandarin
  • Jasmine absolute

Herbs for Bath Bombs

If you want to add some skin-soothing herbs or dried flowers here are some options. Keep in mind that if the pieces are too large, the bath bombs won’t hold together, so I wouldn’t mix in whole leaves or flowers. These herbs are generally safe, especially in such low amounts, but do your research to see which ones will work for you.

  • Calendula flowers
  • Lavender flowers
  • Rose petals
  • Plantain
  • Catnip
  • Chamomile flowers
  • Echinacea flowers or leaves

Homemade Bath Bomb Recipe Equipment

These are easy enough to make but for a fancier and more uniform product, it helps to also have:

  • A scale: A digital scale to help get the proportions exactly right
  • Molds: For the easiest version, just use a cupcake tin. If you‘re making them as gifts or want fancier shapes, metal or silicone molds are the way to go. I have these metal round molds and also this variety pack of assorted shapes that the girls love.

DIY Bath Bomb Tutorial

Making a homemade bath bomb recipe is a great project for kids to help with. Some DIY beauty recipes (especially homemade soap) require precise measuring and handling harsh chemicals like lye, so they aren’t great to make with children around. These bath bombs are the opposite and make for a fun project to do with kids. They’re simple to make with kid-safe ingredients and are completely versatile. Let the kids think of ways to mix up the scents, colors, and other fun customizations.

Bath bombs are a great way to relax in the tub after a long day of dealing with kids, cooking, and all the other activities that motherhood entails. If you’ve never tried them, I highly encourage it. It’s one of my favorite things to do at the end of the day.

bath bombs recipe
Print
4 from 1 vote

DIY Bath Bomb Recipe

This easy bath bomb recipe features simple, nourishing ingredients for a relaxing bath. Great for kids and adults alike!
Prep Time5 mins
Active Time5 mins
Drying time2 d
Total Time2 d 10 mins
Yield: 23 ounces
Author: Katie Wells

Equipment

  • Digital scale
  • Bath bomb mold
  • Medium mixing bowl
  • Fine mist spray bottle

Materials

  • 8 ounces baking soda 1 cup
  • 4 ounces citric acid 1/2 cup
  • 4 ounces sea salt 1/2 cup
  • 4 ounces cornstarch 3/4 cup
  • 2 TBSP carrier oil this one is my favorite but any will do
  • 2 tsp witch hazel or water in a spray bottle
  • 1 tsp vanilla extract optional
  • 60 drops essential oils of choice optional
  • 2 TBSP dried flowers or herbs optional
  • 10-20 drops natural food dye optional

Instructions

  • In a large mixing bowl, combine all of the dry ingredients (baking soda, citric acid, corn startch, and sea salt) and stir well.
  • In a small bowl combine the carrier oil, vanilla extract, essential oils, and natural dye if using.
  • Slowly add the wet ingredients to the dry mixture and work it together with your hands until its crumbly.
  • Add in the dried flowers or herbs if using.
  • Spritz the witch hazel or water onto the bath bomb mixture, mixing well with your hands to combine. Do this just until the mixture holds together when squeezed without crumbling. It should feel like wet sand. You may need to add slightly more witch hazel if it hasn't achieved this consistency yet.
  • Firmly press the bath bomb mixture into silicone molds, muffin tins, ice cube trays, or bath bomb molds.
  • Gently turn the molds over onto a flat surface to remove the bath bombs and allow to dry for 48 hours, or until hardened.

Notes

  • Storage: Keep the bath bombs in an airtight container away from moisture.
  • Shelf Life: About 6 months. 

Non-Toxic Pre-Made Bath Bombs

I finally found some natural bath bombs that use a similar recipe to mine. These are gorgeous and use only natural ingredients. They’re also much bigger than most bath bombs and last longer in a bath. I’ve been sending them as gifts lately and my friends are loving them too!

Bath Bomb Troubleshooting

Although this recipe is easy and doesn’t have a ton of ingredients, they can be a little tricky to make sometimes. The key is to add the right amount of liquid and work quickly when molding.

  • Bath bomb sticks to mold: You may have used too much liquid or didn’t remove them from the mold quickly enough.
  • Bath bombs fall apart: Either too much or too little liquid or they may have been left in the mold too long.
  • Bath bombs cracking when dry: too much moisture in the mix or humidity in the air.
  • Bath bombs sink in the tub: too much moisture or humidity or they haven’t dried long enough.
  • Bath bombs don’t fizz enough: They might not have had enough time to harden, or they weren’t wrapped before storage and they had a reaction with the air.

More Natural Bath Recipes

  • How to Make Luxurious Rose Bath Melts
  • Soothing Colloidal Oatmeal Bath Recipe for Itchy, Dry Skin
  • 5 Natural Detox Bath Recipes
  • Natural Bubble Bath Recipe for Kids

Ever made your own bath bombs? Do you have any favorite scents or herbs you’d add to these? Share below!

Category: Beauty

Share this article

FacebookTweetPinLinkedIn
Print / PDF / Email

About Katie Wells

Katie Wells, CTNC, MCHC, Founder of Wellness Mama and Wellnesse, has a background in research, journalism, and nutrition. As a wife and mom of six, she turned to research and took health into her own hands to find answers to her health problems. WellnessMama.com is the culmination of her thousands of hours of research and all posts are medically reviewed and verified by the Wellness Mama research team. Katie is also the author of the bestselling books The Wellness Mama Cookbook and The Wellness Mama 5-Step Lifestyle Detox.


  • All Posts
Previous Post: « coconut butter cups Chocolate Coconut Butter Cups
Next Post: Health Benefits of Prebiotics prebiotic benefits »

You May Also Enjoy These Posts...

  • Homemade Italian Seasoning Mix Recipe with Dried Herbs
    Homemade Italian Seasoning Recipe
  • Homemade breakfast sausage recipe
    Homemade Breakfast Sausage Recipe
  • Cincinnati Style Chili Copycat Recipe
    Homemade Cincinnati Chili Recipe
  • Homemade Honey Mustard Sauce Recipe
  • Real Food Ranch Dressing Powder Mix Recipe - Wellness Mama
    Homemade Ranch Dressing Mix Recipe
  • Homemade All Natural Glass Cleaner Recipe
    Simple Homemade Glass Cleaner Recipe

Reader Interactions

Discussion (276 Comments)

  1. shelley nolden

    December 21, 2014 at 8:56 PM

    not sure if this is asked already but would adding cream of tartar help preserve it longer? I want to give some as gifts but don’t know if people will use up what I give them in two weeks as recommended.

    Totally love your site. Thank you so much for passing on your wisdom and knowledge to us.

    Reply
  2. Emily James

    December 19, 2014 at 5:56 PM

    If I put them in the oven, would they dry faster? Or would that ruin them?

    Reply
    • Wellness Mama

      December 20, 2014 at 12:43 AM

      hm… It would depend on how low the heat was, I think. You’d need it to be really low.

      Reply
    • Bella

      January 5, 2016 at 1:59 AM

      DO NOT attempt to put these in the oven to dry out faster. I did, at ovens Lowest setting (like 200 degrees) and all of the goop was out of molds and grew like crazy, the bottom of the oven was covered 15 minutes after baking/drying. Though mine didn’t activate after initially mixing and packing molds, after warming in attempt to dry out in oven, the coconut oil melted and started the very large reaction. The good part was the mess cleaned out well, and oven smelled nice. I saved the rest, dried it out and called it bath sand. Still smelled nice and was great in the tub, but there was no fizz.
      Tried the recipe again, WITHOUT the oven. Did slightly less liquid, packed molds, let them dry in a few hours took them out of mini muffin tin. These did not rise unlike other attempts, and they were the most fizzy results.

      Reply
    • Shannon Bachorick

      May 7, 2017 at 8:37 AM

      I have dried mine in the oven with just the light on.

      Reply
  3. Katy

    December 11, 2014 at 3:21 PM

    I was excited about this project but it really is impossible to keep these things from expanding by the minute. I had to sit there and push them down constantly which prevents them from drying. Giving up:(

    Reply
    • Nicole

      December 17, 2014 at 1:04 PM

      Do NOT overfill the molds!

      I cut the recipe in half. This helped a lot with the massive expansion. I just removed all of the extra junk that was oozing everywhere and set it aside. I let the part I set aside dry. I have a few misshapen lumps. I just used those for myself. I’m not too concerned about how they look. I gave the portions that stayed in the molds as gifts.

      I also think that the molds I got were too deep. I think now that a candy mold might be better than a soap mold. They might dry faster. I had to let mine set for three days as opposed to two. And now that I look at the photos I do think my mold is a lot thicker than what Katie is using.

      I hope this helps! It seems like a lot of people were having issues with them growing out of control.

      Reply
    • Tasha

      May 7, 2017 at 10:51 AM

      Don’t give up. It’s an art that requires practice. First, I don’t use witch hazel or water… I found my bombs to crack from it. I use rubbing alcohol 91% or more. The smell evaporates right off. You are adding too much liquid to your dry ingredients. Put it in a spray bottle and spritz one to two sprays at a time, then check your mix. That is your only problem. I have mastered the art of using only additives for moisture (olive, almond, coconut oils etc. EO’s) so I have no liquid in mine at all. KEEP PRACTICING and once you have YOUR recipe down you will love this activity!

      Reply
      • PAM PUFFER

        June 30, 2017 at 12:33 AM

        Tashi,

        So you think the witch hazel is causing cracking? I ask this because I am having the same issue. They turn out great with no expansion issues and I remove them from the mold immediately without any issues. I place them on a terry cloth towel with wax paper on it to dry overnight and then they have racks in themy the next day.

        Reply
  4. Christine Broderick

    December 8, 2014 at 11:14 AM

    My 6.5year old daughter and I have made these as gifts for Christmas from her. Turned out great! We used a gingerbread mold since they’re going to be Christmas Gifts from her. We did encounter some expending but I am wondering if we were putting to much in the molds, Making a second batch and going to try putting less in at first and see how we make out. For the first batch I just kept on it for a few hours pushing them back into the mold as they expended and eventually the expending slowed down and I was able to leave them over night with out worries. Ours took about 48hrs to fully dry before removing them from the molds.
    Thanks for all the great ideas Wellness Mama!!

    Reply
  5. Kathryn

    December 4, 2014 at 1:15 PM

    Can I use these with my little ones? I have a 2 year old. Would it be safe to use in his bath?

    Reply
  6. Lisa

    December 3, 2014 at 4:31 PM

    I plan to use a 6 star ceramic mold I found at Michaels. Would 1 star be too much per bath?

    Reply
    • Katie - Wellness Mama

      December 3, 2014 at 11:50 PM

      I wouldn’t think it would be too much

      Reply
  7. Jill

    November 13, 2014 at 3:32 AM

    Has anyone figured out how to prevent them from overflowing everywhere yet?

    Reply
    • Katherine

      November 23, 2014 at 4:19 PM

      Nope combatting the same problem now! I just gave up and used them to clean my toilets 🙂

      Reply
      • christi

        January 19, 2015 at 4:49 PM

        add the citric acid last, then mist with witch hazel. Her amounts of liquid are quite high. I only use about a teaspoon melted coconut oil, plus eo/fragrance, and a few squirts of witch hazel.

        Reply
  8. Trelisa

    October 13, 2014 at 4:00 PM

    Would you still recommend using the vitamin c before you add the bath fizzies or is the salts enough in this case for chemicals such as chlorine?

    Reply
    • Katie - Wellness Mama

      October 15, 2014 at 11:06 AM

      I use the vitamin c first

      Reply
  9. Sharon Doyle

    September 24, 2014 at 2:10 AM

    Are they safe for my daughter to use who just had a c section?

    Reply
    • Wellness Mama

      September 24, 2014 at 1:42 PM

      You are not really supposed to submerge the scar for a good long while, so right now maybe not, but later definitely.

      Reply
  10. Magda

    August 19, 2014 at 3:59 PM

    How do I get the bombs to dry? Twice now they seemed to be drying ok and then foamed overnight. I kept them in the moulds. How soon should they be taken out of the moulds? The humidity was at 40% both days, so I don’t think it could have caused them to activate…

    Reply
    • Melissa

      September 24, 2015 at 8:40 AM

      You have to take them out of the molds within 15 minutes or so or they won’t dry properly.

      Reply
      • Carmen

        October 7, 2017 at 4:12 AM

        Actually I left mine in the molds for 48 hours, no expanding at all and they were dry (and worked very well)… Don’t add too much liquid! And don’t forget to add literally 6 drops at a time!

        Reply
« Older Comments
Newer Comments »

Join the Conversation... Cancel reply

Your email address will not be published. Please read the comment policy.

Recipe Rating


The information on this website has not been evaluated by the FDA and is not intended to diagnose, treat, prevent, or cure any disease. By accessing or using this website, you agree to abide by the Terms of Service, Full Disclaimer, Privacy Policy, Affiliate Disclosure, and Comment Policy. Content may not be reproduced in any form. Ads provided by CafeMedia Family & Parenting Network. Displayed ads do not constitute endorsement or recommendation by Wellness Mama.


Content

  • Home
  • About
  • Blog
  • Podcast
  • Favorites
  • Wellnesse

Support

  • Newsletter
  • Podcast Application
  • Medical Review Board
  • My Books
  • Sitemap
  • Contact

Policies

  • Privacy Policy
  • Terms of Service
  • Full Disclaimer
  • Affiliate Disclosure
  • Promo Guidelines
  • Comment Policy

Join the
Wellness Mama Tribe!


Copyright © 2022 · Wellness Mama® · All Rights Reserved · Powered by BizBudding