

A decor diva I am not, but decorating for seasons and holidays with kids is definitely a lot of fun. When I found myself admiring the cute front door wreaths and decorations in the neighborhood, I got an idea … why not try to make my own homemade burlap wreath?
Here’s how it went…
Make Your Own Front Door Decor
In case you think I’m a crafting overachiever, let me set the record straight. Martha Stewart I am not. I do enjoy rolling up my sleeves and getting into a DIY project when the mood (and schedule) is right, but I usually stick to things like natural lotions and soaps.
Beyond that, my non-negotiable standards for crafting are:
- Simple and reusable
- Easy to store
- Inexpensive
- Quick to make
- And of course — as natural as possible!
Granted, this DIY project doesn’t totally qualify as natural since glue and paint are involved, but until I learn to make my own paint and glue it will have to do! Since I intended it for the front door and it would be outside I figured I could be a little more relaxed.
How to Make Your Own Burlap Wreath
I like the simple, natural look of burlap and I had used it before to make this burlap garland and also this burlap tent for the kids. Not only is it inexpensive, it goes with everything and is very durable so it really holds up to wear and tear over the years.
While I planned to just make a traditional round wreath, Pinterest gave me the idea to try an easy cut-out “wreath.” I decided to try that too while I had the supplies out, but you could certainly just tackle the one that interests you most!
Wait until you see how simple this project is…
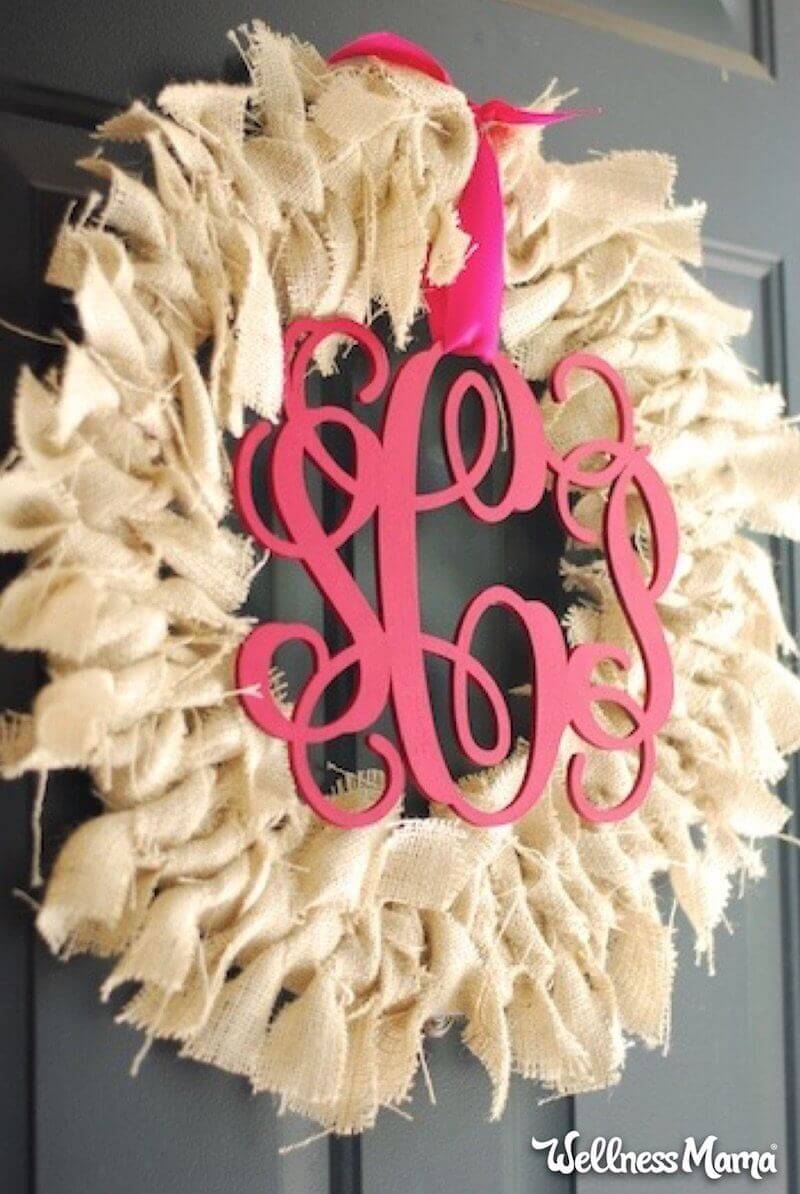
Basic Burlap Wreath
There are more elaborate ways to craft a burlap wreath out there, but this basic wreath is classy and convenient because it creates that ruffled burlap look with no hot gluing, sewing, or stapling.
Basic Burlap Wreath Supplies
Basic Burlap Wreath Instructions
- Roll out the yard and a half of burlap and use a scissors to cut it into 2 inch by 10 inch strips.
- Tie the strips one by one in simple knots around the metal wreath frame until the frame is full.
That’s it! Really! You can brighten your wreath with a pop of color by using some ribbon to tie a centerpiece — like a family monogram — to the top.
This basic wreath looks great on its own but can easily be updated for each season by switching out different colorful centerpieces. For example, you can switch out the centerpiece to change an always appropriate “welcome” message to a pumpkin-themed wreath for fall.
Here’s how one of the wreaths turned out, which I later gave as a housewarming gift to a friend. Isn’t it pretty?
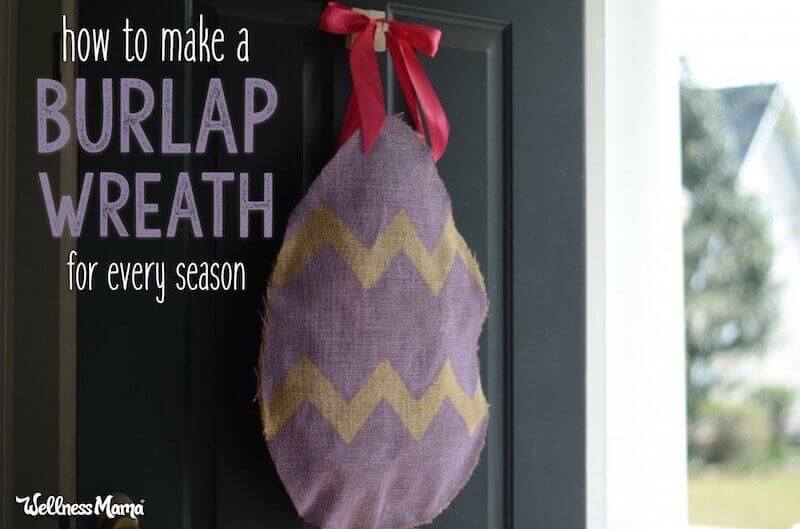
Cut-Out Burlap “Wreaths”
These are a little off the beaten path, but if you want to be slightly more festive you can take the same roll of burlap and make a cut-out door hanging in place of a wreath. This method is infinitely adaptable to different seasonal shapes and allows lots of room for individual creativity.
Not only are they inexpensive to make, since they lay flat and are not bulky or delicate they are easy to store away for the season. Win!
Cut-Out Door Hanging Supplies
- 1 yard of burlap (colored or plain)
- 6-8 sewing or safety pins
- sharp scissors
- hot glue gun and glue sticks (or do a quick baste stitch for a more natural option)
- old plastic grocery bags or other stuffing material
- ribbon
- painter’s tape (optional)
- paint (optional)
- paintbrush (optional)
- cardboard (optional backing for painting)
Cut-Out Door Hanging Instructions
- Fold the yard of burlap in half and pin the edges to prevent shifting. Use a marker or chalk to stencil two of the desired shapes on it. Be careful not to pick a very broad shape, or else the edges may be a little too droopy to hang flat. TIP: You may want to create a cardboard stencil to get the shape set before you mark the burlap.
- Cut out the stenciled shapes, making sure they are the exact same dimensions.
- If you want to paint your cut-out wreath, lay the “front” burlap piece flat on a piece of cardboard or painting drop cloth. If desired, apply painter’s tape before painting to add patterns. Just put the tape where you want the burlap to stay its natural color. The tape will give a nice clean edge to the design.
- Allow the paint to dry completely. Remove any painter’s tape if used for a pattern.
- Hot glue the outer edges of the two halves together, painted side outward, leaving an unglued gap at the bottom to stuff the space in between with old shopping bags. This is one case when I recommend plastic to withstand the elements, but you could certainly use fiber fill from the craft store.)
- Stuff the shape just enough to give it some volume, but not so much that it looks overfull and distorts it.
- Hot glue the opening closed.
- Cut two strips of ribbon to the desired length. Use hot glue to secure them to the side of the wreath that will face the door.
- Then, tie the two ribbon ends together in a bow, adjusting for the distance you want the wreath to hang from the hook on the door.
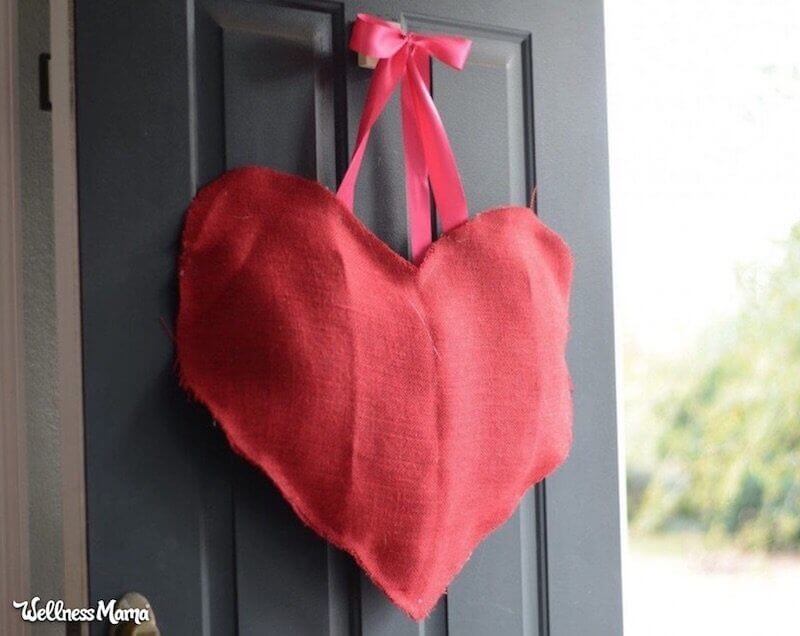
TIPS: It can save time and an extra step to find colored burlap, like this red burlap that would work great for a Valentine’s Day heart wreath.
Note on painting: Since this was for the outdoors I just used a low-VOC spray paint from the craft store, but you could certainly make your own natural paint, especially if you might hang these indoors.
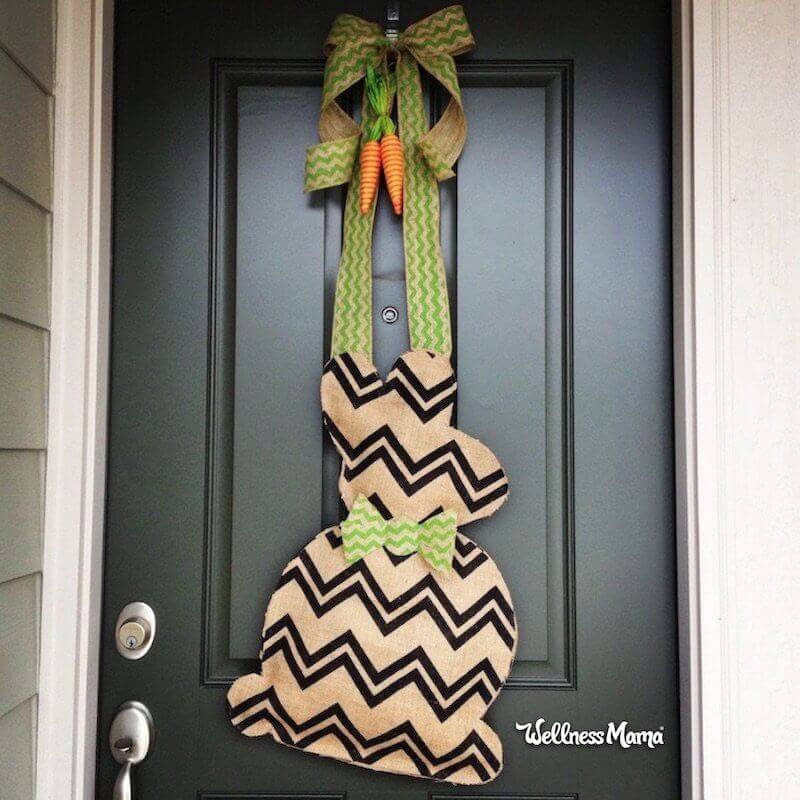
Because the stencil-and-cut-out method is so simple, it’s fun to get creative with different shapes and accessories for different seasons, like this cute Easter bunny with his bowtie and carrots.
More From Wellness Mama
- Natural DIY Christmas Garland to Spruce up Your Home
- 35+ Natural & DIY Christmas Gifts Ideas
- DIY Burlap Garland
- Easy Valentine’s Crafts for Kids
Have you ever made a burlap wreath? What’s your favorite method? Share below!

Leave a Reply