• Skip to main content
  • Skip to header right navigation
  • Skip to after header navigation
  • Skip to site footer
Wellness Mama script logo

Wellness Mama®

Simple Answers for Healthier Families

  • About
  • Favorites
  • Podcast
  • Blog
  • Shop
  • Health
  • Natural Home
  • Motherhood
  • Mindset
  • Natural Remedies
  • Beauty
  • Organization
  • Travel
  • Reviews
  • Recipes
How to make a simple backyard burlap tent that folds up for backyard storage
  • Natural Home

DIY Kids Burlap Tent Tutorial

Katie WellsMay 29, 2015Updated: Jul 30, 2019
Reading Time: 3 min

This post contains affiliate links.
Click here to read my affiliate policy.

Wellness Mama » Blog » Natural Home » DIY Kids Burlap Tent Tutorial

I remember a little pop-up backyard tent I had as a child. My brother and I spent hours making it a fort, a castle, a post office, and so many other things.

Unfortunately, all that survived of that tent is our childhood memories, but I wanted to find something similar that my children could play with outside during the summer. I wanted something easy to store that provided shade but wouldn’t block the breeze either.

DIY Burlap Tent

So of course, Burlap was the perfect choice.

I’ve used burlap for everything from seasonal wreaths to garland for the Christmas tree to table runners and picture frames. A friend used it for some gorgeous DIY curtains.

Burlap is so versatile and I love the natural look.

After we designed it, the building of this project was a grandfather/grandkids activity and they had a blast. Here’s what we did…

Materials Needed

  • (7) 1 x 2 cedar boards (8’ long)
  • (12) deck screws – 1½” long
  • (2) deck screws – 3” long
  • 4 washers (approximately 1” diameter)
  • (1) roll of sisal or jute twine
  • 4 yards of burlap or canvas material 48” wide
  • 3/16” drill bit
  • 1/8” drill bit (for pilot holes)

How to Build It

  1. Cut the 1 x 2’s into the following lengths: four pieces at 72”, one piece at 49¾ ”, four pieces at 48”.
  2. Drill a 1/8” pilot hole into the center of each end of the 48” pieces and the 49¾” piece.
  3. NOTE: All remaining holes will be 3/16”.
  4. For each of the 72” pieces, drill holes in the center of the 2” face at the following locations:
  5. 6” from one end of each board (Hole #1)
  6. 1½” from each end of each board
  7. Every 12” from one end of each board
  8. (This will result in 8 holes in each 72” board.)
  9. Insert a 3” screw into Hole #1 of one 72” board. Place two washers onto the screw. Insert this assembly into Hole #1 of a second 72” board. Attach this onto the end of one 48” board. Do not tighten completely. Repeat this process to attach the remaining two 72” boards to the other side of the 48” board. The 72” boards are the legs of the Teepee Tent.
  10. Open each pair of legs so that the outside boards are on the same side. Attach the 49¾” board to the bottom of the outside legs using the shorter screws through the hole 1½” from the end of each leg. Attach one of the 48” boards to the inside legs using the same procedure.
  11. Insert the twine into the bottom hole in one front leg and pull it through the corresponding hole in the back leg. Tie the twine to each leg so that it does not sag. Repeat for each pair of holes on both sides.
  12. Staple the end of the burlap or canvas material to one of the remaining 48” boards. Wrap the material around the board and attach this to the 48” board at the bottom of the tent. Weave the material over and under each string and over the top 48” board until it reaches the bottom of the other side. Staple the material to the remaining 48” board, wrap the material around the board, and then attach this to the 49¾” board.
  13. Open the tent to the width desired. Insert a piece of twine into the holes at the top of the two 72” boards in the front of the tent and tie into a loop to prevent the tent from opening wider. Repeat this on the back legs.

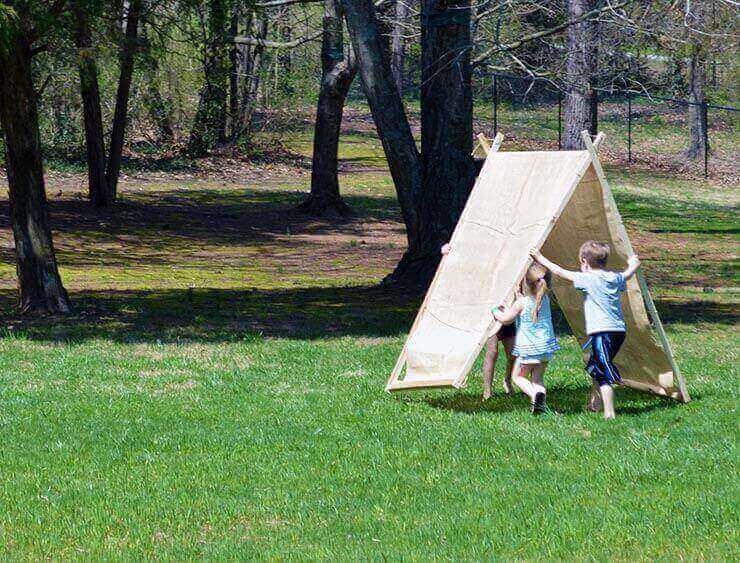
Let the children enjoy the fruits of your labor:

Burlap tent tutorial

Ever made a kids DIY project like this before? How’d it turn out?

Category: Natural Home

Share this article

FacebookTweetPinLinkedIn
Print / PDF / Email

About Katie Wells

Katie Wells, CTNC, MCHC, Founder of Wellness Mama and Wellnesse, has a background in research, journalism, and nutrition. As a wife and mom of six, she turned to research and took health into her own hands to find answers to her health problems. WellnessMama.com is the culmination of her thousands of hours of research and all posts are medically reviewed and verified by the Wellness Mama research team. Katie is also the author of the bestselling books The Wellness Mama Cookbook and The Wellness Mama 5-Step Lifestyle Detox.

  • All Posts

You may also enjoy these posts…

How to Make Burlap Garland

DIY Burlap Garland

How to make a planter box for easy backyard gardening

DIY Planter Box Tutorial

how to make a burlap wreath

DIY Outdoor Burlap Wreath (For Any Season)

diy makeup from natural ingredients

DIY Natural Blush Make-up Tutorial

DIY Canvas Photo Print Tutorial - homemade canvas photo prints for under ten dollars each

DIY Canvas Photo Print Tutorial

Himalayan Salt Scrub DIY

DIY Himalayan Salt Scrub Recipe + Tutorial

Reader Interactions

Discussion (4 Comments)

  1. Pollyanna

    July 29, 2022 at 9:11 PM

    This looks like a fun project. By using burlap or canvas or whatever natural fabric you could also hose it down with water on really hot days. As the water evaporates it creates a cooling effect therefore providing not just shade but also a cooler place to play in.

    Reply
  2. Lj

    May 31, 2015 at 11:10 AM

    Because of lung issues, I have been told to avoid using or even being around burlap. Also, one of the women at the fabric store will not be around whenever burlap is being cut.
    Just an FYI.

    Reply
  3. CAPERNIUS

    May 31, 2015 at 9:38 AM

    30 some odd years ago, I had made one similar to that, but I made it out of PVC schedule 40 plumbing pipe, & sailcloth that I got for a song & a dance….
    My grandkids have it now to play in…the sailcloth has been replaced due to rot & a mouse or 2…
    But the 5 of them have so much fun in it!

    Thank you for this blog, it brought back so many memories… 🙂

    Reply
  4. Vicky

    May 30, 2015 at 12:29 PM

    This is just amazing! I wish my husband and I were handy like that. Maybe I can coerce my brother into making me one of these….

    Reply

Join the Conversation... Cancel reply

Your email address will not be published. Please read the comment policy.

Recipe Rating


The information on this website has not been evaluated by the FDA and is not intended to diagnose, treat, prevent, or cure any disease. By accessing or using this website, you agree to abide by the Terms of Service, Full Disclaimer, Privacy Policy, Affiliate Disclosure, and Comment Policy. Content may not be reproduced in any form. Ads provided by CafeMedia Family & Parenting Network. Displayed ads do not constitute endorsement or recommendation by Wellness Mama.


Content

  • Home
  • About
  • Blog
  • Podcast
  • Favorites
  • Wellnesse

Support

  • Newsletter
  • Podcast Application
  • Medical Review Board
  • My Books
  • Sitemap
  • Contact

Policies

  • Privacy Policy
  • Terms of Service
  • Full Disclaimer
  • Affiliate Disclosure
  • Promo Guidelines
  • Comment Policy

Join the
Wellness Mama Tribe!


Copyright © 2023 · Wellness Mama® · All Rights Reserved · Powered by BizBudding