

Gardening used to be a normal part of life for most people. My grandparents and my grandparent-in-laws (is that a thing?) all talked about times when they ate the food that their family grew in their own yard. They canned what they couldn’t immediately eat and this provided food for the winter months.
Today, if you ask young children where food comes from, many will reply with some variation of “a grocery store.” I think we should change this and get back to our roots… pun intended. 🙂
The Benefits of Gardening
So many aspects of gardening are health promoting. The Vitamin D from the sun, the interaction with the varied microbial environment of the soil for immune building, and the interaction with our food supply.
If you garden with your children, it provides quality (screen-free) time together and makes them more likely to eat and enjoy vegetables because they helped grow them.
A garden is an outdoor classroom for children and most love to plant seeds and care for the growing plants if only given the chance. While some studies have shown that gardening improves academic performance in children, gardening provides children a longer-lasting and much more valuable life lesson along with a great sense of purpose.
As food prices continue to rise, gardening is also a budget-friendly way to ensure that you have organic, high quality produce for your family.
Small Yard?
When my husband and I were newlyweds and even until the time that we had our third child, we lived in an apartment and had little or no yard space. Having a full size garden was out out of the question, but I found that there are always ways to work in a small garden.
We had herbs growing in the kitchen and some container plants indoors and out. I wish I’d thought to build a plater box like this back then as it would have really increased what I could grow in our small space.
Even in a small apartment with a balcony, it is possible to grow some greens in a container or even some microgreens on the kitchen counter if there is truly no outdoor space. My challenge to you is to grow something.. anything… this year.
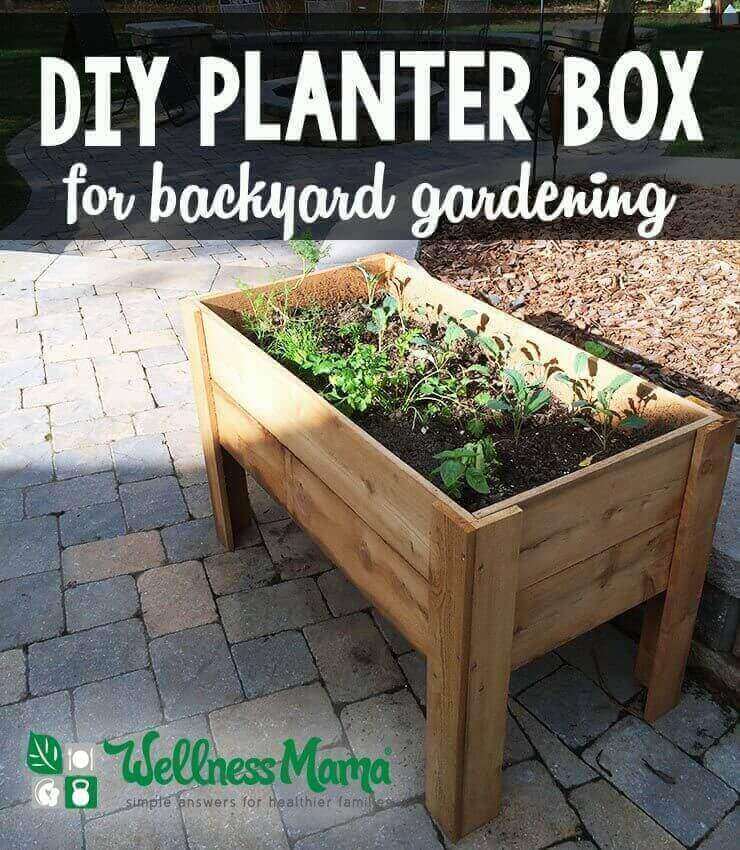
DIY Planter Box Tutorial
I wanted to create a durable planter box that would let me grow herbs, greens and other plants in succession and that could be moved to different parts of our yard for sunlight, if needed. My two boys and my dad worked together to create this planter box, and it is now home for kale, lettuce and herbs growing on our patio.
The planter box is 36 inches long, 18 inches wide and 24 inches high. It is made from six 5/8” by 6” by 6’ dog-eared cedar fence slats and one 1 by 2 cedar board.
Materials Needed
- 6 – 5/8” by 6” by 6’ dog-eared cedar fence slats
- 1 – 1 x 2 cedar board (at least 6’ long)
- 1¼” long deck or wood screws.
How to Build a Patio Planter Box
- Cut the 1×2 into two pieces, each 34¼” long
- Cut 4 of the fence slats into three pieces each: one piece 36” long, and two pieces 18” long. The dog ear should be on one of the 18” long pieces. The measurements do not have to be precise but the four pieces of each length should be exactly the same length.
- Cut the remaining two fence slats into three pieces each, each piece being 24” long. Again, the measurements do not have to be precise but the four pieces of each length should be exactly the same length.
- Cut the four 24” long pieces without the dog ears lengthwise into eight pieces 24” long by 3 inches wide. These will be the leg slats.
- Fasten the boards together as described below by first drilling a pilot hole. This will help prevent the thin boards from splitting.
- Attach each 1 by 2 board to the face of a 36” slat using 5 screws. Align the 1 by 2 with the bottom edge of the slat and center it. This will allow room for the 18” side board. Do not place any screws closer than 2” to the edge of the 1 by 2 to prevent splitting.
- Attach this board to two 18” long boards, one on each end. Drill pilot holes through the thickness of the 36-inch board and into the end of the 18-inch boards. Use 2 screws for each corner.
- Attach the other 36-inch board to the 18-inch boards. This will result in a rectangular box that is approximately 36 inches long and 19¼ inches wide. This is the bottom half of the planter box.
- Attach the remaining two 36-inch boards to the remaining two 18-inch boards to make a second box that is identical to the first but without the 1 by 2 boards. This is the top half of the planter box.
- Place the top half of the planter box on a flat working surface and place the bottom half upside down on top of it. (The 1 by 2’s should be at the top of the assembly.)
- Place one leg slat against the short side of the box and even with the long side. Attach it to the short side with three screws. Two of the screws should connect the leg slat to the edge of the 36-inch board and the third screw should go through the side board into the 1 by 2.
- Place the second slat against the long side of the box and even with the first slat. Attach with four screws, two screws going into the edge of the first slat, the third screw going into the 1 by 2, and the fourth screw placed approximately 2 inches from the end of the leg.
- Repeat for the remaining three legs.
- Turn the assembly upright.
- Cut the 18” long dog ear sections to fit inside the box, on top of the 1 by 2’s. Do not cut off the dog ears off. They will provide drainage for the water.
- It will be necessary to trim the last board lengthwise to fit.
- Finally, place one screw in each end of the center slat to keep the planter box from spreading apart when it is loaded with dirt and plants.
Do you have a garden or patio planter? What are you growing this year?

Leave a Reply