

Many of you may remember the store-bought classic strawberry fruit roll-ups in your school lunchbox. With all that added sugar and food dye though it’s not what I would consider a healthy snack. This homemade strawberry fruit leather is an easy (and tastier!) way to get your fruit roll-up fix!
Our family is really enjoying all of the seasonal produce available right now, especially the berries. I always stock up on berries when I can find them from a fresh, local, and organic source, and freeze and preserve them for the whole year. Blueberries and raspberries are some of our favorites, but strawberries are especially good!
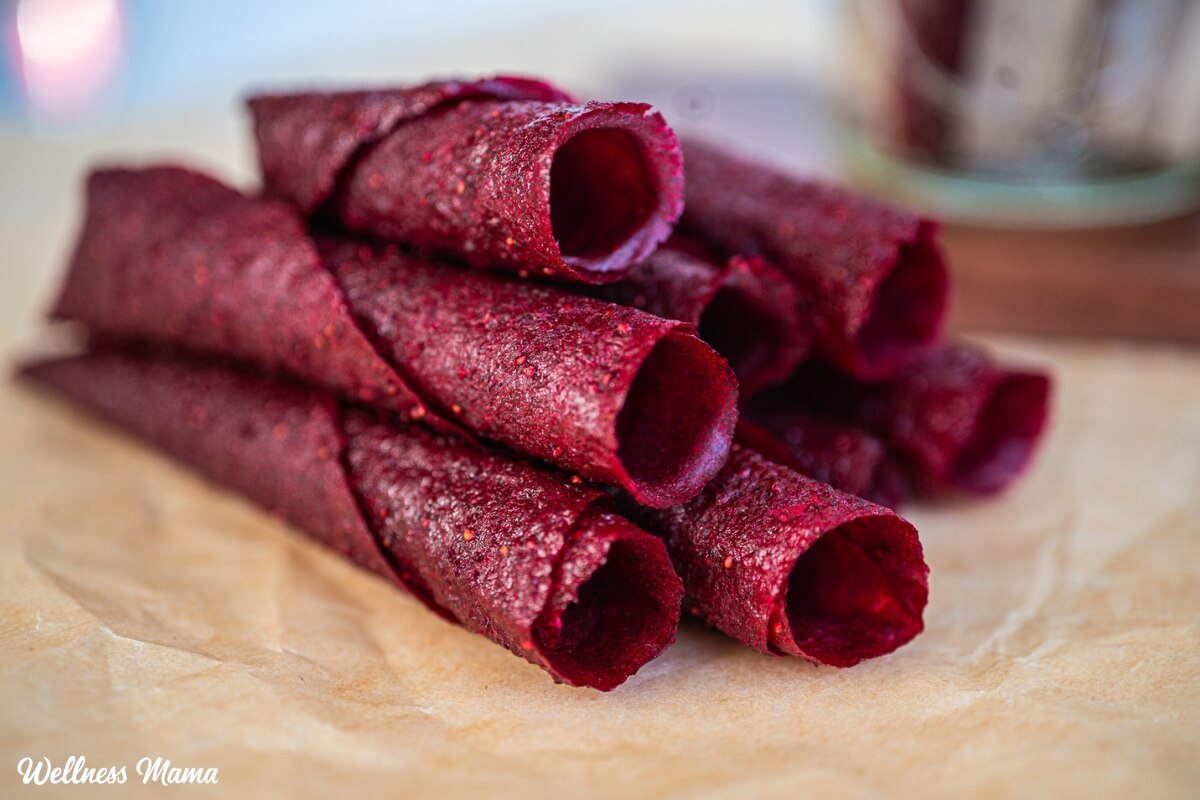
Last week, a quart of delicious strawberries was hidden in the back of the fridge. By the time I found them, they had frozen slightly and were very ripe. They weren’t great for eating plain anymore but were still perfectly good. These berries became strawberry vinaigrette dressing and my strawberry fruit leather with (optional) hidden beets.
How to Make Fruit Leather
Fruit leather is a naturally sweet snack made by pureeing and dehydrating fresh fruit. They’re like homemade Fruit Roll-Ups, but without the artificial everything (plus, they taste better!).
These are a kid favorite at our house and a perfect treat for summer. I like that I can pack them for a quick snack that can be kept at room temperature for a few hours. You can make fruit leather with only fruit, but I like sneaking in the beets. The hidden veggies yield a firmer texture and extra nutrients.
The beets also intensify the bright red color. Plus beets have properties that make them great for detoxification and fighting inflammation.
You can make this easy and natural snack in an oven or food dehydrator in just a few hours. The recipe is so simple that kids of any age can help make (and enjoy) their own fruit leather.

Homemade Strawberry Fruit Leather (with Beets)
Servings
Equipment
- Parchment paper (or silpat liner)
Ingredients
- 2 medium beets (peeled and steamed until soft)
- 4 cups fresh or frozen strawberries (defrost if using frozen fruit)
- ½ cup honey (optional or ½ cup pitted dates or maple syrup)
- 2 TBSP fresh lemon juice (or lime or orange juice)
Instructions
- Preheat the oven to 170 degrees F or use a dehydrator.
- Puree the cooled cooked beets, strawberries, sweetener, and citrus juice in a blender or food processor until completely smooth.
- Line two rimmed baking sheets with parchment paper or silicon baking mats (safe at low temperatures).
- Spread the fruit mixture evenly onto the lined baking sheets.
- Place the fruit puree in the oven and cook until firm and no longer sticky to the touch, about 6 hours. You don’t want it to cook too long and get crispy though.
- Remove the homemade strawberry fruit leather from the oven and let it cool.
- Cut into strips and roll up with parchment paper.
Nutrition
Notes
- Can be stored in the refrigerator or freezer in an airtight container for up to a week (refrigerator) or two months (freezer).
- Use ½ cup extra strawberries if you don’t use beets.
Troubleshooting Homemade Fruit Leather
This recipe is pretty easy, but it does take a little patience. Since oven temperatures vary, yours may take more or less time than mine. Adding the honey or maple syrup intensifies the sweetness, but it does take the fruit leather longer to dehydrate than if it’s omitted.
If using frozen defrosted berries, the liquid will be thinner. If using fresh berries, you may have to add a few teaspoons of water to make the mixture smooth enough to spread. The mixture should be pourable but not thin enough to run off the baking sheet.
Have you made your own fruit leather before? What are your favorite fruits to use? Leave a comment and let us know!


Leave a Reply