• Skip to main content
  • Skip to header right navigation
  • Skip to after header navigation
  • Skip to site footer
Wellness Mama script logo

Wellness Mama®

Simple Answers for Healthier Families

  • About
  • Favorites
  • Podcast
  • Blog
  • Shop
  • Health
  • Natural Home
  • Motherhood
  • Mindset
  • Natural Remedies
  • Beauty
  • Organization
  • Travel
  • Reviews
  • Recipes
How to make butter
  • Condiment Recipes
  • Recipes

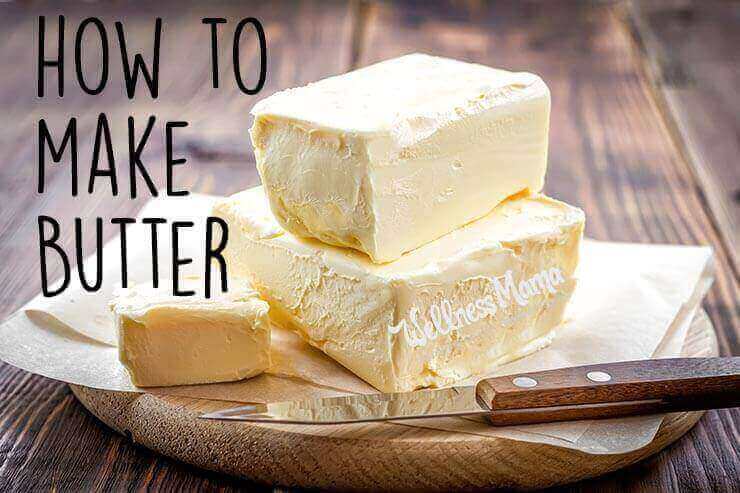
How to Make Butter

Katie WellsDec 2, 2015Updated: Jul 30, 2019
Reading Time: 4 min

This post contains affiliate links.
Click here to read my affiliate policy.

Jump to Recipe
Wellness Mama » Blog » Recipes » Condiment Recipes » How to Make Butter

As a child, I didn’t have much of an awareness of where my food came from beyond the grocery store. I was an adult the first time I made butter and I was so amazed that you could do it yourself. There is a certain satisfaction that comes with making something yourself that you previously purchased from the store with little thought as to where it came from.

How Butter Is Made

Butter is made from the cream that rises to the top of whole milk when it is cooled. This cream has a milk fat content of at least 30%. By agitating the cream, the membranes surrounding the fat molecules are broken, allowing the molecules to stick together. If you agitate the cream for a short amount of time you will make whipped cream. If you persist, the whipped cream is eventually broken down and you will achieve butter.

I personally find it quite fascinating that you can take a liquid and turn it into a solid by simply agitating it. If you are a science geek like me, you can read more in depth about what happens to milk when making butter here.

Choosing Your Cream

In order to take full advantage of all of the health benefits of butter, it is best to use raw cream from grass-fed cows. If you do not have access to grass-fed raw milk, you can also make butter from organic whipping cream that you can buy at the store.

Green ebook cover with spices, bears, and veggies on a table

Meal Prep!

Busy? Save Time + Eat More Protein

With my High-Protein (Family-Friendly) Bulk Meal Prep Guide. This saves me so much time each week and keeps my family fueled! Download it free here:

If using raw milk, refrigerate overnight or until the cream has collected at the top of the jar. Skim the cream by gently dipping a small ladle down into the cream until if fills the ladle by flowing up over the sides. It is best not to scoop as this can cause the cream to mix back into the milk. Continue to do this until all the cream is collected. If you begin to see the thinner milk sneaking into your ladle then you probably have as much cream as you will be able to get.

The milk leftover once you’ve removed the cream from the top is still totally drinkable. It’s now “reduced fat” milk.

See below for variations on flavoring butter.

Getting Ready:

  • I use a stand mixer with a whisk attachment for making butter.
  • Measure your cream. 2 cups of cream yields approximately ½ cup (1 stick) of butter.
  • You will need a fine strainer, a bowl, a wide spoon, and clean, cold water.
How to make butter

Homemade Butter Recipe

Katie Wells
Butter is simple to make at home and a great project to try with your kids!
4.70 from 20 votes
Print Recipe Pin Recipe
Course Condiment
Calories 102 kcal

Ingredients
  

  • 2 cups heavy cream preferably from raw milk or store-bought organic

Instructions
 

  • Put the cream into your mixing bowl. It is important to only fill the bowl halfway so it does not overflow as air is whipped into the cream. (Take my word for it!)
  • Turn mixer on low to medium-low at first to prevent splashing. Once the cream begins to thicken you can turn it up to medium.
  • Mix for about 15 minutes. This time can vary depending on how much cream you are using and what type if mixer you have.
  • As it thickens it will first change to whipped cream. After the whipped cream stage it will begin to deflate and break down. When this begins to happen, stay close. When it makes the change to butter it can happen very quickly. It will also start to splash again so you can hang a towel over the mixer if you'd like.
  • When you see the butter begin to clump and stick to your whisk, it is done mixing.
  • Put your strainer over a bowl and pour the contents of your mixing bowl into the strainer. The solids that collect in the strainer are the butter and the liquid that collects in the bowl is buttermilk. 
  • Now you need to "rinse" the butter. It is important to remove as much buttermilk as possible to keep the butter from going rancid. Put the butter back in your mixing bowl and cover with clean, cold water.
  • With the back of your wide spoon, begin pressing the butter into the side of the bowl. The water will get cloudy as the buttermilk is "cleaned" out of the butter. Pour the water off and add more cold water.
  • Repeat this process 4-5 times or until the water stays clear.
  • Done! Store in refrigerator or at room temperature if you will use it within a week or two.

Notes

You can easily make much larger batches to make more butter, just make sure your mixing bowl is only half full!
The buttermilk leftover from making butter can be used in recipes in place of water. Try it in almond flour pancakes.

Nutrition

Serving: 1TBSPCalories: 102kcalProtein: 0.1gFat: 11.5gSaturated Fat: 7.3gCholesterol: 31mgSodium: 2mg
Tried this recipe?Let us know how it was!

Like this recipe? Check out my new cookbook, or get all my recipes (over 500!) in a personalized weekly meal planner here!

Butter Variations

For salted butter, simply add a healthy pinch of salt per ½ cup of butter. Work it in with the back of your wide spoon.

For spreadable butter, whip ½ cup butter in your mixer with 1 teaspoon high quality olive oil.

For honey butter, whip ½ cup butter with ¼ cup raw honey until smooth.

Learn how to make herb infused compound butter here.

Learn how to make ghee here.

Make ice cream!

Fun For Children

The whole butter making process can be a great science lesson for kids. You can get them more involved by showing them how to make butter in a mason jar. Fill a pint mason jar halfway with cream, seal it tightly with a lid, and let them shake it. They will have to shake for quite a while, but my kids think it is so cool that they don’t mind at all. Eventually, you will see the same transformation you saw in your mixer take place in the jar. When the clump of butter comes together, simply follow the same steps for rinsing it and voila, you have butter!

Have you ever made butter? Will you try any of the variations?

Category: Condiment Recipes, Recipes

Share this article

FacebookTweetPinLinkedIn
Print / PDF / Email

About Katie Wells

Katie Wells, CTNC, MCHC, Founder of Wellness Mama and Wellnesse, has a background in research, journalism, and nutrition. As a wife and mom of six, she turned to research and took health into her own hands to find answers to her health problems. WellnessMama.com is the culmination of her thousands of hours of research and all posts are medically reviewed and verified by the Wellness Mama research team. Katie is also the author of the bestselling books The Wellness Mama Cookbook and The Wellness Mama 5-Step Lifestyle Detox.

  • All Posts

You may also enjoy these posts…

is dairy healthy

Is Dairy Healthy or Dangerous?

ashwagandha tincture

How to Make an Ashwagandha Tincture (Plus Benefits!)

blue cheese dressing

Creamy Blue Cheese Dressing and Dip Recipe

Creatine_Benefits

Creatine Benefits and Why I Use It

probiotic deodorant

How to Make a Probiotic Deodorant Bar (Easy Recipe)

Loaded_Cauliflower

Loaded Cauliflower Recipe (With Bacon!)

Reader Interactions

Discussion (35 Comments)

  1. Kizzy

    December 5, 2015 at 10:58 AM

    What a fantastic idea, I’ve never thought of making my own butter but I’m sure my three would love to help out.

    Reply
  2. Rachel

    December 4, 2015 at 11:41 PM

    This is so fascinating!! I really want to try this! I had no idea it was so simple. 🙂

    Reply
  3. kristi

    December 3, 2015 at 12:07 PM

    I LOVE the butter that I make from my raw milk. My problem is that I don’t know what to do with the buttermilk that is left over. I don’t culture it beforehand – so it wouldn’t be suitable for recipes requiring buttermilk. I tried using it to make yogurt – and that didn’t turn out quite right. Any ideas?

    Reply
    • Ashley

      December 4, 2015 at 8:59 PM

      What about the milk left after you separate the cream? I haven’t tried making butter with my raw milk but the milk is pricey and I don’t want to waste anything. Thoughts?

      Reply
      • Lisa

        May 7, 2018 at 2:29 PM

        When you get raw milk from a farm, the milk is in a jar and the cream floats on the top of the milk. If you shake it up, you can drink it or use it as a whole milk. If you spoon off the cream for butter making or other use, the milk is still fine to drink or use as normal, it will have a lighter cream content in the milk is all. I hope this helps!

        Reply
  4. Amanda

    December 3, 2015 at 9:53 AM

    When I used to get raw milk from a farmer, they sold pints of cream for $1.75. I LOVED making my own butter! At first I tried to just shake the jar, and after almost an hour with very little change (and very sore arms) I dumped it all in my food processor with the plastic blade and had finished the entire process and had fresh butter in the fridge in less than 5 minutes.

    I miss the homemade butter – I think I’ll have to convince my hubby it’s time to go buy organic whipping cream!

    Reply
  5. Ankita

    December 3, 2015 at 2:49 AM

    5 stars
    Nothing is better than homemade butter or ghee. Nice post!!

    Reply
  6. Jess

    December 3, 2015 at 1:07 AM

    Love this! I grew up in a non-healthy conscious environment but somehow my mom taught us to make butter for fun! And I completely forgot about it until this post. I want to share this with you Katie so you can have your kids do it, too, if you want. I love how much you include your kids in the food preparation/cooking process. So anyway, it’s very simple. You put the cream into a glass jar and secure a lid on top. Then have your kids shake shake shake the heck out of that thing! It will go through the same stages, whipped cream first, but keep shaking until it turns to butter! I fondly remember my siblings and I would also sit on the (carpeted) ground and roll the jar back and forth to each other until it turned into butter. We thought we were doing magic! 🙂 anyway, thanks for reminding me about this! I’m going to get raw milk and do this with my preschooler now.

    Reply
  7. Deborah

    December 2, 2015 at 11:44 PM

    This sounds so actually doable, and I wish I lived near a source of raw milk from grass-fed cows! (Soon, I hope to move out to “the country” and then perhaps a neighbor…). Anyway, I don’t have a stand mixer, as I don’t bake a whole lot. Have you ever tried making butter in a Cuisinart? Would that work?

    Reply
    • ChrisB

      December 6, 2015 at 9:43 PM

      4 stars
      We have a couple grass-fed milk cows and I’ve made lots of butter in my Cuisinart. I follow the same basic process she gives here, but I pour the chunks of butter and buttermilk into a strainer, work it with a wooden spoon and rinse it under a fine stream of cold water. If the cream is thick and about 55 degrees it only takes a couple minutes to make butter in a food processor.

      Reply
  8. sangavi

    December 2, 2015 at 2:38 PM

    Hi Katie,
    I grew up with farm fresh milk and dairy. I am not sure how to make heavy cream at home but here is what i am used to. Always wanted to share this info, so here it is.
    The process of making butter starts with making yogurt from fresh milk that is pasteurized at home. The process of making yogurt will leave a thick cream on the top. This cream is collected for a couple of day or more. After a good amount is collected, the cream is then churned by adding water. This will make the butter to float on the top. The butter is then filtered out of the liquid. The remaining liquid is buttermilk to enjoy with fresh ginger, curry leaves, salt and if you are up to it with some thai green chilies. So next is the fun part of making ghee, that makes the whole house smell good. The solid remains of the ghee can be added with coconut palm sugar and moong dhal flour and roll it into small ball for kids treats.
    I noticed that in you how to make ghee post, you had mentioned that ghee will have be refrigerated after a month. Ghee can be stored at room temperate for year and year with no change in texture or taste.

    Reply
  9. Reiner

    December 2, 2015 at 1:39 PM

    5 stars
    Hi Wellness Mama
    I am in the lucky position that I can get heavy cream made from raw milk.And this heavy cream is really HEAVY cream.When I make my butter same way as you do I have NO buttermilk at all.Love my own butter.Once in a while I make Ghee out of this butter.It is out of this world.
    Thank you so much for your butter recipe.

    Reply
  10. Donna

    December 2, 2015 at 1:04 PM

    Ah, having grown up on a farm we had our own dairy cows so we got fresh milk, cream and made butter. Ice Cream too. Nothing better, but not much fun when you HAVE to make it.

    Reply
Newer Comments »

Join the Conversation... Cancel reply

Your email address will not be published. Please read the comment policy.

Recipe Rating


The information on this website has not been evaluated by the FDA and is not intended to diagnose, treat, prevent, or cure any disease. By accessing or using this website, you agree to abide by the Terms of Service, Full Disclaimer, Privacy Policy, Affiliate Disclosure, and Comment Policy. Content may not be reproduced in any form. Ads provided by CafeMedia Family & Parenting Network. Displayed ads do not constitute endorsement or recommendation by Wellness Mama.


Content

  • Home
  • About
  • Blog
  • Podcast
  • Favorites
  • Wellnesse

Support

  • Newsletter
  • Podcast Application
  • Medical Review Board
  • My Books
  • Sitemap
  • Contact

Policies

  • Privacy Policy
  • Terms of Service
  • Full Disclaimer
  • Affiliate Disclosure
  • Promo Guidelines
  • Comment Policy

Join the
Wellness Mama Tribe!


Copyright © 2023 · Wellness Mama® · All Rights Reserved · Powered by BizBudding