, ,

Healthy Homemade Chocolate Recipe

Katie Wells Avatar

Reading Time: 5 minutes

This post contains affiliate links.

Read my affiliate policy.

chocolate recipe
Wellness Mama » Blog » Recipes » Healthy Homemade Chocolate Recipe

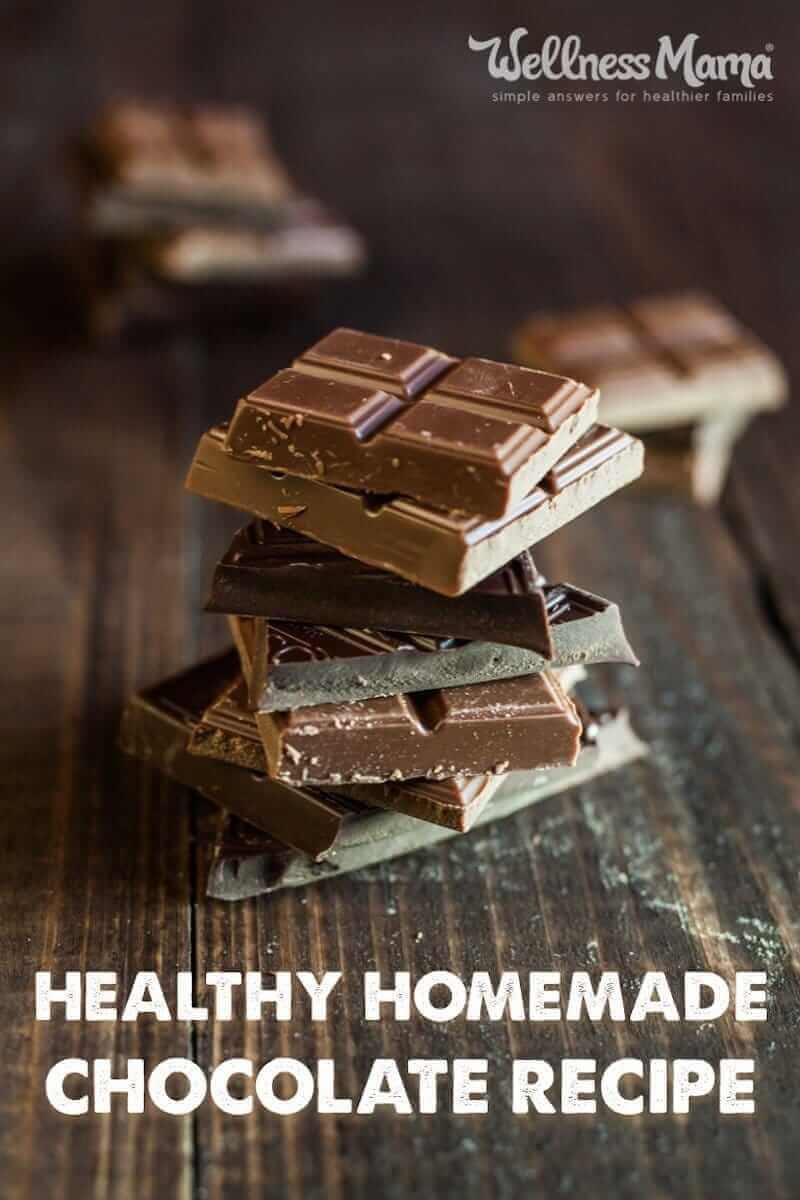
If there’s one guilty pleasure all moms enjoy, it’s chocolate! Thankfully there’s a way to justify indulging a little because chocolate (like wine) has some fantastic health benefits. The key is to choose quality chocolate from the right sources … or make your own homemade chocolate recipe.

It’s quick and easy and you have total control over the ingredients (and maybe even get to lick the spoon!). This recipe takes just a few ingredients. Melt over the stove, pour into molds, and … there you have it! The best chocolate that’s also healthy.

Why a Homemade Chocolate Recipe is the Best

It turns out that there are biological reasons why women crave chocolate. It may be for the magnesium boost (yes, chocolate contains magnesium). Or it could be for the feel-good serotonin and dopamine release that helps mood and sleep.

All chocolate is not created equal and most store-bought chocolate brands contain a lot more than cocoa powder. High fructose corn syrup, hydrogenated oils, soy lecithin, artificial flavoring, and carrageenan make the list of objectionable ingredients in many commercial brands.

Then there’s the sugar content, which is a problem … just 1/3 of a Cadbury chocolate bar has 22 grams of sugar. That’s not to mention white chocolate which is made with milk powder, cacao butter, and lots and lots of sugar.

Thankfully more brands are making healthy chocolate options with less sugar and quality ingredients. One of my favorites is Spring and Mulberry. It’s sweetened only with dates (no refined sugars!) and they have delicious flavors like lavender rose, pear and ginger, and mixed berry.

Making your own is cheaper though, and you can easily control the ingredients.

You can stock up on the few ingredients needed to make chocolate (as well as a few silicone candy molds to make fun shapes). It’s a delicious way to whip up a batch of healthy chocolate!

How to Make Chocolate at Home

In search of a GAPS friendly (and gluten-free, dairy-free, etc.) healthy chocolate, I realized I wanted to make my own. This homemade version is smooth and delicious. You can avoid the artificial ingredients when you make your own chocolate from scratch.

Some recipes just involve melting semisweet chocolate chips, but then you’ll still need to search for a healthy chocolate to start with. Instead, I opted for unsweetened cocoa powder as the base.

If it’s your first time making chocolate, here’s how to do it step by step.

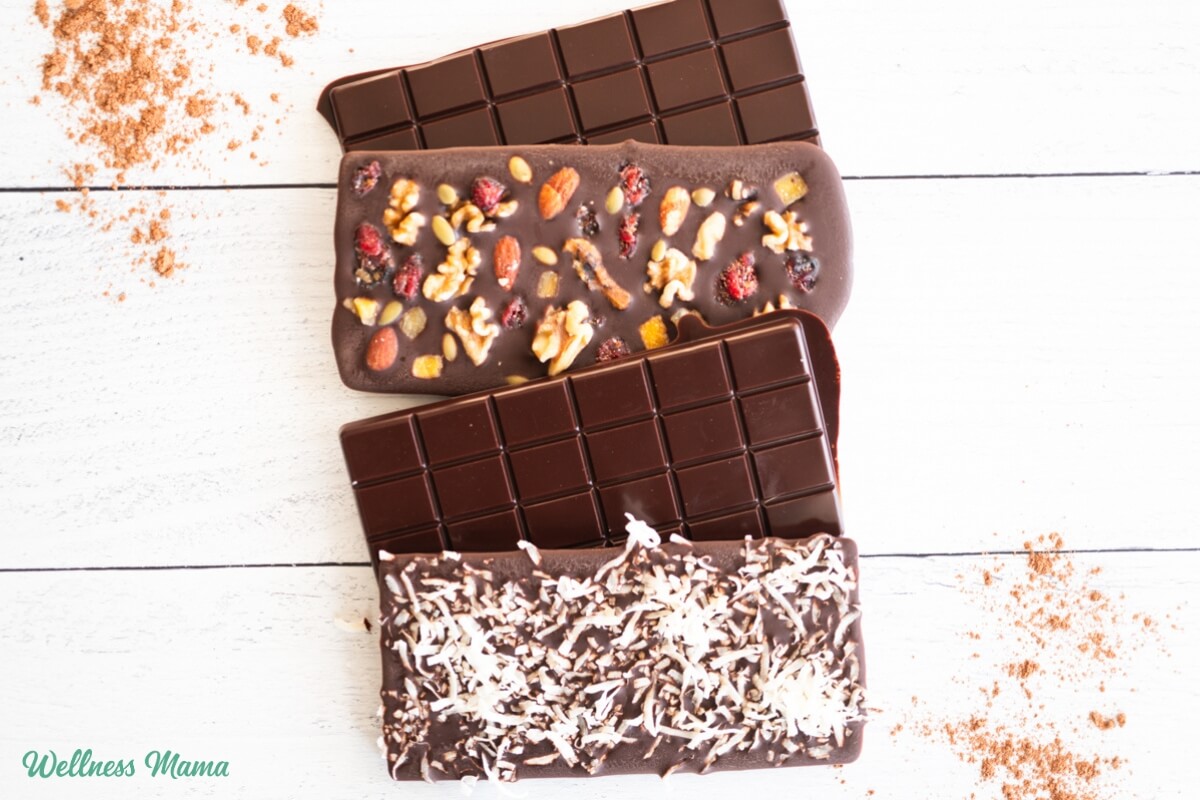
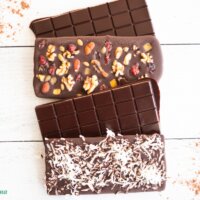
Making chocolate at home involves melting cocoa butter, cocoa powder, honey, and vanilla on the stove. I use a double boiler (or heat-safe bowl set over a pan with water). Next, you’ll pour the chocolate recipe into molds for it to set.

Choosing a Shape

I used these silicone heart molds to make fun bite-size chocolates (great gift idea!). This mini loaf pan is great for bar sizes. You can even find silicone molds in a chocolate bar shape if you want to be really authentic!

I’m gifting little jars of homemade heart chocolates for Easter this year. They’re great for Christmas, St. Nicholas Day, and other holiday gifts too! You can easily find silicone molds that match any holiday theme (or just make bars).

Different Flavor Options For Homemade Chocolate

Our family prefers the taste of dark chocolate over milk chocolate so the chocolate recipe isn’t overly sweet. If you prefer a bittersweet bar then reduce the honey to 1/4 cup for a more intense chocolate flavor. It’s easy to add a variety of different flavors and mix-ins to create a specialty taste.

Here are some flavor options to try!

  • Mix in dried fruit
  • Add a pinch of salt to the chocolate mix for a sweet and salty taste
  • Add chopped-up marshmallows to the molds before pouring the chocolate in
  • Try some healthy trail mix sprinkled on top
  • Add coconut flakes or chopped nuts
  • Use herbs like lavender or rose petals
  • Flavor it with peppermint, orange, lemon, almond, or vanilla extract
  • Add a teaspoon of brewed espresso for a mocha bar
chocolate recipe

Healthy Homemade Chocolate Recipe

A simple and delicious homemade chocolate that’s GAPS, paleo, and kid-approved! Customize the recipe to make your favorite flavor.
Prep Time 5 minutes
Cook Time 5 minutes
Cooling Time 4 hours
Total Time 4 hours 10 minutes
Calories 529kcal
Author Katie Wells

Servings

5 bars

Ingredients

Instructions

  • In a double boiler on the stovetop, melt the cocoa butter over medium-low heat. You can also use a glass bowl on top of a small pan with a few inches of water in the bottom. Be sure the boiling water doesn’t get into the bowl!
  • Once the cocoa butter is melted, remove from heat and add cocoa powder, vanilla, and other flavor extracts.
  • Allow the mixture to cool slightly. When it’s the same thickness as the honey you’re using, stir in the honey. If using a solid raw honey, melt with the cocoa butter.
  • Make sure all the ingredients are well incorporated and smooth. Be careful not to get any water or moisture in the chocolate recipe or it will get grainy!
  • Pour the chocolate into silicone molds or a glass pan to harden. You can also pour it onto a baking sheet lined with parchment paper.
  • Let chocolate harden for several hours at room temperature until firm and remove from the molds. You can also stick it in the refrigerator to harden more quickly.

Nutrition

Nutrition Facts
Healthy Homemade Chocolate Recipe
Amount Per Serving (1 serving)
Calories 529 Calories from Fat 18
% Daily Value*
Fat 2g3%
Saturated Fat 27g169%
Polyunsaturated Fat 1.4g
Monounsaturated Fat 15.4g
Sodium 5mg0%
Potassium 280mg8%
Carbohydrates 38g13%
Fiber 6g25%
Sugar 28g31%
Protein 3g6%
Vitamin C 0.2mg0%
Calcium 24mg2%
Iron 3mg17%
* Percent Daily Values are based on a 2000 calorie diet.

Notes

  • These chocolates will stay fresh for over a week at room temperature or in the refrigerator for longer. They can also be frozen.
  • The nutrition data is for 1 chocolate bar but will depend on the size mold you use and how much of the bar you eat. 

Like this recipe? Check out my new cookbook, or get all my recipes (over 500!) in a personalized weekly meal planner here!

This healthy homemade chocolate recipe is easy to make and healthy. It uses honey instead of sugar with cocoa butter and is GAPS, paleo and primal approved!

More Chocolate Recipe Tips

You can use coconut oil instead of cocoa butter. This makes a really healthy chocolate, but it won’t be as thick or creamy (but it’s still very good!). If you use coconut oil, I recommend hardening and storing them in the fridge. This is one easy way to add coconut oil and magnesium to your daily diet!

I’ve melted the mixture in a small pan on very low heat and haven’t had a problem, but it’s not as reliable as the double boiler method. 

Looking for More Homemade Chocolate Recipes? Try:

Have you ever made chocolate at home? What are your favorite flavors? Share below!

Katie Wells Avatar

About Katie Wells

Katie Wells, CTNC, MCHC, Founder of Wellness Mama and Co-founder of Wellnesse, has a background in research, journalism, and nutrition. As a mom of six, she turned to research and took health into her own hands to find answers to her health problems. WellnessMama.com is the culmination of her thousands of hours of research and all posts are medically reviewed and verified by the Wellness Mama research team. Katie is also the author of the bestselling books The Wellness Mama Cookbook and The Wellness Mama 5-Step Lifestyle Detox.

Comments

324 responses to “Healthy Homemade Chocolate Recipe”

  1. Sue Avatar

    OK Katie everyone is asking – what is the weight of 1 cup of cocoa butter? It’s an expensive ingredient, so we need to make sure we get this right.

  2. Janice H Avatar
    Janice H

    I think you should know that cocoa butter is deadly to the heart. A great chocolate can easily be made without the cocoa butter.

    1. Holly Avatar

      Cocoa butter is not “deadly to the heart.”

      It is true you can make delicious chocolate without cocoa butter. But it doesn’t taste quite the same, in my opinion. Chocolate, with OR without cocoa butter, is a healthy addition to most people’s diets, as long as it is eaten in moderation.

      Moderation. That is key. Even life-giving water can be deadly when ingested in too large of quantities.

  3. Debbie Avatar

    Hi, I would like to make this recipe but my cocoa butter is in big hard lumps. How would you measure 1 Cup? Have you measured your ingredients in weights yet?

  4. Emily Avatar

    I have tried making this, and it was good other than the fact that everybody thought that it tased to much like coconut. I also have tried making it with peanut butter instead of chocolate. This turned out fantastic! Every body loves them!

    1. Faith Avatar

      5 stars
      Magnesium is naturally in cocoa. The less processed the cocoa (ie, dutch vs a dark natural unrefined cocoa), the more the magnesium. If you’re looking for more magnesium, have a higher cocoa amount in the recipe. For example, if you bought the chocolate (instead of making it) you would look for a dark chocolate with high cocoa content like 70% or 85% cocoa (instead of a milk chocolate).

      I added a little more cocoa to mine, but it can get too rich/bitter if you’re not careful or not used to very dark chocolate. It might result in needing to add more sweetener ‘to taste.’ The recipe has a generally higher magnesium amt as is, considering it’s homemade with quality ingredients and little processing.

  5. Pam Burleson Avatar
    Pam Burleson

    3 stars
    I’ve tried to make this recipe twice now, using the solid cocoa butter in a tub from Mountain Rose Herbs. 2 problems:
    1) It takes a lot of work to scrape out 1 cup of the stuff.
    2) The chocolate never hardens all the way. It becomes really thick (and also delicious) fudge. But I’d really like hard chocolates.

    Is there a different kind of cocoa butter that I should be using? Should I use less cocoa powder?

    3 starts because it’s yummy, but not what I was hoping.

    1. Minaz Avatar

      Hi Pam,
      Did you ever get a reply to your questions?
      My chocolate doesn’t harden to ‘snap’ consistency either, even in the freezer.
      Tastes awesome but the consistency is disappointing. I wonder what the problem is?
      I do hope that Katie or someone else replies soon as am so looking forward to making
      Healthy Chocolate 😀

      1. Wellness Mama Avatar

        Depending on how thin you spread the chocolate before you freeze, you might not get the same “snap” you’re used to with a regular chocolate bar.

  6. lindsay Avatar

    i’m seeing all these comments about their chocolate separating…. i have to wonder, are y’all whisking it together long enough? when it’s properly mixed, it’s nice and kind thick, like hot fudge sauce. it takes a little while, i noticed- i’ve made it three or four times and each time, i have to whisk it for a little while until it’s all the way mixed. i think the separation issue has more to do with having the ingredients mixed all the way… jmo.

  7. Jessica Avatar

    5 stars
    Hey Katie!
    This is my second time attempting the recipe, I used coconut oil instead of coconut butter. Both times the honey ended up separating from the chocolate and coconut oil, making the top of the chocolate hard and bitter and making the base wet and sugary.

    Have you had any problems with this? I even kept it in the fridge to make sure it didn’t melt down (since coconut oil at room temperature will do that).

    I’m thinking its because i haven’t used raw honey, maybe it needs to be creamy? Or maybe the problem is when i mix the coconut oil and honey together, perhaps i don’t mix enough!

    Its still very delicious, but I’m thinking that maybe the recipe isn’t crazy flexible and i need to use those ingredients exactly to make it work haha~ will try again soon!

  8. Sarah Avatar

    4 stars
    I made this and it turned out fantastic. I know why people are getting the problem of the honey separating and sinking. The chocolate needs to be tempered. There are two ways to do this. First off, when I first made it, I had the same problem of it separating when it hardened. The top was very bitter, but the bottom ridiculously sweet. So I remelted it, and then hardened it again. That is the “quick temper” method.

    The second way to temper is after mixing it all, let it come to room temperature on it’s own for about 30 minutes (it will stay liquid). Every 5 minutes or so, just stir it a little. Then when it’s at room temperature, pour into a mold and let it harden (I just pop it in my freezer).

    Secondly, I have the chocolate chunks of cocoa butter (not scoopable). I found a conversion chart and 7.69 oz of cocoa butter = 1 cup. So I just measured that out by weight and melted it (no shredding or cutting or anything).

    I actually quartered the recipe because it was going to be an experiment and I didn’t want to waste the *very* expensive cocoa butter. So a quarter of that is 1.92 oz. I hope that helps somebody!

    I gave this recipe 3 stars because while it’s good, it needs more information.

    1. Sarah Avatar

      3 stars
      Oh for Pete’s sake. I wanted to give it 3 stars, but when my mouse hovered over, it changed to 4 just as I was posting.

  9. Jacque Avatar

    Would someone who used the cacao butter buttons please weigh a cup of them in grams? You don’t need to make the recipe–just weigh the buttons. I have chunks of cacao butter, and I’d love to try this recipe. But after reading about so many failures, I hesitate to try without knowing the weight.

    Thanks!

    1. Sarah Avatar

      I also have chunks and would like to know. I read that the author has “scoopable” cocoa butter, so I’m scared to try and guess. I think the ones that didn’t work and were too thick was because theirs was like ours. Chunks and not scoopable. I looked up a conversion chart, and it says 1 cup of cocoa butter is 7.69 oz. I think I might try and do a half or a quarter of the recipe in case it goes wrong.

    2. Weezy Avatar

      Just today I guessed at what I thought was probably a cup of chunks. Melted super slow on low and poured it into a liquid measuring cup. It was just under 1/2 a cup, and it was the last of my raw cacao butter, so I adjusted the remainder of the recipe by half. Next time I will weigh first, to see how much that weight measures out to be in a liquid measuring cup.

  10. Cinda Avatar

    1 star
    This recipe is really discouraging me. Maybe I am just not supposed to satisfy that chocolate craving. I have wasted ingredients twice already. The first time I wondered if maybe water got into mix, but after being super careful the second time, I realize that isn’t the problem. The mixture just gathers into a lump. I added more cocoa butter (quite a bit the first time) thinking that it was because I had shredded the chunks and didn’t have enough, but that didn’t work. I tried spreading batter (literally batter) on a cookie sheet and freezing, but it was way too chewy. Awful! Too much wasted time and money. Will try one more time with maple syrup…what am I doing wrong?

  11. Deb Avatar

    5 stars
    I made this for christmas treats. Came up well. Did it late at night as was taste testing and wondered why I couldnt sleep…
    I used honey that had slightly started to crystalise (candy) so put it in with the cocoa butter to melt. I think it does need a bit of melting to blend but would not put in the microwave. Honey does contain water naturally – around 17%. Maybe why it settles on the bottom – as it cools it becomes heavier and settles? Just a thought? I noticed it did this with the end of the batch. I could taste the honey.

    I put 1/3 of mixture in separate containter and added some organic vanilla essence for sweetness and flavour. It was quite sweet but nice. A lid full (1/2 tspn?)
    2nd 1/3 I added a few drops of peppermint essence which was lovely.

    3rd lot I left plain to test the sweetness. Not sweet, but if you like intense dark choc it was yummy. Could taste the honey after being in the fridge for a week.

    I found pouring very thinly into paper patty pans/cupcakes worked good. Too thick and it was too rich to eat in one go.
    Used different colours for different flavours so all knew what was what.

    Thanks for a great recipe! Will definitely pass this one on.

  12. Emily Avatar

    how do you keep the oil and honey from separating? really vigorous stirring? honey is water based and obviously wont blend in well if I try to make this with coconut oil.

    also, how can I make it into milk chocolate? i’m afraid of mixing in whole milk because that will make the final product too soft. I’d try milk powder but I don’t know if it’s a safe clean ingredient.

    any thought on milk powder? yea or nay?

  13. Anna Avatar

    2 stars
    Great idea, but honey separated and sunk, so my first chocolates were bitter and last ones were overly sweet with a honey filling.
    I research about it and apparently – two things: coca butter needs to be heated just enough to melt and be taken off the heat while there are still small solid pieces in it, it will continue melt on the countertop; and after adding cocoa powder and honey the mixture has to be whisked vigorously for a couple of minutes until smooth and glossy.

  14. June Avatar

    Could not melting the coconut oil , but mixing all ingredients with an immersion blender prevent the sinking honey problem? This would go in the fridge right away once poured into pan.

  15. Sherri Webber Avatar
    Sherri Webber

    I tried the arrowroot powder with coconut oil — didn’t stop the honey from sinking for me.

    1. Jane Avatar

      5 stars
      Sherri Webber, try waiting for the coconut oil to cool (begin to solidify) before adding the honey! Or you could stir the honey and coconut oil together until it thickens (the coconut oil — the honey definitely will!) It worked wonderfully for me. =]

  16. Lisa Avatar

    So glad I only attempted a half recipe of this. After reading reviews I thought it might be worth it to heat the honey with the cocoa butter. It did not work. At first when the cocoa powder went in it looked okay but kinda thick. Put in my vanilla and it all started to come together like a thick doughy consistency. It taste great but there was no salvaging it to pour in to candy molds. It seriously is malleable like a dough and doubt it will set up. I attempted to reheat but quickly took it off because all that did was pull out an oily runny like water liquid from the chocolate. I will try the recipe directions as is next time but I am very hesitant. I have a child with allergies and was really hoping this would work. I used the exact cocoa butter and cocoa powder you used. I used local raw honey. Vanilla is homemade from Fris Vodka and vanilla beans.
    Any suggestions or tips as to where things may have gone wrong would be much appreciated.
    The water on the pan did not touch the bowl from what I could see and no water got in to the chocolate.

    1. Jane Avatar

      5 stars
      Hi Lisa!
      I can relate! Well, kind of… my coconut oil and honey wouldn’t stay together. I tried mixing them in a blender, melting them together, just heating the coconut oil and just heating the honey, but none of them produced what everyone else seemed to be getting! The chocolate, once drained of oil, was still delicious, but not what I was looking for.
      But then I came across this little gem: wait for the coconut oil to cool (as it cools it will thicken, eventually returning to its original, solid state.), and when it’s around the consistency of honey (unheated), then you can add in the honey (the cocoa powder can be added whenever)! It works like magic. Or you could stir melted honey and coconut oil until the coconut oil begins to harden — I’m sure it’ll work either way.
      There’s room for lots of experimenting, but it’s still amazing!

      1. Tanusha Avatar

        5 stars
        Thank you very much for the helpful tip Jane! Just made a batch of this chocolate with coconut oil using your tip, turned out great, no separation at all. Thank you Katie for this recipe!

Leave a Reply

Your email address will not be published. Required fields are marked *

Recipe Rating