

I’ve been fascinated with soap making for a long time. What was once a common household skill now seems like such a complicated process that many people simply buy soap instead. Unfortunately, many conventional soaps have additives, antibacterial ingredients and artificial fragrances.
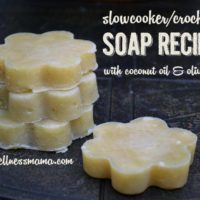
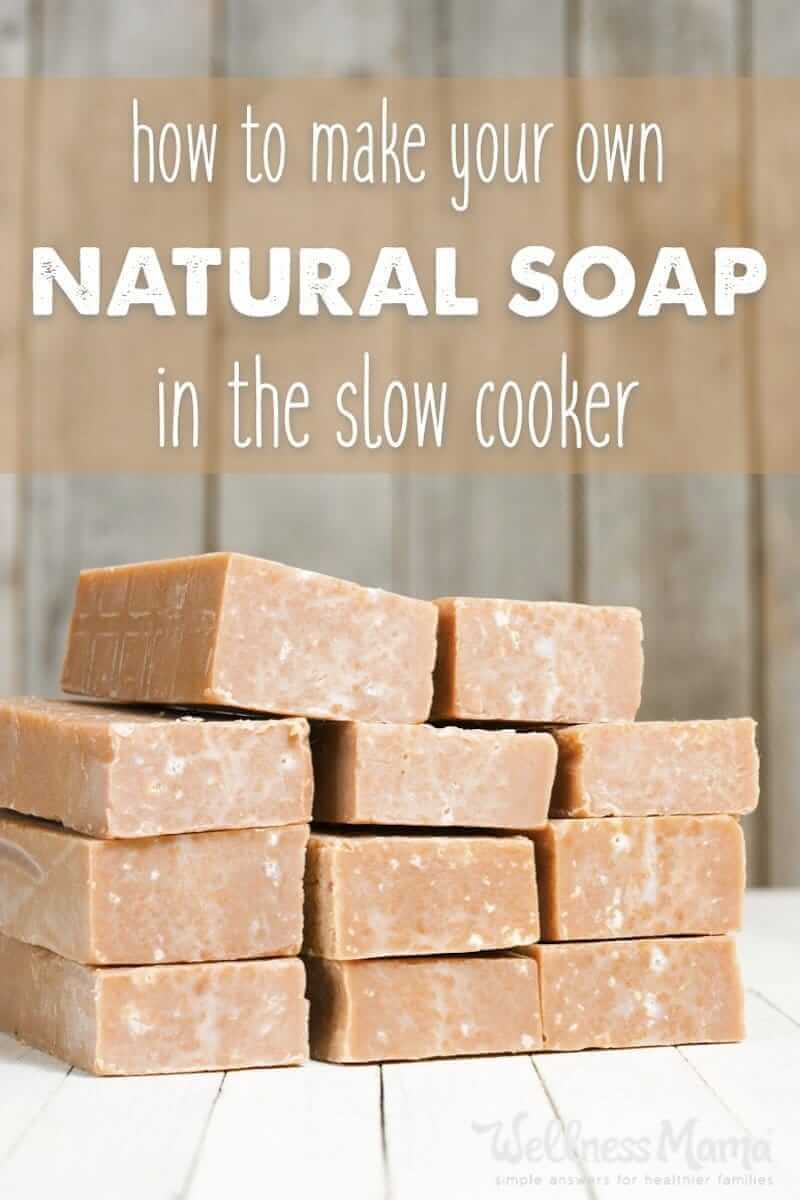
Slow Cooker Soap Tutorial
I first started using homemade soap when I realized that it was the most cost effective way to get an all-natural soap.
I buy all ingredients in bulk so for under $10 I can make 12-18 big bars of organic soap. Store-bought alternatives cost 4-5 times that amount.
A Word About Lye
Many people are afraid to try recipes that use Lye, but I’ve found that much of this fear is based on misinformation.
Yes, Lye (or Sodium Hydroxide) is extremely dangerous by itself. It can cause skin damage, blindness (with eye contact) and death (if ingested). Lye in its pure form is something that can be very harmful and extreme caution should be used when using it in any way.
Lye is created through the electrolysis of sodium chloride (salt) and it creates an extremely alkaline substance. If added to water, it becomes sodium and hydroxyl ions and creates a strong exothermic (heat creating) reaction. Flashbacks to high school chemistry anyone?
Moving on…
When Lye is used in soap making, it is what is called a reagent, meaning it is used in a chemical reaction to create other substances. In soap making, a carefully measured water/lye mixture is blended with natural oils in a process called saponification. Lye is simply an agent used to create soap from oils and water.
There is no unreacted Lye remaining in properly made soap. If you’re considering making soap, definitely use extreme caution with unreacted lye and use a soap calculator to make sure you are using the correct ratio of water/lye/oils but don’t be afraid of this age old process.
Where to Find Lye: Some hardware stores carry Lye (sodium hydroxide) though many have stopped carrying it. I wasn’t able to find it at any of our four local hardware stores so I ordered this one online. If you have a local (not big brand) hardware store they might also be able to special order it for you.
Hot Process vs. Cold Process
As the name suggests, the difference between these types of processing is if heat is used or not. With both methods, a water/lye mixture is used and oils are used. The two are mixed together in the process of saponification.
With cold processing, the water/lye mixture is mixed with the oil mixture and the resulting mixture is poured into insulated molds.
Hot processing adds an additional step of “cooking” the mixture which speeds the saponification process and makes the soap ready to use in days instead of weeks. Both methods work and I’ve done both, but the hot process method is much faster.
Choosing Ingredients for Soap Making
 The advantage to making soap at home is that you can use high-quality organic ingredients and still get organic soap for much cheaper than store bought options.
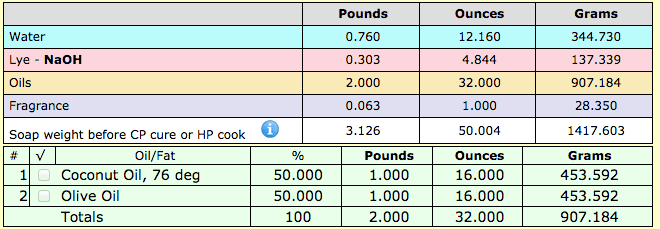
In this basic recipe, I used organic Coconut Oil and organic Olive Oil, though any natural oils can be used. Use this Soap Calculator to figure out how much Lye and water are needed for whatever type of oils you want to use.
Really- the world is your oyster when it comes to picking ingredients but some popular and favorite ingredients are:
Once you’ve picked your ingredients, head over to the calculator and find out how much water and Lye you need.
For this specific recipe, I used an equal mix of olive oil and coconut oil, but just pure coconut oil can be used (like this great recipe from Mommypotamus) or just olive oil can be used. If just olive oil is used, you’ll have a pure castile soap (named after that region in Spain) which is very moisturizing but can take longer to cure.
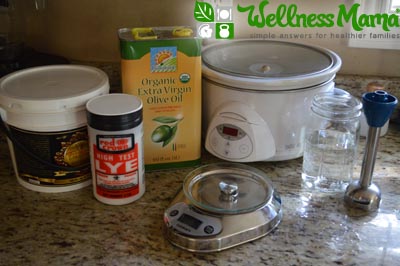
Gathering Equipment
 I personally keep separate equipment to use for soap making. I found all of my equipment at a thrift store and keep it in the garage with the soap making ingredients.
Every source I’ve seen says that it is fine to use regular kitchen equipment for soap making as long as you wash it carefully afterward (see my notes at the bottom of this post on that). At the end of the process, you are just dealing with soap, so it isn’t toxic, but cleanup can be messy. To simplify, I just keep separate tools for soap making.
I have:
- A slow-cooker (I got an older one at a thrift store)
- A digital scale (this is important for making a soap that is not too harsh or too oily)
- Glass jars and bowls
- A stick blender
- plastic cups (optional)
- A metal spoon
- A wooden spoon
- A spatula
- Soap molds (or an old cardboard box lined with parchment paper). I have green flower molds, red silicon rose molds and basic bar soap molds.
- Gloves and sunglasses or eyewear
- A large bottle of white vinegar for neutralizing the lye mixture if it spills on anything.
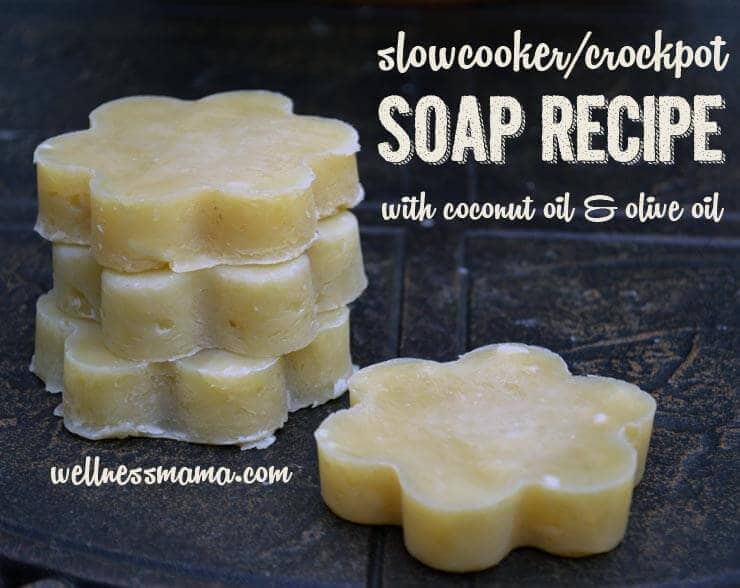
Slow Cooker Soap Recipe
Materials
- 16 oz coconut oil
- 16 oz olive oil
- 4.844 oz lye
- 12.16 oz water
- 1 oz essential oils (optional)
Instructions
- Prepare your mold. Wood molds will need to be lined with freezer paper or wax paper. Silicone molds are ready to use as is. You can also use any box if you line it with freezer paper, wax paper, or a thick garbage bag. I’ve heard of people using empty Pringles containers, but haven’t tried it.
- Make sure that your work area is clean, ventilated and that there are no children nearby. This is not a good recipe to let children help with since lye is caustic until mixed with water and oils.
- Weigh out 16 ounces of olive oil and 16 ounces of melted coconut oil and pour them both into the slow cooker.
- Turn on high just until the oils heat up and then reduce to low heat.
- While oils are heating, carefully measure the lye and water separately. TIP: This is the only thing I ever use disposable plastic cups for. They don’t weigh anything on the scale so they make measuring easy. I keep three separate cups labeled “Water”, “Lye”, and “Oil” to use for this purpose only. I reuse them each time so they aren’t wasted and I don’t worry about anyone drinking out of them since we don’t usually use these types of cups.
- Carefully take the cups with the measured water and lye outside or to a well ventilated area.
- Pour the water into a quart size or larger glass jar.
- With gloves and eye protection, slowly add the lye to the water. DO NOT ADD THE WATER TO THE LYE (this is really important).
- Stir carefully with a metal spoon, making sure not to let the liquid come in direct contact with your body.
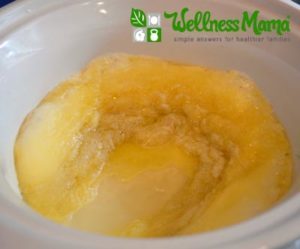
- As you stir, the mixture will become white and cloudy and get really hot. Let this mixture sit for about 10 minutes to cool. It should become clear when it has cooled.
- When the oils in the slow cooker have heated to about 120-130°F, slowly stir in the water and lye mixture.
- Quickly rinse the container used for the water and lye mixture out in the sink. I rinse well and then re-rinse with white vinegar to make sure all the lye has been neutralized.
- Use a stick blender to blend the mixture in the slow cooker for about 4-5 minutes or until it is opaque and starting to thicken.
- Cover and keep the slow cooker heat on low to thicken. I set a timer for 15 minutes and check it every 15 minutes until it is ready. It will start to boil and bubble on the sides first. After about 35-55 minutes (depending on the slow cooker) it will be thick enough that the entire surface is bubbly and the sides have collapsed in.
- Turn the heat off and remove the inner bowl of the slow cooker.
- If you are going to use essential oils for scent, add them now. I added lavender and orange.
- Quickly and carefully spoon the mixture into the prepared molds.
- Cover the molds with parchment paper and set them in a cool, dry place.
- After 24 hours, pop the soap out of the molds. It can be used right away, but I prefer to let it set for a few more days so that it lasts longer.
Notes
As I mentioned, keeping separate tools for soap making simplifies the process since things don’t have to be cleaned enough for food use. I still clean all tools carefully with dishwashing soap and water and rinse with vinegar just to be sure.
Since we are making soap, I typically soak the crock from the slow cooker with all tools in it for 8+ hours to dissolve and use the soapy water to help clean all the tools.
Ever made soap? How did it go? Share your favorite recipe below in the comments!

Leave a Reply