• Skip to main content
  • Skip to header right navigation
  • Skip to after header navigation
  • Skip to site footer
Wellness Mama script logo

Wellness Mama®

Simple Answers for Healthier Families

  • About
  • Favorites
  • Podcast
  • Blog
  • Shop
  • Health
  • Natural Home
  • Motherhood
  • Mindset
  • Natural Remedies
  • Beauty
  • Organization
  • Travel
  • Reviews
  • Recipes
DIY Canvas Photo Print Tutorial - homemade canvas photo prints for under ten dollars each
  • Natural Home

DIY Canvas Photo Print Tutorial

Katie WellsOct 26, 2014Updated: Jul 30, 2019
Reading Time: 4 min

This post contains affiliate links.
Click here to read my affiliate policy.

Wellness Mama » Blog » Natural Home » DIY Canvas Photo Print Tutorial
Table of Contents[Hide][Show]
  • DIY Canvas Photo Print...
  • Canvas Print Materials:
  • Cost Breakdown:
  • Variations:
  • What You Need:
  • Instructions:

With our wonderfully busy life and five small children, I often find that I’m usually enjoying (surviving) the moment, rather than taking pictures of the moment. When I do manage to get pictures of all of the children, someone is inevitably not looking, or picking a nose (usually their own) or trying to walk away.

I’ve come to realize that these moments are a real glimpse and memory of what life was like at this stage, so rather than obsessing about trying to get the “perfect” picture of all of us, I’m learning to embrace the “beautiful but real life” shots instead.

A great side-bonus of this new outlook on family photos is that we’ve opted not to hire professional photographers for most family photos, and we save money by enlisting a family member or friend to take some shots instead. I figured I’d just go get prints of the shots I loved and do any edits on my own.

When I looked at the options, I fell in love with canvas photo prints that most photo-printing places offered. I didn’t fall in love with the price tag.

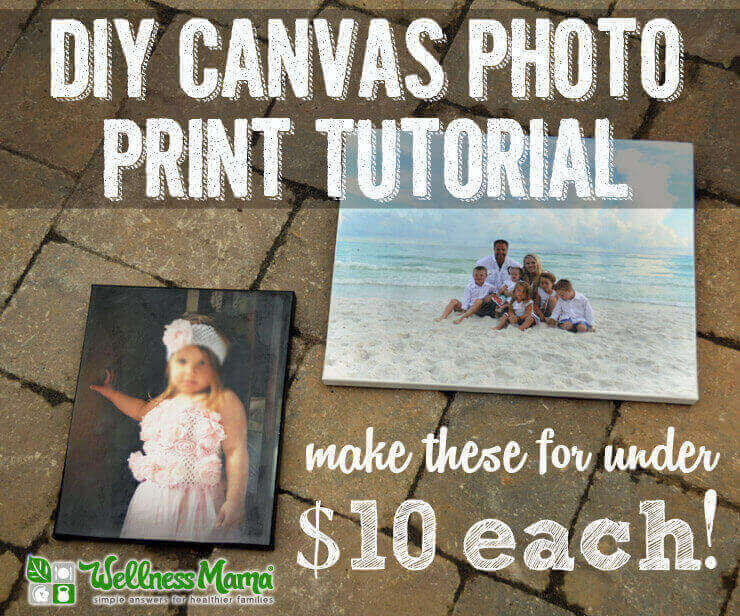
DIY Canvas Photo Print…

Make your own canvas photo prints for ten dollarsI figured there had to be a cheaper/DIY option. I stumbled upon a tutorial for making homemade canvas photo print on Pinterest, but the link didn’t work so I could never find the original article.

After some experimentation, I found a method that worked great to make homemade canvas photo prints for under $10 (or less, depending on size!)

The inspiration came when I was doing a craft project with my kids that involved Mod Podge and I realized that I’d used it for photos before. I decided to try using it with photos on a canvas and see if I could create a photo canvas look alike. It worked great and I’ve now found a few variations and adaptions as well.

Canvas Print Materials:

Homemade canvas photo print tutorial

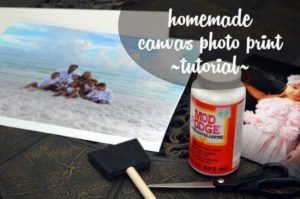
  • Mod Podge (I used this Matte finish one to get the right texture)
  • Photo print that you want to mount (same size as canvas or 2 inches bigger- see below for options)
  • Stretched canvas (I’ve found good deals at local stores like Michaels and Hobby Lobby and I’ve also ordered an inexpensive 7-pack of 11×14 canvases and this 12-pack of 8×10 canvases at a good price online)
  • Foam Brush (I got this value-pack so we’d have extra for future art projects)
  • One huck towel (I already had these in my kitchen)

Cost Breakdown:

I bought the materials to make 12 prints (six 8×10 and six 11×14) so that I could make some for Christmas gifts for relatives. I bought the materials in bulk and printed the photos during a sale, so cost may vary based on your location and sales:

  • Pack of 11×17 canvases: $24
  • Pack of 8×10 canvases: $19.99
  • Mod Podge: $7
  • Six 8×10 prints ($2 each on sale at Walgreens)
  • Six 11×14 prints ($4 each on sale at Walgreens)
  • Foam Brushes: $6.5

Total Cost: $91 for 12 prints or $7.58 per print. 

Variations:

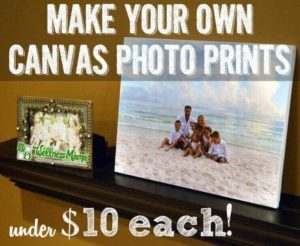
I made the prints in the picture by following the basic instructions below, but have experimented with a few variations that also worked really well:

  • Mount on a piece of 1/2 inch plywood for wooden photo prints
  • Print the photo 2 inches bigger than the canvas and carefully wrap the edges to create the wrap-around photo effect in many store bough canvas photos
  • Make an inexpensive frame with 1/2 inch lumber and wrap the photo around completely to create a canvas-less canvas print
  • Get a black canvas or paint the sides of the canvas black with acrylic paint to make a black-rimmed print.

What You Need:

  • 1 stretched canvas in the size of your choice
  • 1 photo print in either the same size or 2 inches larger (see above)
  • Mod Podge
  • 1 Foam Brush
  • A huck towel or piece of rough textured material

Instructions:

  1. Trim the white edge from the photo if there is one (there is often a 1/4 inch white frame on printed photos from most places)
  2. Make sure that print matches the size of the canvas correctly.
  3. Paint mod podge on the entire top surface of the canvas and carefully place the photo on the canvas. I used a towel to carefully smooth out the photo and make sure it was touching the entire surface of the canvas.
  4. Wait a few minutes to let it dry.
  5. Paint the sides and entire surface of the photo with a thin and even layer of mod podge. It looks like it will ruin the photo- don’t worry… it won’t! You’ll want it to look mostly opaque at this point.
  6. While this layer of mod podge is still wet, carefully place the huck towel over the canvas and press down. Peel it off carefully without rubbing or pulling it side to side. This creates the texture of the canvas on top of the photo.
  7. Let dry completely.
  8. Voila! Homemade canvas print for under $10!

Note: you can also do this project with a favorite inspirational quote, rather than a photo

Do you have any favorite DIY art projects like this? Ever tried one similar? Share below!

Category: Natural Home

Share this article

FacebookTweetPinLinkedIn
Print / PDF / Email

About Katie Wells

Katie Wells, CTNC, MCHC, Founder of Wellness Mama and Wellnesse, has a background in research, journalism, and nutrition. As a wife and mom of six, she turned to research and took health into her own hands to find answers to her health problems. WellnessMama.com is the culmination of her thousands of hours of research and all posts are medically reviewed and verified by the Wellness Mama research team. Katie is also the author of the bestselling books The Wellness Mama Cookbook and The Wellness Mama 5-Step Lifestyle Detox.

  • All Posts

You may also enjoy these posts…

How to make a planter box for easy backyard gardening

DIY Planter Box Tutorial

diy makeup from natural ingredients

DIY Natural Blush Make-up Tutorial

How to make a simple backyard burlap tent that folds up for backyard storage

DIY Kids Burlap Tent Tutorial

Himalayan Salt Scrub DIY

DIY Himalayan Salt Scrub Recipe + Tutorial

easy fleece t-shirt quilt tutorial

Fleece T-Shirt Quilt Pattern & Tutorial

Homemade Sleepytime Foot Spray

Sleepy Time Foot Spray Tutorial

Reader Interactions

Discussion (25 Comments)

  1. Lisa

    March 5, 2019 at 9:24 AM

    Hey thanks for sharing!! What kind of paper do I need to print the photo on? I’m anxious to try this!

    Reply
  2. Naomi

    November 12, 2018 at 8:51 PM

    Thank you lots <3!! Helped me for my first art show 🙂

    Reply
  3. Krista

    September 30, 2018 at 4:28 PM

    Any thoughts on what to do about bubbles? I’ve tried making 3 and they all have ended up with noticeable bubbles. Two of them I tried smoothing with a towel. The 3rd I used a credit card and I thought I had it super smooth. But as soon as I put on the top layer of mod podge, bubbles started emerging.

    Reply
  4. Jill

    July 27, 2018 at 6:51 AM

    What do you print the photo on? Thank you so much!

    Reply
  5. Chuck K

    June 15, 2018 at 1:49 PM

    Hello! I was wondering if th photo goes face down or up on the canvas

    Reply
  6. Deb B

    April 19, 2018 at 9:27 AM

    I am very excited to try this. Thank you for all your awesome post and recipes!

    Reply
  7. Cam Buchanan

    September 28, 2016 at 4:33 PM

    What type of photo did you use – glossy, matte?

    Reply
  8. David

    August 31, 2016 at 7:51 AM

    Question: Any reason to not just use the iron on transfers to do this and then add a protective coating over the canvas once the iron on is in place? Seems like the process would take less time and be more cost effective.

    Reply
  9. Trinity

    November 21, 2015 at 2:53 PM

    Now that you’ve had these done for awhile, did they fade or turn yellow or anything?

    Reply
    • Wellness Mama

      November 23, 2015 at 12:03 AM

      They have not faded or changed color at all…

      Reply
  10. Candace

    February 9, 2015 at 12:34 PM

    Looks like a good plan but a lot of work.
    I am going to try this:
    https://www.amazon.com/gp/product/B000CS9BLY/ref=as_li_tl?ie=UTF8&camp=1789&creative=390957&creativeASIN=B000CS9BLY&linkCode=as2&tag=wellnessmama-20&linkId=6IGTSNNYPO5GAAWT

    Reply
« Older Comments
Newer Comments »

Join the Conversation... Cancel reply

Your email address will not be published. Please read the comment policy.

Recipe Rating


The information on this website has not been evaluated by the FDA and is not intended to diagnose, treat, prevent, or cure any disease. By accessing or using this website, you agree to abide by the Terms of Service, Full Disclaimer, Privacy Policy, Affiliate Disclosure, and Comment Policy. Content may not be reproduced in any form. Ads provided by CafeMedia Family & Parenting Network. Displayed ads do not constitute endorsement or recommendation by Wellness Mama.


Content

  • Home
  • About
  • Blog
  • Podcast
  • Favorites
  • Wellnesse

Support

  • Newsletter
  • Podcast Application
  • Medical Review Board
  • My Books
  • Sitemap
  • Contact

Policies

  • Privacy Policy
  • Terms of Service
  • Full Disclaimer
  • Affiliate Disclosure
  • Promo Guidelines
  • Comment Policy

Join the
Wellness Mama Tribe!


Copyright © 2023 · Wellness Mama® · All Rights Reserved · Powered by BizBudding