Luxurious DIY Lotion Recipe

Katie Wells Avatar

Reading Time: 3 minutes

This post contains affiliate links.

Read my affiliate policy.

DIY lotion
Wellness Mama » Blog » Beauty » Luxurious DIY Lotion Recipe

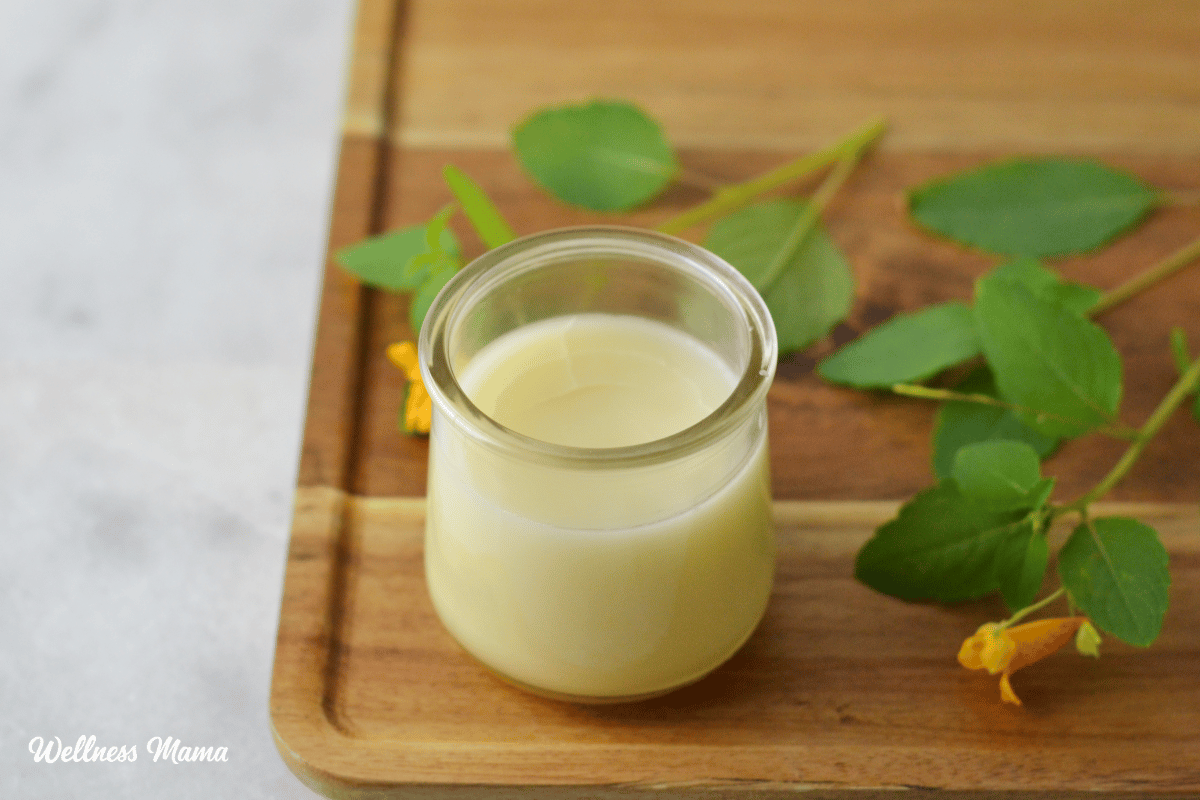
If you’re still using store-bought lotion there are super easy natural alternatives that are fun to make! This DIY lotion recipe has three basic ingredients and only takes ten minutes to whip together.

The basic recipe is an ultra-moisturizing water-free version that lasts for years without preservatives. While lotion is technically a formulation of water and oil-based skincare ingredients, this one is oil-based. It feels more like a body butter and is great for dry skin.

Homemade Lotion

I discovered years ago that I could use natural ingredients to make my own skincare products and I haven’t looked back since! From homemade lip balm to whipped body butter I love making my own. Lotion bars were one of the first things I made and I’ve branched out to other kinds of lotion too. This version uses unrefined coconut oil, almond oil, and shea butter to nourish skin deeply.

Most lotions use emulsifying wax to blend distilled water and carrier oils together. It can be tricky to do at home. Plus it requires preservatives to keep it from going bad! This DIY lotion skips that problem by eliminating the water. You can further extend the shelf life by using vitamin E. This antioxidant helps oils not go rancid as quickly.

Choosing a Carrier Oil

I use sweet almond oil for the carrier oil since it’s a middle of the road oil. It’s not as heavy as coconut oil, but it’s more moisturizing than something like grapeseed oil. You could replace it with whatever liquid carrier oil you prefer. Jojoba, olive oil, or avocado oil are also good options.

This lotion is ultra-moisturizing and more oily than water-based lotions so you won’t need to use as much. It also has a longer shelf life than some homemade lotion recipes. All the ingredients are already shelf stable and no water is added.

Custom Lotion Making

Once you master the base recipe, have fun customizing your lotion to your skin type, skin conditions, and desired scent!

There are endless variations, but some of my favorites are:

  • Baby Lotion – Infuse the oil with dried calendula and chamomile before making the lotion.
  • Cooling Muscle Rub – Add peppermint, wintergreen, and ginger for sore muscles.
  • Anti-aging Face Lotion – Use argan oil and add lavender and patchouli essential oils.
  • Lavender and Vanilla Lotion – Add a few drops of lavender and a little natural vanilla extract.

Essential Oil Safety

So how many drops of essential oils should you add to your DIY lotion? It depends on the essential oil and your preference. If you add the optional shea butter, 45 drops of essential oil will be a 1% dilution. A 2% dilution is generally considered safe for skincare products like lotion.

If you like a really strong scent you could double the amount (to 2%). Or if you prefer a lighter scent or have more sensitive skin, you could cut the amount in half (or even less!). I avoid using essential oils on little ones, especially babies.

Certain oils like wintergreen, cinnamon, and lemongrass are harsher and need to be used in smaller amounts. Others, like grapefruit and lime, are phototoxic. Some of my favorite skin-friendly essential oils to use include:

Don’t Want to Make It?

If you want healthy lotion but don’t want to make it or don’t have the ingredients there are some good store-bought options. These lotions have clean ingredients and help hydrate thirsty skin:

DIY lotion
Print
4.08 from 765 votes

Homemade DIY Lotion Recipe

Make smooth, luxurious lotion at home with almond oil, coconut oil, beeswax, and optional essential oils.
Prep Time20 minutes
Yield: 9 ounces
Author: Katie Wells

Materials

Instructions

  • Combine the almond oil, coconut oil, beeswax, and shea or cocoa butter, in a double boiler. Or use a glass bowl on top of a simmering pan of water.
  • Stir occasionally as the ingredients melt.
  • Once the ingredients are completely melted, add the vitamin E oil and any essential oils or vanilla.
  • Pour into a glass jar or tin for storage and cool to room temperature. Small mason jars work perfectly for this. This will not pump well in a lotion pump!

Notes

  • A little goes a long way! This lotion is incredibly nourishing and great for diaper rash, eczema, and for preventing stretch marks.
  • Store in a cool, dry place for up to 1-2 years.

Other Homemade Lotion Recipe Variations

There are lots of ways you can make your own lotion at home. Here are some more lotion tutorials to try:

Ever made DIY lotion before? How did it go? Let me know below!
Sources

Become a VIP member!

Get access to my VIP newsletter with health tips, special deals, my free ebook on Seven Small Easy Habits and so much more!

Easy Habits ebook on ipad

Katie Wells Avatar

About Katie Wells

Katie Wells, CTNC, MCHC, Founder of Wellness Mama and Co-founder of Wellnesse, has a background in research, journalism, and nutrition. As a mom of six, she turned to research and took health into her own hands to find answers to her health problems. WellnessMama.com is the culmination of her thousands of hours of research and all posts are medically reviewed and verified by the Wellness Mama research team. Katie is also the author of the bestselling books The Wellness Mama Cookbook and The Wellness Mama 5-Step Lifestyle Detox.

Comments

1,341 responses to “Luxurious DIY Lotion Recipe”

  1. Dawn Avatar

    Thanks for this recipe. I was looking for an easy, natural lotion and this is it! I tried it today and it came out great. One thing you might include in the recipe ( for the kitchen challenged) is that once everything is melted, the “lotion texture” starts to happen while it is cooling. I figured it would, but I was also wondering if I did something wrong during the simple process when I had a jar of oil in the end. I wanted to keep adding beeswax to thicken the mixture and I’m glad I didn’t! Thanks again , I appreciate your effort. Will try the lotion bars next!

  2. Ammie Hill Avatar
    Ammie Hill

    Love this lotion recipe. I shared it with my friends via my blog, definitely giving you all the credit. I can’t wait to try more of your recipes!

  3. Sylvia Avatar

    hello mama, I really like your page. I just want to ask if you do homemade moisturising shower gel or soap both for adult and baby? Thank you.

  4. Tara Avatar

    My first batch came out too hard so I added more coconut and olive oil and a little more vitamin E and re-heated it, it is now a much softer consistency and very smooth! I didn’t know how much coconut/olive oil and vitamin E to re-add so I just eye balled it and it came out fine.

    I just love this lotion! I think I’ll be making more around the holidays and giving it as gifts. 🙂

    Thank you!

  5. Indira Avatar

    Dear friends,

    Do try this same recipe with half the quantity of beeswax.
    Are you wondering what to do with the lotion you have already made?
    Add (as per recipe):
    1/2 cup almond or olive oil (can infuse with herbs first if desired)
    1/4 cup coconut oil
    (and the other optional oils if you choose).

    Reheat as described in recipe and store in containers.
    Keep jars open till the creams cool and harden

  6. Danielle Avatar
    Danielle

    I made this lotion and rubbed it on my sister’s sunburn. She immediately felt better. She basically style it from me (haha) and has been using it on her cracked feet that she got when she had a pedicure two years ago. Nothing seemed to be working. Two weeks of using this and her feet are almost all better. No more cracks. No more bleeding. We love the sunscreen too!

  7. Indira Avatar

    Dear Katie,

    Congratulations on your excellent website. Thank you for the time and trouble you take to provide us with all this useful information.

    Since I make creams and lotions using natural produce and oils for my own use, I have a suggestion to make.

    I make them in small quantities, to last a week or so, so that there is no chance of
    any growths or rancidity. Coconut oil, even as a component, can turn rancid fast, especially
    during the hot summer days. The work is very little and the freshness is maintained.

    If I am too busy to make it weekly, I make a “large” quantity, fill small containers and
    leave them in the fridge till I need them.

    Also, I use a small silver spoon or wooden spatula to scoop out the cream. I pour out the lotion into my palm before I use it.
    I NEVER dip my fingers into the jar, since there is a chance that there may be SOME moisture in your fingers, like water if you have just washed your hands, and perspiration, which you may have not noticed. So I never take a chance by dipping bare fingers into my creams or lotions. Thus, I have NEVER had my creams or lotions go “bad”.

    I find this is a much better way of avoiding “contamination” than using ingredients which may
    be harmful or which I know little of, especially of their harmful effects.
    Also, I like to keep my products 100% natural so to do otherwise, would defeat the very
    purpose of why I go through the effort of making them at home in the first place. : )

    I hope your readers will find the above tips helpful.

    Re: Some of the posts I have read above – I feel that the onus is on the users of this website, to seek out more information which may not be available here, if they so need it. This is not a consultation, but a fun website for those of us who would like to make our own products at home. Those who need “professional” advice or help, should do their own research.

    Thank you once again for all the information Katie. Keep up the good work.

    Cheers!

    Indira. Toronto, Canada

  8. cassa Avatar

    My lotion came out like a firm play dough consistency. Can I fix it? It is really hard to rub in and leaves white globs. PLEASE help.

      1. Tara Avatar

        I posted recently that my lotion came out on the hard side too, looks like your response to Cassa is that we can re-melt and add more oil, that won’t ruin the lotion I have, correct?

        I don’t have almond oil but I do have coconut and olive (which I used in the original making of the lotion) will those thin/soften it too?

  9. erika Avatar

    How do you measure the beeswax if it is purchased in bar form? Do you grate it or melt it first?

  10. Tara Avatar

    I made the lotion last week and it came out quite firm (and yellow in color, I presume from the bees wax?). What do you think I did wrong? I can still use the firm lotion but it is tough to rub on. I did not use any essential oils but did use vitamin E oil (and shea butter instead of cocoa butter).

    I will continue to use this lotion but when I make it again I’d like the consistency to be softer and easier to put on.

    I also made the sugar scrub and sea spray toner, both came out fantastic! I have been doing the honey face wash in the mornings as well. Now that I am using the scrub (1-2x a week tops), toner, lotion and honey face wash, my skin is looking much smoother and clearer, love it!!!

    Thank you for sharing these wonderful, natural recipes!

    1. Cerena Avatar

      If you stir it while it’s cooling it will come out in a lotion consistency. U don’t need to constantly stir just occasionally while cooling depending on how u want the consistency

  11. Adrienne Avatar
    Adrienne

    Hi! I’m new to all of this but very excited to try out this recipe. Can someone please tell me if I need to use a bar of beeswax or the pellets? I’m a little confused since this is my first time. Thank you all and Many Blessings 🙂

  12. Ravnit Avatar
    Ravnit

    using the basic recipe, if I wanted to incorporate other liquids like those you mentioned in our favourite combinations, how would I add those to the recipe?

  13. Tamara Avatar
    Tamara

    Thanks for this great recipe, I am excited to try this out! I am slowly switching over all of my personal care products to natural alternatives and your website has been immensely helpful! A question on adding extracts – if I wanted to add vanilla extract, or other types of extract, would I need to add a preserving agent? I noted your comment that because all of the ingredients are oils, preserving agent is not required – however I just want to double check if this is still true if I add in additional ingredients. And if I do need a preserving agent, what would you recommend? Thanks very much!

  14. Jo Avatar

    I just made this today, but did not use the directions–just the portion sizes, and guessed at the amount of essential oils to put in. I melted the oils and beeswax over low heat until it all melted. I then removed it from the heat and added my essential oils. I poured into a jar and let cool. When it was cooled, I used a stick blender to blend it as an attempt to make it creamy, like a lotion. It worked fabulously, and there was no need to add anything else. It is now exactly like lotions bought in a store, but without the unhealthy ingredients. 🙂

  15. Michele Avatar
    Michele

    I made this today. Can’t say yet how it will turn out. I added a couple of the optional ingredients, but as I’ve been looking into more recipes, most say to add the Vitamin E and/or essential oils after the lotion is done “cooking” or melting. I added mine with the rest at the beginning because you say to mix all the ingredients in a jar and melt. Does heating the vitamin E do anything to it to lose it’s effectiveness? Should I have added it at the end? Same question for essential oils.

  16. Winda Avatar

    This is too rich for my skin (normal to combination skin) so I use for body lotion and it was great.
    specially great for my heel.
    Thank you!

  17. Karen Avatar

    Just came across your site in search of diy body care products and I love your recipes! Quick question – you list essential oils as optional – just curious how much of the essential oils to use…wouldn’t want to disrupt the consistency/texture…thank you!!

    1. Wellness Mama Avatar

      You shouldn’t be using enough to change the texture too much… just a few drops. If your oils come with dilution or portion instructions, I’d just go with that. A very little goes a long way!

  18. Ariel Avatar

    Thank you so much for the recipe! I’m going to try it today, it looks fantastic. You’ve encouraged me to go all natural; I’m so excited to try many more of your recipes! Cheers, Ariel 🙂

  19. Briana Avatar

    Hi Wellness Mama,
    Just made my first batch today and noticed the lotion is very oily, I noticed that a lot of people commented with the same problem and I didn’t see your response to their questions. Can you please respond and let me know how I can make the lotion more of a lotion, more thicker or creamy? Thank you so much.

      1. Briana Avatar

        Thank you. My concern is I live in AZ and the lotion seems to be sort of melting and is more softer, not as solid. Is that normal? If not, how would I fix it? Thank you so much for responding.

  20. Neha Avatar

    Hi,

    Lots of people have been asking for a eczema relieving lotion and I wanted to put my two cents in. I grew up in India and we traditionally use coconut oil for hair and body. My dermatologist in India actually told me to apply camphor mixed with coconut oil on my eczema and also for sun sensitivities. My skin cannot tolerate the harsh tropical sun and I had trouble with it growing up. However coconut oil and camphor helped a lot. Camphor is antimicrobial as well.
    Also Mustard oil is beneficial for giving massages to babies. North Indians traditionally massage babies with mustard oil till they are at least 2 years old before giving them a bath.

    Camphor tablets can be bought at any Indian grocery store in your area where they keep hindu prayer items. Coconut oil and mustard oil is also cheaper and can be easily bought while you are there.

4.08 from 765 votes (701 ratings without comment)

Leave a Reply

Your email address will not be published. Required fields are marked *

Recipe Rating