

We’ve switched to organic bedding, but organic pillows can be expensive. One less expensive solution I’ve found is to make our own organic buckwheat pillows. These use organic buckwheat hulls (and optional herbs) for a very comfortable and natural pillow.
If you can sew a (somewhat) straight line, you can make these pillows and I actually find them more comfortable than regular pillows. You can even make your own buckwheat hull neck pillows and eye masks!
Benefits of Buckwheat Pillows
I’ve already mentioned they’re a more affordable alternative to organic bed pillows, but buckwheat pillows have some other benefits too. Unlike some options (I’m looking at you memory foam), buckwheat is more breathable so it doesn’t feel so hot. The hulls deliver more air circulation for a better night’s sleep.
A buckwheat hull pillow is also an eco-friendly alternative to filling options made out of plastic. And it won’t wiggle its way through the fabric and poke you in the neck like down feather pillows do.
If you make a whole pillow, it’s firmer than a regular stuffed pillow but also helps with neck support to avoid neck pain. Some people also love it for back pain and to help with spinal alignment. You can even make a lumbar pillow or a neck roll with buckwheat for firm back and neck support.
What Do Buckwheat Pillows Feel Like?
Buckwheat pillows offer firm support while having plenty of airflow to feel cool. The filling is also more moldable than a lot of synthetic pillows, so it adjusts with your head and neck. They feel very similar to a millet pillow made with millet hulls (another healthy pillow option).
The Best Buckwheat Pillows
There are some reports that buckwheat pillows are hypoallergenic, but that may not be true in all cases. A 2004 Korean study compared new synthetic fill pillows with popular Korean buckwheat pillows. The researchers found the new buckwheat pillows had significantly more endotoxins on them and over time had more dust mites. They hypothesized it was because of the lack of quality buckwheat fill.
The endotoxin from the buckwheat husks most likely comes from buckwheat flour residue given that in buckwheat pillow manufacturing in Korea, the husks are not normally cleaned. Buckwheat pillow manufacturers in Korea do not use detergents nor wash the husks, they just remove the fine dust from the husks and pack the pillows (personal communications). In the U.S.A., unlike Korea, buckwheat husks used for filling buckwheat pillows are normally extensively cleaned.
This flour residue is the perfect food for dust mites to feed on. This is why it’s important to choose high-quality organic buckwheat hulls when making your own pillows. Which brings me to my next point.
Washing and Cleaning Buckwheat Pillows
One of the biggest downsides to buckwheat hull fill pillows is that they’re not machine washable. I always keep a clean pillowcase on these pillows.
I also don’t recommend using them with potty training toddlers (I speak from experience… buckwheat and urine = not nice together). About once a month or so, I leave the buckwheat pillows out in the sun to make sure they don’t retain any moisture. The sun also helps naturally kill any bacteria that accumulates.
The Asthma and Allergy Foundation recommends replacing pillows about every 2 years. Over time sweat, dirt, dust mites, and other yucky things build up. I’ve found that these handmade buckwheat pillows last for several years, which is the same time a pillow should be replaced anyway.
Don’t Want to Make It?
Are you convinced about the benefits of a buckwheat pillow but don’t want to make your own? While it is a little cheaper to make it, there are some good-quality organic buckwheat pillows available. Since these pillows are traditionally popular in Asian countries (like Japan), it’s easy to find them in smaller Japanese-size pillows.
This organic one is available on Amazon and made in the USA.
How to Make a Buckwheat Pillow
The first step is to decide how big (or small) you want your pillow to be. You could make a standard size or a travel pillow size (these are also good for toddlers). Some people even use buckwheat hulls to fill bean bags!
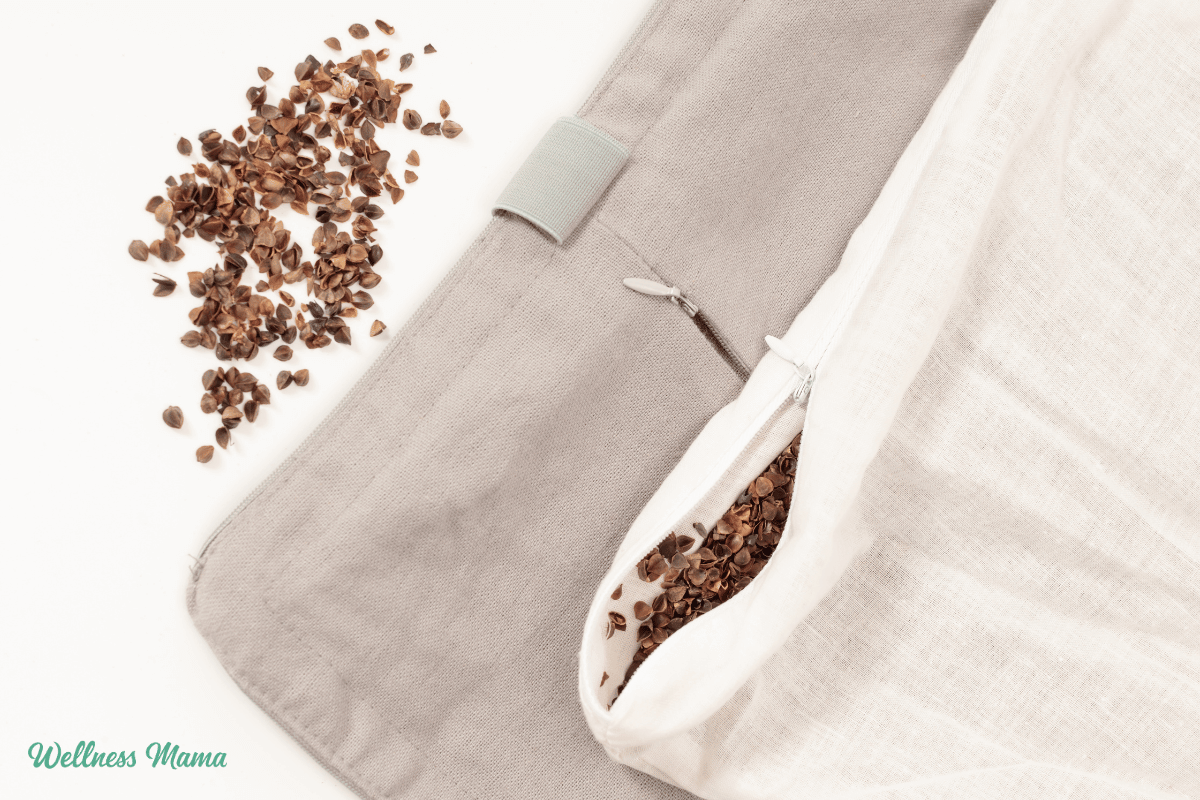
A standard-size pillow is 20×26 inches, while a Queen size is 20×30 inches. A more traditional Japanese-style pillow is smaller at 14×20 inches. I used an organic cotton fabric, but organic cotton twill is another good option. Once you’re done making the actual pillow you can use (or make) a cotton pillowcase to keep your pillow clean.
How much pillowfill you need can also depend on your sleeping position. Back sleepers can comfortably get by with a thinner pillow, while side sleepers need more support. I found that a 5-pound bag of buckwheat hulls was the perfect amount for a pillow that was just slightly smaller than a regular one and it still fit into a standard-size pillowcase.
Adding Herbs
I use lavender in these DIY rice heat packs for a relaxing scent. I’ve found herbs also work well in these homemade buckwheat pillows for more relaxing sleep. I added about 1/2 cup each of lavender, chamomile, and yarrow for a gentle scent and for their relaxing aromatherapy properties.
An even easier solution is to make a neck pillow that can be used with a regular pillow, or an eye mask with the herbs added to help improve sleep (and block sleep-disrupting light).
DIY Buckwheat Relaxation Pillow
Equipment
- Sewing machine (or needle and thread)
- Fabric (I used organic cotton muslin)
Materials
- 5 pounds organic buckwheat hulls (or less if making a smaller pillow)
- ½ cup lavender flowers (optional)
- ½ cup yarrow flowers (optional)
- ½ cup chamomile flowers (optional)
Instructions
- Cut the fabric into the size and shape you want your pillow to be (allow 1/2 inch extra for seams). My fabric was about 20×24 inches.
- Lay the two pieces of fabric on top of each other with the right sides facing each other and pin the edges together. The wrong side of the fabric will be on the top and bottom.
- Sew three sides and half of the remaining side. Leave an opening to fill with the buckwheat hulls and herbs (if using).
- Turn the pillow cover right side out and fill it with the buckwheat and herbs (if using).
- Fold the unsewn fabric edges down into the opening and pin the edges together. The pinned area should lay flush with the already sewn area.
- Hand sew or use your sewing machine to seal the opening.
Notes
Have you ever made your own pillows? Going to try this? Share below!

Leave a Reply