

If you know anything about organic gardening, you may have heard the saying “feed the soil, not the plant.” Creating healthy soil for plants to grow in is the best way to have a healthy garden that produces without synthetic fertilizers. Knowing that is one thing… knowing what to do is another!
It’s tempting to skip this step and just get planting, but bottom line: If you don’t want to be a frustrated gardener, pay attention to your soil!
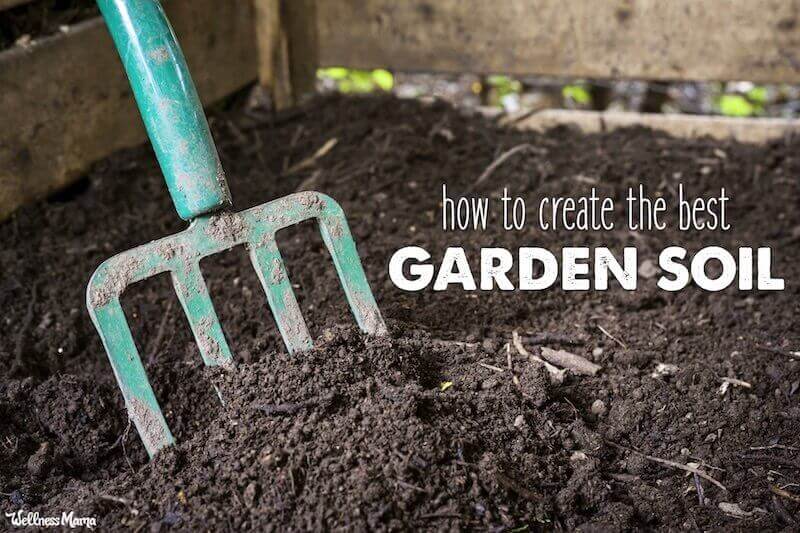
What Is “Good” Garden Soil?
Garden soil preparation is an essential first step to creating a successful vegetable garden or flower bed. Healthy garden soil has three main things: it’s loose, has a good texture, and has plenty of nutritious organic matter. If your soil is not these things, don’t worry, you can help it along. Almost any soil can become the best garden soil with a little bit of attention.
For a healthy garden, you need about 12 to 18 inches of loose soil. You’ll find it difficult achieve healthy plant growth in compacted soil as there will be no room for the plant roots to grow with no aeration and no drainage.
There are a few ways to loosen the soil. Three main ways include the following:
- Tilling – Using machinery, like a rototiller, to break up and mix up the soil. Fast and relatively easy to do, but can damage soil structure.
- Double digging – Using a shovel to mix soil manually. You dig one shovelful out and set aside. Dig another shovelful (so the hole is about 2 feet deep) and set aside again. Then dig a spot next to your first hole and flip into the first hole. In the end, the entire bed has been “flipped.” This is hard work but easier on the soil than rototilling.
- Broadforking – A broadfork is like a giant fork with wide tines that you stick in the ground. You then pry the soil upward (but don’t flip). This gives air and drainage to the soil without disrupting the soil structure. (Note: If you’re starting a new garden with this technique you will need some additional steps for getting rid of sod. Only use the broadforking technique if the soil is already well worked). Broadforks can be expensive, so if you don’t have one consider a cheaper alternative like this Yard Butler. It does a similar thing with a slightly different action.
After aeration and drainage, soil needs the two other main features, texture and nutrients, to be healthy and grow a great garden.
Texture
While loosening soil is important, the texture is also important for drainage and rooting. You have the right texture if you can take moist soil and squeeze it into a ball, but that ball breaks apart easily. If it stays in a lump, you have clay soil and need to add sand and humus (rotten leaves).
If your soil crumbles without sticking together, you may have sandy soil. Adding lots of organic material (compost, manure, etc.) will help improve the texture. Coconut coir is also great for boosting aeration.
Sandy soil drains very quickly so adding organic material will help hold onto moisture too.
Nutrients
While important, good texture is not enough for healthy plants. Soil needs to have all of the nutrients plants need to survive. The three main ones are nitrogen (N), potassium (P), and phosphorus (K). A good quality compost or aged manure will add these important nutrients.
You can also add some Epsom salt to replenish magnesium levels. Since many people are deficient in magnesium because of poor soil, it’s not a bad idea. Broadcast one cup of Epsom salt on 100 square feet of garden space before planting. You can also add 2 tablespoons to 1 gallon of water and use that to water plants once per month.
Soil pH
For many gardeners, the above tips will be enough to create an amazing garden. But in some cases you might find your garden doing poorly even if you’ve taken the above steps. In that case (or if you want to prevent this issue) you’ll want to check the soil pH.
Ideally, you want your soil close to neutral (not too acidic and not too alkaline) as most plants do well there. Adding compost and other organic material like grass clippings will help get your soil to neutral.
However, some plants like acidic or alkaline soil, so getting a test (and knowing what your plants like) is smart.
For example, these plants prefer acidic soil:
- Blackberry
- Blueberry
- Cranberry
- Parsley
- Potato
- Raspberry
- Sweet potato
If you’re growing these plants and they aren’t doing well, you may need to raise the acidity of the soil.
Few if any plants prefer alkaline soil, though many can tolerate it. Those that can tolerate alkaline soil include the following:
- Beet
- Broccoli
- Cantaloupe
- Cauliflower
- Lettuce
- Onion
- Oregano
- Parsnip
- Peaches
- Peas
- Sage
- Watermelon
These plants do great in neutral to slightly acidic soil too, so it’s always best to try to start with neutral soil.
How to Do a Soil Test
Performing a soil test is easy. There are many soil test kits available online and at garden stores. Since I usually do this every year, I bought a reusable soil monitor that measures water and sunlight as well as pH.
You can also test your soil pH at home with just vinegar and baking soda:
- Collect samples of soil from different parts of your garden. Dig down about 8 inches and get some of the soil at every depth. Mix the soil together and let dry.
- Find two cups and put a few spoonfuls of soil into each cup.
- Add ½ cup vinegar to one cup. If it fizzes you have alkaline soil. If it doesn’t move on to the next step.
- In the other cup add distilled water to dampen the soil. Then add ½ cup baking soda. If it fizzes you have acidic soil.
- If it doesn’t fizz in either, your soil is neutral, right where it should be.
How to Amend pH
If you have acidic soil, add lime to raise the pH. If you get a professional pH test, you’ll also get guidelines for amendments. On average it takes about 2-5 pounds of lime per 100 sq feet of slightly acidic soil. Always err on the side of not enough as it can be hard to reverse the effects of lime.
If you have alkaline soil, add powdered sulfur. Again, a professional pH test (through the Cooperative Extension office for your state) will give you recommendations for how much to add. About 2 pounds per 100 square feet of garden space is a maximum amount.
If you have very problematic soil, or you’re not sure how to amend it, you may consider layering mulch (leaves, wood chips, etc.) with compost or manure and then covering with topsoil. This is a good way to have a garden this year and prepare the soil for future years.
When to Amend Garden Soil
There are two times of year to give the dirt in your garden some special attention:
Spring
When you begin preparing your garden for the season, you’ll want to add lots of organic material like compost or aged manure. If you think about soil layers in nature, manure and compost always sit on top (and may be covered by mulch like fallen leaves), so it doesn’t need to be worked into the soil. Aeration is important though, so broadforking is a good idea. Worms also help with aeration.
Fall
In fall after your last harvest, add more organic material. You can even include un-aged kitchen scraps since it will have time to sit and decompose over the winter. These scraps feed the worms who fertilize and aerate the soil. Then cover with a layer of mulch, which protects worms and prevents nutrient loss. In the spring, you may not need to add much compost or manure at all!
Parting Encouragement!
If there’s anything I’ve learned about gardening, it’s that a) you don’t have to be an expert to get started and b) gardening is unpredictable and even experts have their ups and downs. Whether you’re starting a new garden from scratch or preparing an already established garden bed, these tips will help you create the best soil. In most cases, adding these soil amendments is enough for an amazing and abundant organic garden!
How do you create healthy garden soil?

Leave a Reply