I once asked my high school drama teacher if I could buy some of the ultra-thick stage makeup from her… she looked at me a little strange, since I wasn’t even on the cast of the current musical and was working backstage/tech.
She asked why and I confessed that it was the only makeup I’d ever found that completely covered my acne. At that age, my skin was terrible. I wish I could go back and tell my high school self that it had more to do with my school-lunch diet of hamburgers/pizza and hormones than it did with the many products I tried topically.
Out of pity, she gave me some stage makeup and I used it for the next few years to cover my acne.
A Natural Concealer?
These days, my skin is much healthier and blemishes are a rare occasion, but I still think back about how embarrassed and frustrated I was with my skin. Super-thick and oily stage makeup probably made the problem worse, but I was desperate for a solution.
I don’t wear makeup as often now, but wanted a natural concealer/highlighter that I could use for formal occasions or to hide under eye bags when little ones keep me from getting much sleep.
This concealer/highlighter is very similar to my homemade liquid foundation recipe, but has more zinc and minerals for additional coverage and less color so that it lightens and blends into skin (and how I wish I’d had this all those years ago!)
To make a homemade base lotion for the concealer, you’ll need these ingredients:
And these additional ingredients for color and coverage:
- kaolin clay, Earth Clay or Bentonite Clay
- zinc oxide powder (non nano and uncoated)
- organic cocoa powder
If you don’t want to make the base lotion and prefer a pre-made option, I recommend using a completely natural and non-comedogenic lotion as the base and adding the colors and minerals in to get the desired shade. These are the two lotions I’ve tried that worked well on my skin:
Natural Concealer Ingredients
- 2 teaspoons of argan oil or jajoba oil
- 1 teaspoon of shea butter
- 1/2 tsp emulsifying wax
- 1 tablespoon aloe gel
- 1 teaspoon witch hazel
- OR 3 tablespoons of natural pre-made lotion (in place of first 5 ingredients)
- 2 Tablespoons non-nano zinc oxide
- 1/4-1/2 tsp cocoa powder
- 1/2 tsp clay of choice (if using)
How to Make Natural Concealer
- If making the simple version… just mix the organic lotion and powdered ingredients to get the desired color and consistency.
- For the complete DIY:
- Melt the shea butter, argan oil and emulsifying wax in a double boiler until completely melted.
- Add the aloe and witch hazel and whisk until completely incorporated and smooth.
- Turn heat off.
- Add zinc and clays (if using)
- Add cocoa powder a tiny pinch at a time until desired color is reached.You will want this to be lighter than your skin tone so it blends and lightens. If it is too dark, it will leave dark spots on the skin.
- Dip the tip of a spoon into the mixture and let cool for a few seconds. Test the color and coverage on your forehead and inner arm to make sure you’ve achieved the right tone for your skin and the amount of coverage you want.
- Spoon the mixture into the desired container and let cool.
Important Notes:
Adding more zinc oxide powder will offer more coverage and adding less will create a thinner coverage that is better for highlighting. Experiment by adding small amounts at first to find your desired coverage. I recommend finding the desired coverage first by adding zinc/clays and then adding cocoa to get the desired shade for skin. For really dark skin tones, not as much zinc will be needed and more cocoa can be added. A mineral powder in the color of your skin tone can also help match the color more easily.
Highlighting and Contouring
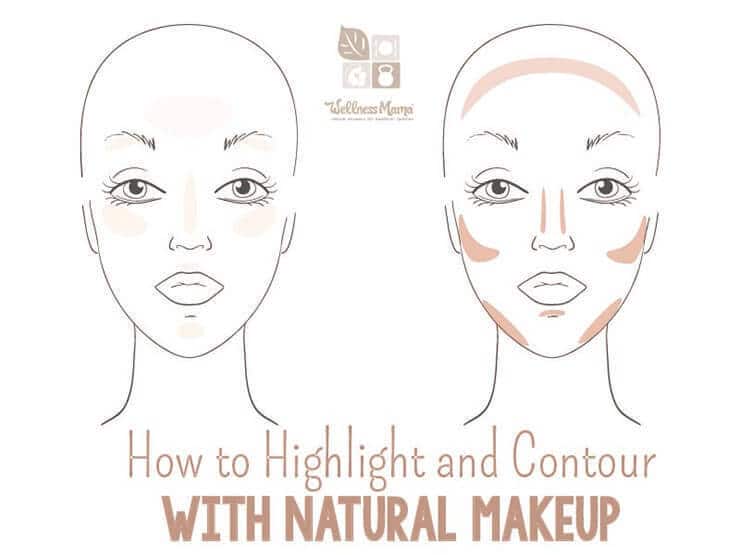
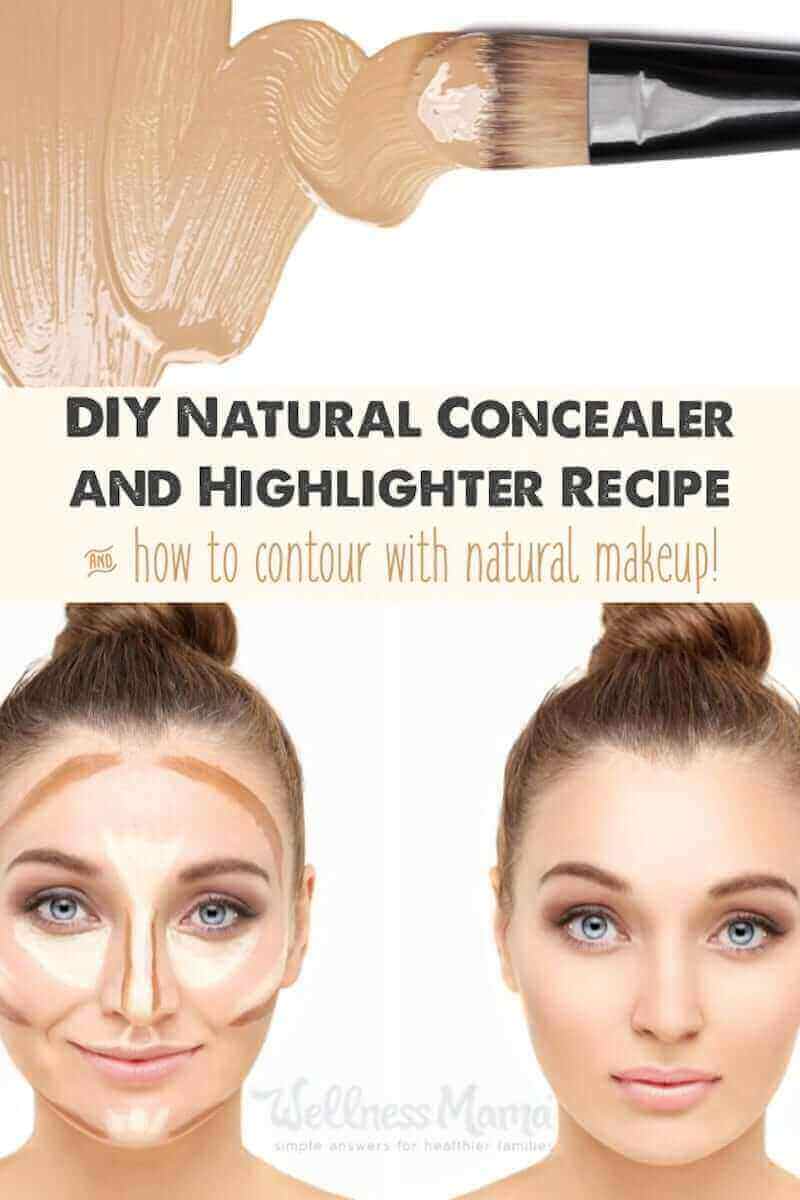
This concealer also works really well as a highlighting cream for highlighting and contouring. This is a method of applying makeup in a way that accentuates and brightens the face to accentuate the eyes and other features.
There are highlighting and contouring sets available on the market now, but I prefer to use this concealer for highlighting and my natural bronzer for contouring. I use a natural brush to apply the makeup and to blend.
This is the typical highlighting and contouring pattern that is used for accentuating the face. The lighter hues on the left side are where highlighting would be used and the darker ones on the left are where contouring would be used.

Want a powdered version? Check out my original homemade makeup tutorial.
Do you make your own makeup? What versions have you tried? Tell me about it below!


Leave a Reply