

Sugar waxing is one of the few uses for white sugar I can get behind. (Sugar scrubs come in at a close second!) Here’s how to make your own natural DIY sugar wax and use it for smooth, radiant skin.
What Is Sugaring?
Sugaring, or sugar waxing, is the process of applying warm, melted sugar to the skin, then quickly removing it and taking body hair with it. It’s different than hot wax, which uses actual wax. Sugaring is considered easier and safer to do at home than other waxing methods. It does require the hair to be at least one-quarter inch long to work, but that’s not so hard to accomplish with a little negligence.
You can safely use sugar wax on most areas of skin, including the legs, arms, underarms, face, and bikini line. Like with other waxing and hair removal methods though, never use it on damaged skin.
The Benefits of Sugar Wax
If you’re going to remove body hair, sugaring can be a great way to do it. As I mentioned before, it’s more user-friendly than hot waxing with actual wax. Sugaring also lasts longer than shaving (up to 6 weeks!) and isn’t as likely to cause skin irritation. It doesn’t take a lot of time, especially once you get the hang of it, and you can have smooth skin for weeks on end.
Sugaring also helps exfoliate by removing dead skin cells, leaving smooth, glowing skin behind. Unlike waxing, which removes hair against the grain of the hair follicle, sugaring goes with the natural direction of the hair. This helps reduce pain, irritation, hair breakage, and ingrown hairs. Over time, hair may become finer and thinner.
A Note of Caution
Sugar waxing isn’t for everyone and there are some precautions. Of course, be sure that the melted sugar isn’t too hot before applying. A sticky sugar burn is the last thing we want! Also, people with certain skin conditions, like eczema, or taking certain medications shouldn’t do sugaring.
Some meds, like certain antibiotics, can make the skin much thinner than usual, making it prone to tearing. If you’re unsure you can always do a patch test or consult your physician first.
PreMade Sugar Wax
Don’t want to make it or don’t have the time? This organic sugar wax has clean ingredients like chamomile, lemon, and tea tree essential oil.
How to Sugar Wax Skin
The first step is to buy or make your own sugar wax (see recipe below). Once that’s taken care of, it’s time to get started. You’ll want to prep the skin area that you want to wax. This is an important first step because without it we risk skin irritation and/or the sugaring may not remove the hair.
How to Prep the Skin for Sugar Waxing
You want to make sure the skin is completely clean and dry. If there are dead skin cells and debris then the sugar will just stick to that and not really pull out the hair. You can dry brush or exfoliate the day before to make sure there’s nothing in the way. Exfoliating right before sugaring may cause skin irritation.
Once the skin is all clean you can apply a thin layer of non-GMO cornstarch or arrowroot powder. Be sure to brush off any extra. This helps get rid of any excess moisture or oil.
So to recap:
- Exfoliate the day before (optional).
- Wash and dry the skin.
- Apply a thin layer of powder.
Sugar Waxing Method
- Once your skin is ready, use a flat wooden stick (like a fat popsicle stick), or your fingers to spread a thin layer of the warm sugar in the opposite direction of the way the hair is growing. The sugar should be a thicky syrupy consistency, similar to raw honey. Don’t spread the layer too thick or it may not remove the hair.
- If using your fingers, roll the sugar into a ball between your thumb and fingertips, then press and spread it into the skin. Spend a bit pressing and “molding” the sugar wax into the skin so it really adheres to the hair.
- Pull the skin above the sugared area taught with one hand, then use the other to quickly flick the sugar down in the same direction the hair is growing. You’re going to pull it in the opposite direction of the way you applied it.
- If there’s a little bit of stinging (there usually is the first time), then apply pressure to the area with your hand after waxing to help relieve the discomfort.
- Spread another layer of sugar in a new area and repeat the process until you’ve sugared wherever you want to.
- Afterward, apply lotion or oil to moisturize the skin. You can also put some aloe vera gel on before applying the lotion for extra skin soothing.
Clean-up Tips
Sugar wax is water-soluble, so it’s easier than some methods to clean up. All you need is some warm water afterward and you’re done.
I sat in the bathroom with my leg propped up on the bathtub while I did my legs, but you could easily do this in the bedroom, or wherever you feel comfortable. The mess stays fairly contained and doesn’t require being in the shower to do it.
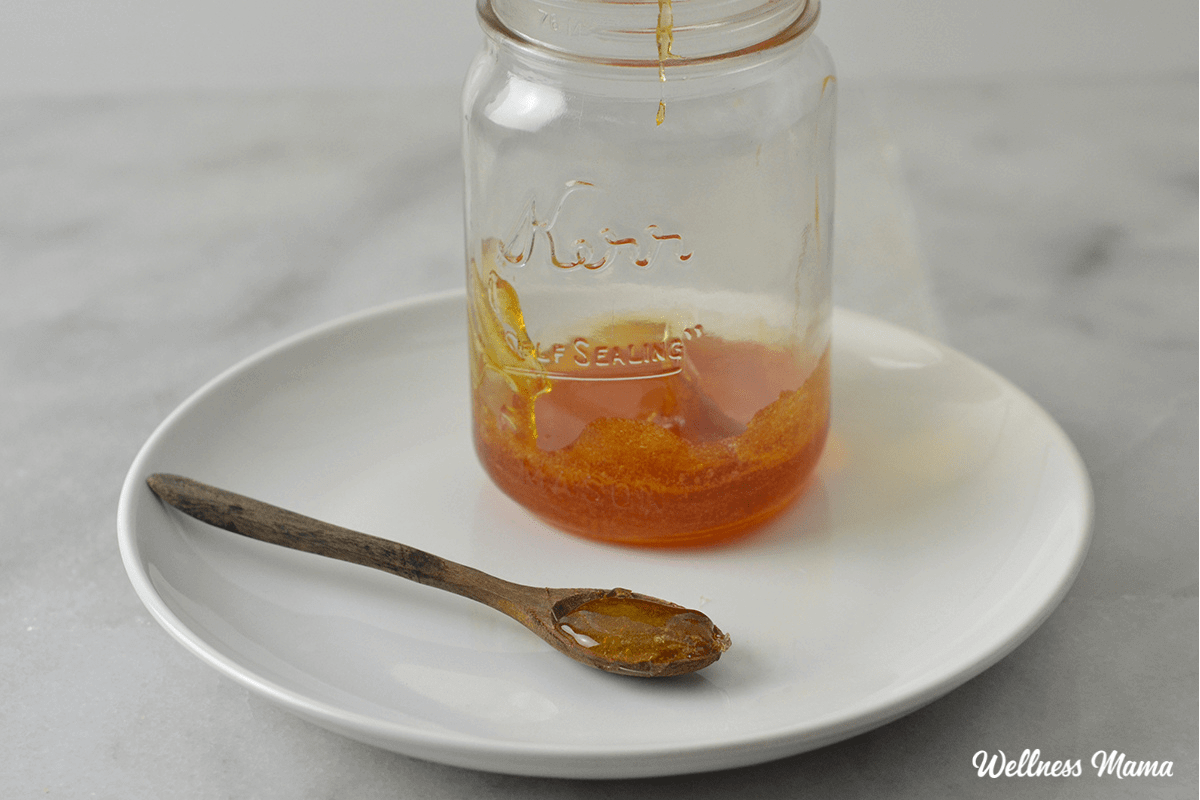
DIY Sugar Wax Recipe
Materials
- ½ cup organic white sugar
- 2 TBSP lemon juice
- 2 TBSP filtered water
Instructions
- Combine the ingredients over medium-high heat, stirring constantly. Continue to heat and stir until the mixture has simmered for about four minutes and has just started to turn a golden color.
- Immediately remove from the heat (don’t just turn off the burner) and pour it into a glass mason jar that’s been lightly oiled. The oil prevents the sugar wax from sticking like glue to the jar.
- Once it’s cooled down, but still warm, about 30 minutes, it’s ready to use.
- Take a golf ball size piece of sugar (or a little smaller) and roll it between your fingertips to knead it. Use to sugar your legs, arms, or other areas of skin as desired.
Notes
Have you ever waxed before? Are you up for trying it? Leave us a comment and let us know!

Leave a Reply