

When you think back to your childhood, which memories stick out? Is it a favorite toy or birthday gift? Probably not.
More than likely, your favorite memories involve some type of quality family time, such as reading together, cooking with your mom, or building forts in yard.
Art can create togetherness in the same way. This simple Block by Block art project is one you can do little by little every day, and the whole family can work together!
How (& Why) to Start a Family Creativity Time
One simple way to add quality family time daily without adding a ton of extra work (read: stress!) is to establish a dedicated Family Creativity Time. I also count this as art time in our homeschool day.
This does not have to be a long period of time each day; as little as 20 to 30 minutes. Family Creativity Time might look different each day, or it can be the same thing every day for a period of time. We use a rolling art station by the kitchen table.
You could be doing the same thing side by side or it can be working together on a joint mission – whichever works best for your family at the time. I personally prefer to plan one theme or activity that will work for a few days (or even weeks) so that I am not reinventing the wheel each day. The point of creative time together is to unwind and bond, not to add stress!
Here are some tips (discovered the hard way!) for success:
- Keep the time short. This helps keep the focus on creating, not completing. The goal is not to rush through the process and finish but to work a little each day and enjoy the process.
- Attach to a routine. Most kids love knowing what to expect next. Try attaching your new art time to a part of your daily routine you never miss. While we do not have a set time on the clock, our Family Creative Time is while dinner is cooking. Once I get everything in the oven we sit down and work together until it is time to eat.
- Use open-ended, low mess projects. It’s hard to keep it short if you have to set up and clean up. It’s also hard to keep kids of different ages and attention spans on the same page.
Sometimes we pull out coloring books, make cards, but our all-time favorite is this Block by Block art project! All you need is paper and some markers or pens.
Bonus: Art has health benefits too!
Block by Block (& Day by Day) Family Art Project
We’ve spent months on different versions of this art over the years. The finished result is useful too! We’ve done them on canvas and given them as gifts or hung them up as artwork.
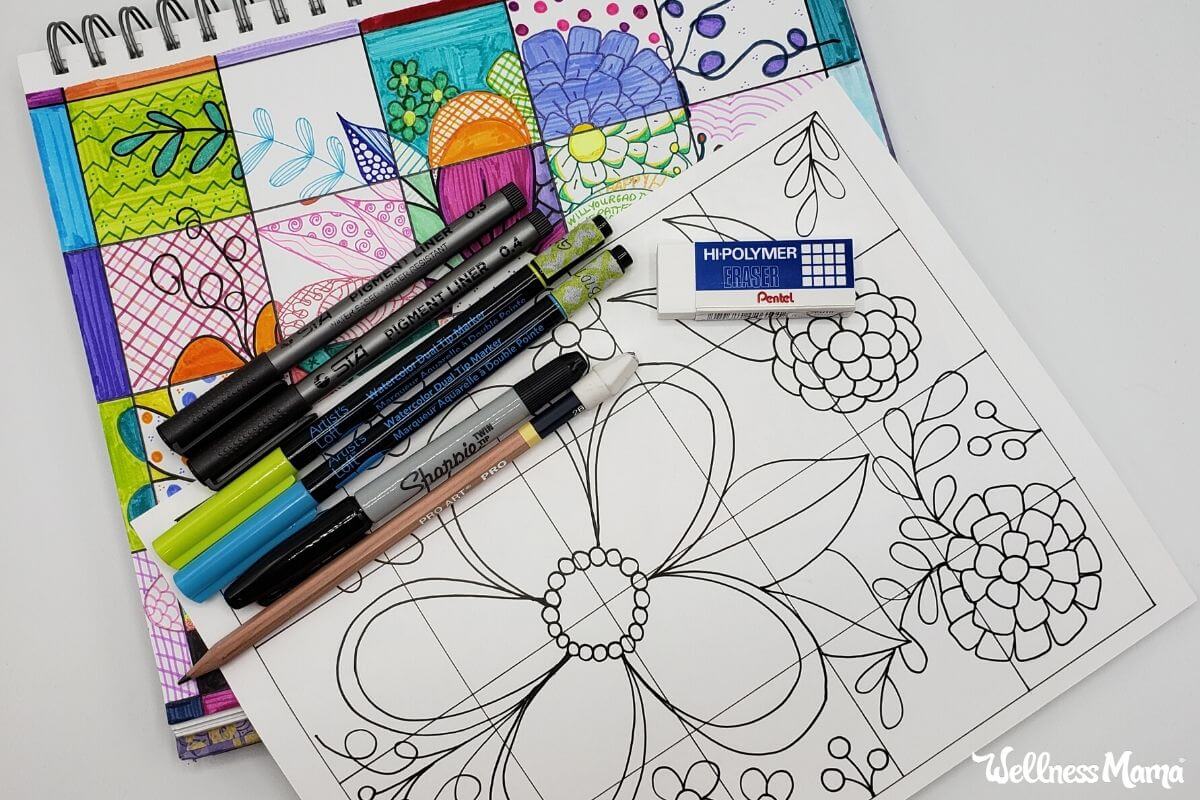
Materials
To get started you will need:
- White paper or large canvas (8.5 x 11 or as large as 24 x 36 newsprint – the bigger the paper the longer the project will last)
- Pencil
- Ruler
- Thin black marker or pen
- A variety of coloring options: markers or watercolor markers, colored pencils, crayons, gel pens, or paints, etc.
- Paintbrush (if you are doing a canvas)
How to Work as a Team
Use a very large sheet of paper for a group effort (and think of what a cool keepsake it would be to have from your time together).
We have also used smaller, individual sheets of paper and make each piece in merry-go-round fashion, rotating each day to the person to our right.
What to Do
Here’s how to start your family Block by Block art:
Step 1: Draw Boxes
Once you have your paper, take a ruler and a pencil and fill the paper with boxes. Each box should be at least 2 inches wide. For example, on a 8.5 x 11 sheet I create about 20 boxes.
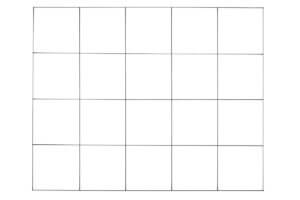
Once you are happy with your lines, trace over your lines with a thin black marker/pen.
For more difficulty/older kids: If you want a bigger challenge or a more mosaic look, make even smaller squares. Keep in mind you will only be working on one square a day, so the more squares, the longer the project will last.
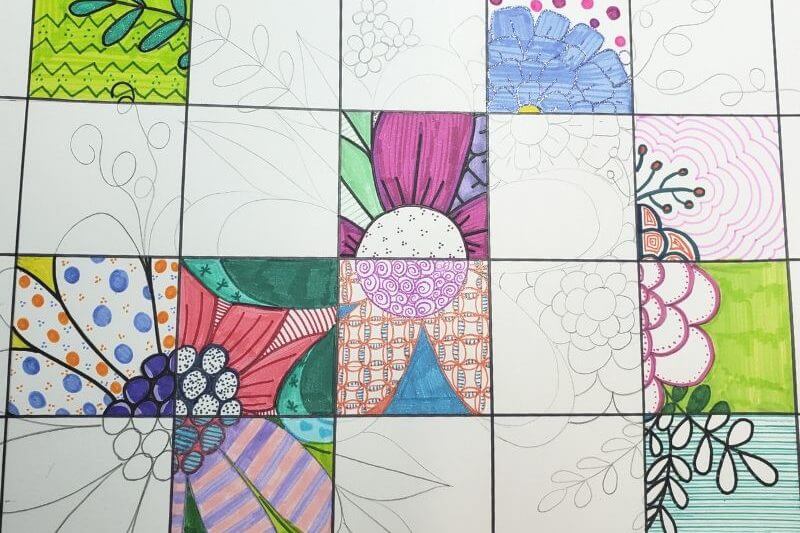
Step 2: Choose a Design/Theme
Next, with your pencil you are going to draw a picture on the page. For my sample I drew a combination of simple flowers and leaves. You could also draw a simple outline of your home or a famous landmark, stars and stripes for the Fourth of July, a simple outline of an animal, etc. Whatever you draw, keep it to basic shapes without a lot of detail.
For example:

Need help thinking of ideas? Google “preschool coloring pages!” Because they are geared for younger kids, they have the perfect amount of (or lack of ) detail. You could even print one out and divide it into 2×2 boxes on the coloring page itself rather than drawing your own.
Step 3: Start Creativity Time and Work on a Box!
Time to get started! Your goal is to “doodle” one complete box each day, adding color and details.
The only rule is to have fun and do your own thing. The goal is NOT to feed off of what has been done in the box next to the one you’re starting or the day before, but to create each box as its own unique picture creating an awesome patchwork result!
Here’s some tips that help:
- If you have younger children, try working on one picture at a time and talk together as each child worked on their masterpiece for the day, asking additional children waiting their turn how they plan to color their square today.
- Boxes do not need to be done in any order. Jump around — be free and creative to do whatever strikes your fancy!
- Try switching up your medium. Markers, watercolor markers, colored pencils, crayons, or gel pens are all great choices.
Note: After a few days of work, kids will get excited as they begin to see it come together and will want to do more than one square a day. I suggest avoiding this and, if needed, instead start a second picture. The uniqueness in your end project often comes from your different moods and approaches each day. Completing more than one square a day tends to create a more uniform look which takes away some of the fun!
Step 4: Display Your Work of Art!
Hang your finished Block by Block piece on the fridge or on the wall and enjoy what you made together! These tips for displaying and organizing artwork may help as your creations pile up.
Do you have a family art time? Will you try some Block by Block art? Let me know how it goes!

Leave a Reply