You might have heard that gardeners may live longer than non-gardeners. While a lot of the evidence is anecdotal, I believe it! It makes sense that gardening is beneficial to our health because it’s a reason to spend time outdoors and eat more veggies while you’re at it.
If you’re looking to start your own garden for healthy produce, you may get the idea to try starting seeds indoors rather than buying them from your local greenhouse. It saves money over buying more mature plants and is a great learning experience for the kids (and the adults too!).
I’ve had wins and losses when it comes to starting my own seedlings, but if there’s one thing I’ve learned about gardening, it’s that there’s no better way to learn it than to just roll up your sleeves… and get dirty!
When to Start Seedlings
The timing of starting seeds indoors is going to be different for everyone depending on location. Typically you will look at your last frost date in your area to determine when you need to start your seeds.
- Go to this website and type in your location. It will give your last frost date for the season.
- When you know your frost-free date, you can plug it into this tool to get a list of vegetable plants and when they need to be started indoors.
- Your seed packets should also tell you how many weeks before the last frost you need to start your seeds inside, so do some quick math and plot out the dates for sowing seed.
Which Seeds to Start Indoors
Depending on where you live, you can start many seeds inside to extend the growing season. On the other hand, there are some seeds that do best directly sowed into the ground.
If you’re new to gardening, the information on the seed packet is a handy resource. There will be instructions for planting and it will mention whether the seeds should be sowed directly outside or planted indoors before being moved outside.
As a rule of thumb, these seeds do well started indoors:
- Fruiting plants like tomatoes, eggplant, peppers, squash, etc.
- Greens like lettuce, kale, arugula (though these can be direct sowed as well)
- Brassicas (broccoli, cabbage, etc.)
- Most flowers
And these are seeds to plant directly in the ground outside:
- Root vegetables (potatoes, carrots, beets, etc.)
- Peas
- Beans (can be started inside but they grow so fast it’s hardly ever necessary)
- Radishes
- Corn
Luckily, most seed packets will tell you if you should start your seeds inside or direct sow them, taking the guesswork out of it for you. If you’re a beginner, opt for seed packets that give extensive information on the packet.
How Much to Grow
Knowing how much to grow is a really individual thing and many people don’t get it right even after years of experience. But to give you a roundabout answer you can look at this calculator to see how many seeds you should plant per person in your family for each kind of plant.
Most seed isn’t expensive and a little goes a long way, so don’t stress too much about this part. After all, if you end up with too many seedlings to fit in your square foot garden, the worst that can happen is that you have gifts for your friends and family members! I’ve even sold my extra seedlings or offered them for free on local swap websites before. It can be a great way to connect with fellow gardeners in your area.
Where to Get Seeds & Supplies
Starting your own seeds indoors is fairly easy. Seeds need a healthy growing medium, water, and sun (or artificial light) to grow. Here’s what you need to get started:
- Seeds (non-GMO and organic recommended) – I have had great success with Seeds Now or True Leaf Market.
- Starter pots – You can use peat pots, recycled containers, or even leftover eggshells. Just make sure there is drainage at the bottom. For tomatoes, squash, and larger plants, you will want to start in larger 4-inch pots (or transplant later on).
- Organic seed starting mix (different from potting mix or garden soil)
- A warm area to start germination (light not required)
- Bright light from a south-facing window (in the northern hemisphere) or a height-adjustable grow light
- Plant identification tags (preferably non-plastic for the sake of the environment) – a popsicle stick and a permanent marker work well
Now, we get to work!
Pre-Germination (Optional)
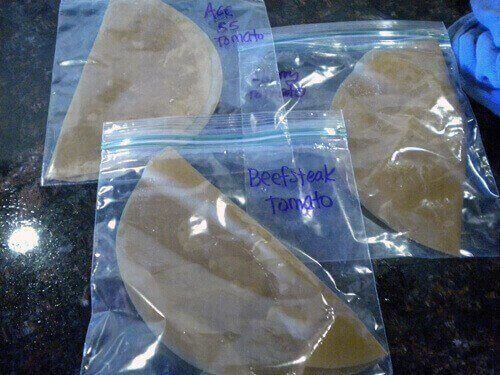
To speed up the process, you can pre-germinate the seeds in unbleached coffee filters or paper towels in unzipped plastic bags.

To pre-germinate:
- Just place about 10 seeds with space in between on 1 unbleached coffee filter.
- Put another coffee filter on top and get damp with warm water.
- Fold in half and put in a quart size or larger plastic bag, but don’t zip it!
- Place the bag on a plate and put on top of your fridge or in another slightly warm place. Keyword: warm!
- In 2-3 days, you should see tiny sprouts coming from the seeds.
- At this point, plant seeds in small pots indoors using tweezers.
- Keep pots indoors near a window (south-facing if possible), keep moist, and watch them grow!
Time to Start Planting!
- Choose the seeds that you’re going to plant (I talk about how to do that below). There are many reputable places to get quality seeds. They are in high demand this year, so order early!
- Fill the starter pots with dampened (not wet) seed starting mix. Seed starting mix is lighter than potting soil or garden soil. This allows the seeds to grow deep roots with minimal effort.
- Follow the directions on your seed packet. It should tell you how deep to plant the seeds and how far apart. In starter pots, you will usually plant 1-3 seeds per pot. You can also plant seeds in trays and transplant them to larger pots later.
- As you go, write down the name and variety of the seed on a marker and put it in the pot or tray. Take it from me, you will really regret it if you skip this step! I also recommend writing down the date planted and days to maturity (which will be listed on the seed packet). Transfer this marker to the garden when you transplant.
- Once planted, mist the pots with water (a spray bottle works well) until the soil is wet but not soggy.
- Keep your pots or trays warm and moist until the first tiny green shoots start to show. Until this happens no light is needed, so opt for a spot with a consistent warm temperature even if it’s not by a window. (And also where you won’t forget to check on the plants!) Tip: Keep soil moist by covering the pots or trays with some damp cheesecloth or lightweight beeswax cloth, removing often to check for green shoots.
- When growth is visible, move the pots or trays in a sunny window with at least eight hours of sun or under a grow light. If you don’t live in a northern climate, I highly recommend a grow light or greenhouse.
- Keep spraying the pots until plants are well established. Also, make sure there is good air circulation to avoid mold, mildew, or a fungal disease called damping-off.
Warm vs. Cool Germination
Plants that like warmer temperatures (~60-80 degrees) for germinating include tomatoes, peppers, and squash. Keep these plants warm the first few days after planting, using a heat mat if necessary. (These are also useful for fermenting kombucha or yogurt!
Plants that need cooler temperatures (~50 degrees) include lettuces, greens, and peas. These usually grow well in a room temperature house without any extra warmth.
Tip: A good rule of thumb to tell what temperature your seeds need for germination is to look at when they can be transplanted outside. Plants that can be set out near the last frost likely need a lower germination temperature. The plants that must wait 4-6 weeks (or longer) after the last frost to go outside likely need a higher germination temperature.
Best Garden Plants for Beginners
If you’re a beginner you may feel overwhelmed when it comes to choosing which plants to start with. My best tip here: it’s a good idea to start slow and learn with just a few plants.
Which plants you start with is going to depend on your priorities and where you live but here are some basic guidelines:
- Choose vegetables that are expensive to buy in the grocery store (like greens).
- Grow fruits and vegetables that are on the Dirty Dozen list (if you grow them, they won’t be covered in pesticides!)
- Always choose plants that you actually like to eat. There’s no point in growing something if your family won’t eat it. (Although I always sneak in at least one new thing to try to prevent any picky eaters…)
- Grow plants that do well in your climate (the seed packet or catalog should tell you this information).
You also want to choose plants that are easy to grow. Here are some of the easiest plants to grow (even for beginners):
- Beets
- Bush beans
- Calendula (the flower is edible, but also great for deterring pests among other benefits)
- Carrots (I like to plant several colorful varieties)
- Chard, Lettuce, or Kale
- Cucumber
- Peppers
- Pumpkins (note: these take a lot of space)
- Tomatoes (I like to get a variety for colorful salads)
- Zucchini or other summer squash (very easy, but a warning: you only need a few zucchini plants or you’ll have more than you know what to do with!)
I recommend picking no more than 10 different plants to grow. This will help you learn about the ones you are growing and become an expert in those plants before expanding to more. Remember, it’s not just starting the seeds and caring for the young seedlings you need to worry about. You are also responsible for transplanting, caring for the garden, harvesting, and preserving your plants!
If you prefer a one-stop shop approach, this all-in-one veggie variety pack has most of the suggestions above and sticks to the rule of 10 or less.
When to Move Plants Outdoors
About a week before it’s time to plant (remember, you calculated that based on the last frost date and the type of seed), start to reduce the frequency of watering. Expose heat-loving plants like tomatoes to sunlight outdoors in small doses in a spot sheltered from wind. This is called “hardening off.”
Follow these tips for transplanting and watch your babies grow!
Ready, Set…Plant!
Starting seeds indoors can be a fun way to get a jump on the season. It does take a little extra time and effort (and resilience when some things don’t grow!), but you’ll be rewarded with a wide array of heirloom and non-GMO veggies and flowers for your garden!
More Garden Tips
- Why to Plant a Butterfly Garden (& How)
- Bee-Friendly Plants for Your Yard or Garden
- It’s Time to Bring Back Victory Gardens
- Organic Gardening 101: How to Start Your Own Backyard Garden
Have you started any seeds yet? What are your tips and tricks?


Leave a Reply