Mobile Menu

  • Home
  • Start Here
  • About
  • Resources
  • Podcast
  • Blog
    • Health
    • Beauty
    • Mama Wellness
    • Natural Home
    • Natural Remedies
    • Organization
    • Travel
    • Reviews
    • Recipes
      • Beef Recipes
      • Breakfast Recipes
      • Condiment Recipes
      • Dessert Recipes
      • Drink Recipes
      • Pork Recipes
      • Poultry Recipes
      • Salad Recipes
      • Seafood Recipes
      • Side Dish Recipes
      • Snack Recipes
      • Soup & Stew Recipes
  • Newsletter
  • Shop
  • Facebook logo
  • Twitter logo
  • LinkedIn logo
  • YouTube logo
  • Instagram logo
  • Pinterest logo
  • Menu
  • Skip to right header navigation
  • Skip to main content
  • Skip to primary sidebar
  • Skip to footer

Wellness Mama®

Simple Answers for Healthier Families

  • About
  • Start Here
  • Resources
  • Podcast
  • Blog
    • Beauty
    • Health
    • Mama Wellness
    • Natural Home
    • Natural Remedies
    • Organization
    • Travel
    • Recipes
    • Reviews
  • Shop
  • Search
Wellness Mama » Blog » Natural Home » How to Grow Sprouts In Your Kitchen

How to Grow Sprouts In Your Kitchen

March 23, 2015 (Updated: July 30, 2019)   —  by Katie Wells

How to Grow Sprouts in Your Kitchen- and why you should

Reading Time: 3 minThis post contains affiliate links. Click here to read my affiliate policy.

“A total hippie food”… that was what I thought as I looked down at the turkey, sprouts, and avocado sandwich on flax bread that my friend had insisted I “had to try.”

This was well before my transition to real food and I wasn’t enthralled with the rather dry sandwich, but I really liked the texture of the sprouts.

These days, if sprouts are hippie food, I must be a hippie because I have some growing on my counter right now.

Turns out, sprouts have a lot of health benefits and are an inexpensive and easy-to-grow local superfood.

Why Grow Sprouts at Home?

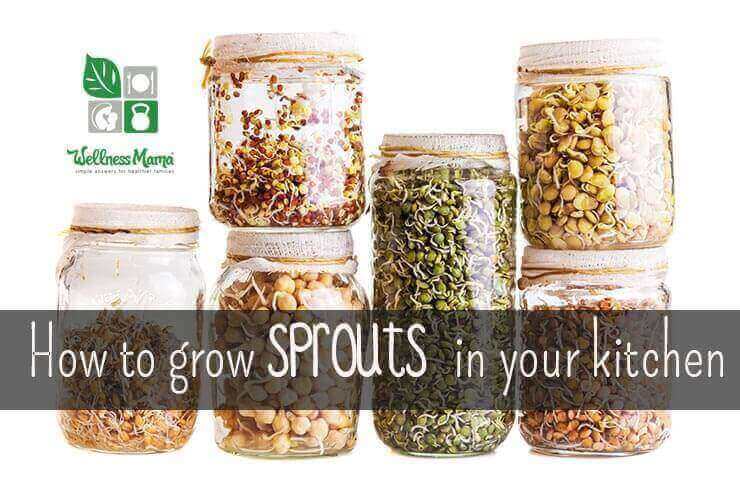
Sprouts are soaked and germinated seeds, nuts or grains that are full of beneficial enzymes, vitamins and amino acids. They are also incredibly easy to grow at home on a kitchen counter with plain water and minimal equipment.

I prefer to sprout any beans or grains that I consume to make the nutrients more bioavailable and to reduce lectins and phytic acid. I also like sprouting certain seeds and nuts for adding to salads and stir frys.

Sprouts are incredibly nutritious and inexpensive, and take only a few days to grow. Sprouting increases the nutrient content of seeds and legumes and makes them easier to digest. If you’ve never tried to grow sprouts at home, you are missing out on an easy way to have fresh food year round.

The most common seeds used to grow sprouts are:

  • Alfalfa
  • Broccoli Seeds
  • Red Clover Seeds
  • Lentils
  • Mung Beans
  • Pumpkin Seeds
  • Sunflower Seeds
  • Chia Seeds

Supplies to Grow Sprouts

There is equipment specifically designed for sprouting, like sprouting trays, which make sprouting easier and allow for more growth at once, but all that is really needed are:

  • A wide-mouth quart size or half gallon size mason jar
  • A Sprouting lid or a piece of cheesecloth and a rubber band
  • A bowl or box to help the jar stand upside-down at an angle
  • Organic Sprouting seeds (I buy mine in bulk here) – Make sure they are specifically labeled “sprouting seeds” and “organic”

How to Grow Sprouts

How to grow sprouts at home

  1. Wash hands well and make sure that all equipment is clean and sterile.
  2. Pour one type of seed into the jar. Use about 1 teaspoon of small seeds like alfalfa or broccoli or 1/4 cup of beans and lentils (for a quart size jar).
  3. Cover with 1 cup of filtered water and put lid or cheesecloth over the jar.
  4. Allow to soak for up to 12 hours. It is often easiest to do this at night and soak overnight.
  5. In the morning, strain off the water. This is easily done with a sprouting lid. If you are using a cheesecloth, strain through a fine strainer and return to jar.
  6. Rinse well with filtered water and drain again.
  7. Place upside down at a slight angle so that excess water can drain off and air can get in. I find a dish rack or medium size bowl is perfect for this.
  8. Re-rinse the sprouts several times a day with filtered water, returning to the tilted position each time.
  9. You should see sprouting in a day or two and most sprouts are ready to harvest in 3-7 days.
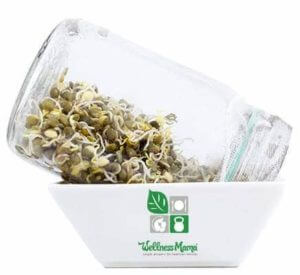
  10. When done sprouting, rinse thoroughly in cool, filtered water and store in a covered container in the fridge for up to a week.

There are some important notes about growing sprouts. Please read this article for cautions and specific instructions. Some seeds (like walnuts and pecans) do not sprout and some beans (like Kidney beans) are dangerous and should never be eaten sprouted. Also, special care should be taken to avoid bacteria growth in sprouts.

Ever eaten sprouts or made your own? Let me know below!

FacebookTweetPinLinkedInReddit

Category: Natural Home

Print Friendly, PDF & Email

About Katie Wells

Katie Wells, CTNC, MCHC, Founder and CEO of Wellness Mama and Co-Founder of Wellnesse, has a background in research, journalism, and nutrition. As a wife and mom of six, she turned to research and took health into her own hands to find answers to her health problems. WellnessMama.com is the culmination of her thousands of hours of research and all posts are medically reviewed and verified by the Wellness Mama research team. Katie is also the author of the bestselling books The Wellness Mama Cookbook and The Wellness Mama 5-Step Lifestyle Detox.

  • View All Posts
  • Globe icon
  • Facebook logo
  • Twitter logo
  • LinkedIn logo
  • YouTube logo
  • Instagram logo
  • Pinterest logo

It Shouldn’t Be This Hard to Be Healthy…

Join the Wellness Mama VIP email newsletter to get the latest articles, recipes, podcasts, special discounts, and FREE access to my Quick Start Guide, 7 Simple Steps for Healthier Families, and 1 week real food meal plan!

Wellnesse Products is my very own personal care line created for my family and yours!

I couldn't find natural products that met my standards so I created my own. Wellnesse is the result of a decade of research and dozens of tests, and your family can now use them too!

Learn More

Wellnesse Products

You May Also Enjoy These Posts...

  • How and why to grow microgreens in your kitchen
    How to Grow Microgreens
  • The Benefits of Sprouts and Microgreens
    The Health Benefits of Sprouts and Microgreens
  • How to Grow Sprouts in Your Kitchen for Nutritious and Inexpensive Food With Doug Evans
    336: How to Grow Sprouts in Your Kitchen for Nutritious and Inexpensive Food With Doug Evans
  • Benefits of Broccoli Sprouts
    How to Grow Broccoli Sprouts (& Why We All Should)
  • Roasted Brussel Sprouts with bacon
    Roasted Brussels Sprouts Recipe
  • How to grow more in less space with vertical gardening
    How to Grow More in Less Space With a Vertical Garden
Previous Post: «The Many Benefits of Ginkgo Biloba Ginkgo Biloba Benefits
Next Post: How to Grow Microgreens How and why to grow microgreens in your kitchen»

Reader Interactions

Discussion (27 Comments)

  1. Dee Dee

    February 16, 2016 at 8:16 PM

    I got a Sprout House sampler pack to start with so I could decide my favorites seeds before buying in quantity.

    Reply
    • Jessie

      January 8, 2020 at 11:00 AM

      me too. just did the same.

      Reply
  2. Angelo

    August 30, 2015 at 12:54 PM

    Hi there,

    Firstly, is quinoa normally difficult to sprout?

    Also, can sprouted nuts, seeds or grains be boiled or must they omly be eaten raw? I’ve tried eating mung beans raw after sprouting, however I find thrm hard to digest and get an upset stomach.

    Your insights would be mostly appreciated.

    Thanks in advance,
    Angelo

    Reply
  3. Laurel

    June 2, 2015 at 8:08 PM

    I had bought the sprouting trays but the mason jar method is so simple! I’m a domestic flight attendant, and can bring the mason jar with me and have fresh sprouts. It’s like gardening on the airplane!

    Reply
  4. Richard

    May 31, 2015 at 12:14 PM

    I soak mung beans for twelve hours in a glass of water. Then tip them into a steamer – stainless steel, lots of holes in the bottom. The beans are swollen by now so don’t fall through. Then I put a plate underneath and a lid on top to keep light out – this is what makes them sprout like crazy. With light everything slows to a crawl and by the time the shoots are a few inches long the seed husks are starting to rot. Then once in the morning and once at night I fill the plate underneath with water. This plate isn’t flat – it has raised edges so the water rises a few mm inside the steamer, soaking the seeds. This soaking method prevents them from being disturbed. If for example I use tap water from above then the seeds get disturbed and their shoots grow at all sorts of crazy angles, slowing down their growth upwards. the idea is to get uniform shoots a few inches long all growing upwards so that it’s easy to grasp them and wash off the husks at the bottom.

    Once the shoots are an inch or so long and tightly packed together then it’s easy to soak them from above instead of soaking the plate below.

    One or more steamers can be placed on top of each other with different sprouts in them.

    Reply
    • Kristine

      April 26, 2019 at 11:49 PM

      I appreciate the instructions for uniform sprouts

      Reply
  5. Michelle

    May 6, 2015 at 6:30 PM

    I’ve grown sprouts before and it was a very good experience. After a move I got out of the habit but I plan to start back again soon. I really like the tip of using mason jars to do this. I’ve always used a sprouting tray that I got along with my beans from sproutpeople.org. I’ve never tried your supplier but I’ll check it out. I liked sprouts mainly in salad and sandwich wraps. Thanks for posting the article, it gives me renewed motivation to get back to sprouting!

    Reply
  6. Rosalie

    April 29, 2015 at 4:50 PM

    Hi Katie,

    How do you sterilize your sprouting jars?

    Thanks!

    Reply
    • Katie - Wellness Mama

      May 6, 2015 at 10:53 PM

      I run them through the dishwasher…

      Reply
  7. Carolyn

    April 9, 2015 at 10:45 AM

    How come you need sprouting seeds specifically? Why won’t normal planting seeds work? Or chia seeds you get at the grocery store? Or normal dried beans? And on the microgreen post you had a link to a mix of seeds for growing microgreens. Can you not use sprouting seeds to grow microgreens or grow normal brocolli seeds and just trim them down while they’re micro?

    Reply
    • Katie - Wellness Mama

      April 10, 2015 at 4:07 PM

      You can use any seeds, sprouting seeds and microgreen seeds are just typically cheaper because they are in bulk and are not sprayed with anything

      Reply
  8. Sheila

    March 26, 2015 at 5:37 PM

    Can all of these be sprouted in their food state or only as seeds?

    Reply
    • Katie - Wellness Mama

      March 30, 2015 at 10:28 AM

      For sprouts and micgrogreens, seeds are needed.

      Reply
  9. kreichert

    March 25, 2015 at 10:01 AM

    Thanks! For some reason this has always intimidated me. I guess b/c I always saw people w/these elaborate sprout growing things that I couldn’t afford. It made it seem like I would have moldy stinky sprouts if I didn’t have one…..I’ll give it a try.

    Reply
  10. Katharine

    March 25, 2015 at 4:19 AM

    Thanks for this! Your tip on using a tilted jar in a bowl to drain & aerate is brilliant.

    Reply
Newer Comments »

Join the Conversation... Cancel reply

Your email address will not be published. Please read the comment policy.

Recipe Rating


Footer

  • Sitemap
  • Start Here
  • Comment Policy
  • Affiliate Disclosure
  • Newsletter
  • Privacy Policy
  • Terms of Service
  • Full Disclaimer
  • Promo Guidelines
  • Contact
Wellness Mama®
  • Facebook logo
  • Twitter logo
  • LinkedIn logo
  • YouTube logo
  • Instagram logo
  • Pinterest logo

Site Footer

The information on this website has not been evaluated by the FDA and is not intended to diagnose, treat, prevent, or cure any disease.

By accessing or using this website, you agree to abide by the Terms of Service, Full Disclaimer, Privacy Policy, Affiliate Disclosure, and Comment Policy. Content may not be reproduced in any form.

Ads provided by CafeMedia Family & Parenting Network. Displayed ads do not constitute endorsement or recommendation by Wellness Mama.

Copyright © 2006–2021 Wellness Mama® · All Rights Reserved · Sitemap