Lately I’ve been experimenting with making furniture and learning to distress wood. What started by making wine bottle tiki torches has turned into a passion for upcycling and DIYing all kinds of household items.
Here’s how the DIY furniture part all began:
The Problems with Some Wood Furniture
When I learned that most furniture contains some unsavory chemicals and flame retardants, I started looking for more natural options. Unfortunately, pre-made organic furniture is pricey and hard to find. Buying used is a great option because it reduces landfill waste so we turn to that when we can. In fact, we have an older leather sectional sitting in our living room that we bought years ago used for $300 that is the most comfortable couch ever and our kids love it.
It’s fun to refinish and re-make used furniture into something that fits in our home. The downside is that it can be hard to find the exact pieces and sizes we’re looking for. I wanted a certain size coffee bar in our kitchen to fit in a specific space and couldn’t find anything the right size. So I decided to make it. 🙂
I should disclose at this point that I’m not the most handy with advanced power tools, so I decided to stick to an easy-to-use design. The goal was a rustic barn lumber and steel pipe construction and I’m happy to say it was a success! (Here’s the tutorial if you’re interested)
My favorite part was figuring out how to make the wood look like aged barn lumber through a simple distressing process. I took $30 worth of wood and made it look like well over $100 in reclaimed lumber. Score!
What Happens When Wood Ages?
In nature, the weather ages the outside of wood without (in most cases) affecting the structure or durability of the wood. In order to distress wood artificially, we must imitate this process.
Wood is made up of mostly cellulose, lignin, and hemicelluloses. The strong covalent and H-bonds within and among the cellulose molecules and fibrils are able to resist high tensile stresses, which is why people have used wood as a building material throughout history.
Over time, wood can age anaerobically (under water or buried) or aerobically (in air). The “reclaimed barn lumber” look I was going for is the result of aerobic aging. To understand how to mimic it, I had to understand how it happens.
A few scientific journals later, I found that wood exposed to sunlight experiences photodegradation. This is when the UV light acts on the lignin in the wood. This affects the color of the wood but not typically the strength or structure. Wind and rain water can also chemically affect wood by acting in the tannins. The more tannins, the darker the wood becomes with oxidation.
Over time, this process of oxidation and photodegradation creates the beautiful grey color of reclaimed, aged wood.
How to Distress Wood (or Make New Wood Look Old)
For this project, I my goal was to recreate the color of a piece of beautiful wood we found while on a family camping trip in Yellowstone last summer. That was all well and good … except I didn’t want to wait 10 years for my lumber to turn that color. I also wanted to use inexpensive and untreated pine lumber, which is naturally low in tannins. (Unlike woods like oak and walnut which are very high in tannins.)
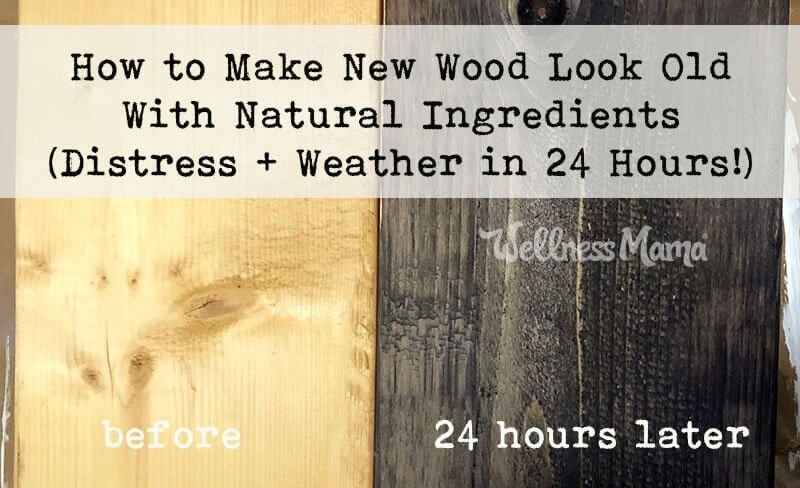
After some chemistry research and experimentation, I found a way to replicate the process of wood aging within 24 hours. There are many online tutorials that recommend using vinegar and steel wool. I tried this alone but didn’t get the color I was hoping for.
Make New Wood Look Old and GREY
In order to get the best aging effect, the iron acetate (what happens when you mix vinegar and steel wool) has to interact with the tannins in wood to oxidize and create an aged effect. To intensify this effect, I added a tablespoon of hydrogen peroxide to the vinegar/steel wool mixture. This created instant oxidation and helped get the color I was looking for.
I also brewed a really strong mixture of tea and coffee and even sacrificed a little red wine. This mixture is rich in tannins and was the pre-treatment before the iron acetate stain.
The result was the perfect ashy grey aged look I was looking for. The best part? I used natural ingredients I already had around the house and it cost virtually nothing to do!
How to Age Wood in 24 Hours (for a Beautiful, Weathered Look)
Now for the practical application … here’s how to age wood in 24 hours. I recommend testing this on a small piece of wood to make sure you get the right color before going over all of the wood.
Staining Supplies You’ll Need
- grade 0000 superfine steel wool
- vinegar (white or apple cider both worked)
- 6 teabags of inexpensive black tea (the link is to the one I had on hand, but any black tea works)
- 1/2 cup coffee (optional) – use what you have
- 1/4 cup wine (optional)
- two quart-size or larger mason jars
- paintbrushes or old rags
Step 1: Make Two Mixtures
- In the first jar: Shred one piece of the steel wool and add to one of the mason jars. I used cloth gardening type gloves for this so the oils in my hand would not coat the steel wool and prevent the chemical reaction. Heat three cups of vinegar in a saucepan on the stove or in the microwave until hot but not boiling. This concentrates the acetic acid in the vinegar and speeds up the process. Some tutorials recommended waiting 1-3 weeks to let the reaction happen naturally. I didn’t want to wait that long so I heated the vinegar instead. Putting the mixture in the sun should also speed the process because the UV helps the oxidation. Note: Do not cover this jar! It is important that the gasses can escape! Stir every hour or so.
- In the second jar: Place the tea bags and coffee (if using). Add 3 cups of boiling water to the jar and set aside.
Step 2: Wait a Few Hours
During this time, the acetic acid in the vinegar is dissolving the iron oxide on the surface of the steel wool. It may not look like much is happening, but it is. The tea is also steeping and the amount of tannins in the liquid is rising. I left both of these overnight (about 12 hours). You can leave them as little as 3 hours or as much as a few days. The longer you leave it, the more intense the aging effect.
Step 3: Strain
After the desired amount of time, strain the tea/coffee out of the liquid and reserve the liquid in the mason jar. Add the 1/4 cup of wine, if using, at this point.
Add 1 tablespoon of hydrogen peroxide (basic 3% like this one – not medical grade) to the vinegar/steel wool mixture and stir. This should immediately darken the mixture. I found that this step is also crucial to getting the grey color (at least on the pine wood I used).
At this point, you can strain out the steel wool if you want to. I found it was easy enough to apply without removing the steel wool.
Step 4: Paint the Wood with Tannins
Now for the fun part! Using a paintbrush, foam brush, or painter rags and paint the wood you’re using with the tea/coffee/wine mixture. Make sure to get all sides and not miss any spots as they will be very noticeable on the finished product. I haven’t tried it, but next time I plan to use a spray bottle to spray the wood for better coverage.
Let dry completely for about an hour. Don’t worry that this won’t darken the wood much! The real magic happens in the next step.
Step 5: Add the Iron Acetate Mixture
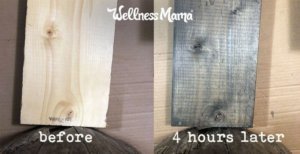
 Now, brush on the vinegar/steel wool/hydrogen peroxide mixture. Again, make sure to coat all parts of the wood. Within a few seconds, you’ll see the wood start to darken. The full color develops over the next few hours. Don’t worry if it doesn’t look dark right away! Adding a second coat can further darken the wood, if desired. This is the step that works to actually distress wood.
Let dry completely for at least a few days. The vinegar mixture can be stored indefinitely. Just put a lid on it and store in a cool, dark place.
Step 6: Seal (Optional)
I let the wood dry for a week before sealing. I made a quick furniture wax (recipe soon) to seal it, but a natural furniture wax (like this one) would work as well. Even plain olive oil will provide some protection. If using in the kitchen, I’d recommend sealing in some way so water doesn’t mess up the finish.
Why Does This Work to Distress Wood?
If you’re a science nerd like me, here’s the reason this method works to distress wood:
Creating Iron Acetate
The acetic acid in the vinegar is causing a reaction between the iron oxide (rust) on the surface of the steel wool. Once the vinegar gets below the outer layer and to the actual iron, it needs a little more help with oxidation. The hydrogen peroxide provides this since vinegar isn’t a strong enough oxidant to make more iron oxide from pure iron.
Tannins + Iron Acetate
Tannins are organic molecules that are highly oxygenated. The oxygens on tannic acid have a negative charge so they can create an ionic bond with other molecules (like iron).
When tannins and iron acetate bond, they create a colored complex that makes the wood look aged.
And now you know how to distress wood! Keep an eye out for my post with the finished coffee table project soon.
Are you a DIYer? What have you made? Share below!


Leave a Reply