I first heard of sous vide years ago and my initial thought process went something like this:
Me: Hmm… sounds French. Must be fancy… I wonder how it works.
Also me (upon researching it): The appliance to cook sous vide costs over $500 and takes hours to cook food!? I’m out. And you cook the food in plastic bags!? I’m double out!
Having never tried it, it appeared that this cooking method was simply a way to spend eight times as long cooking food in a super-expensive machine while increasing plastic exposure. Given my objections to using plastic, and my objections to spending hundreds of dollars on a non-essential appliance, I figure this was one cooking method I’d never try.
What Is Sous Vide?
If you aren’t familiar with it, there is more to sous vide than my initial assessment, and it was worth a second look.
How Do You Say “Sous Vide”?
Sous vide (pronounced soo-veed) means “under vacuum” in French. This relatively new cooking method gained popularity in the 1970s and typically involves vacuum sealing food in a plastic bag (see why I don’t like it) before cooking in a circulating water bath at a consistent temperature.
How It Works
This unique method developed in France allows consistent cooking that is difficult to get in most other cooking methods. By sealing the food off from the water, it produces a much different result than boiling or steaming. While the particular method is new, the idea of cooking food in sealed bags, parchment paper, or even leaves is age-old.
The first thing I ever cooked using the sous vide method was a steak … and it was incredible. But I’m getting ahead of myself… I’ll explain how I got around the plastic issue in a minute.
Advantages of Sous Vide
The main advantage of sous vide is the ability to have precise temperature control over a period of time. This cooks food to perfect internal temperature and texture without the room for error in other types of cooking.
Think about this…
In pan cooking, grilling, and other regular cooking methods, the pan or cooking device is much hotter than you want the food to be when it is done. This means that outside parts of the food are more done than they need to be and if you don’t remove the food at the precise time, it can be overcooked. Of course, this may be the goal with some foods, like roasted sweet potatoes, but it makes meats and seafood tricky.
With sous vide, the food slowly comes up to the perfect temperature and it can hang out there until it’s ready to be eaten. High-end restaurants have been using sous vide for years because of its ability to consistently produce perfect results and its time flexibility.
Disadvantages of Sous Vide
I know, I know… there’s always a downside. In this case, you can probably already guess them:
Expense
Call me frugal, but I’m not up for spending over $500 on a single-use cooking appliance. That’s how much most of the original models cost, and restaurant models can cost many times that much. Sure, I’ll dish out the money for a great blender but I use it multiple times a day. I just couldn’t justify this for something like a sous vide.
The Plastic
On top of the cost, I wasn’t up for spending more money on a vacuum sealer and I certainly wasn’t up for cooking food in plastic. I’ve gone to great lengths to ditch all the plastic in our kitchen and I wasn’t bringing it back… even for some amazing perfectly cooked steaks and seafood.
How to Sous Vide without Plastic
A year or so ago, I decided to give sous vide a second look and figured out a way to solve both of my main problems with it. Spoiler alert: I now use this method all the time in our home and wanted to share why we love it so much!
Cinder Grill “Sous Vide”
If exceptional food is a priority and the budget allows, we did discover this appliance that gives the results of a sous vide without the plastic or boiling. It looks like a giant panini press with ceramic plates and you can use it indoors to cook meat, fish, veggies, or anything that needs that perfect sear. It is also temperature controlled so you can’t overcook food.
It is a pricey appliance (we got ours on Amazon) but since it can be used for everything from eggs to pancakes to grilling it’s much more versatile than other sous vide methods and earns its keep.
Less Expensive Sous Vide
Thankfully, price is no longer as much an issue, as there are now smaller models that attach to a pot or pan you already have and cost under $100. This is the one I have.
Without the Plastic
The bigger hurdle was figuring out how to get rid of the plastic. Keeping the food from touching the water is vital to this method working, but I wasn’t giving in on my pledge to avoid plastic.
After some failed experimentation, I’ve settled on two methods that work well:
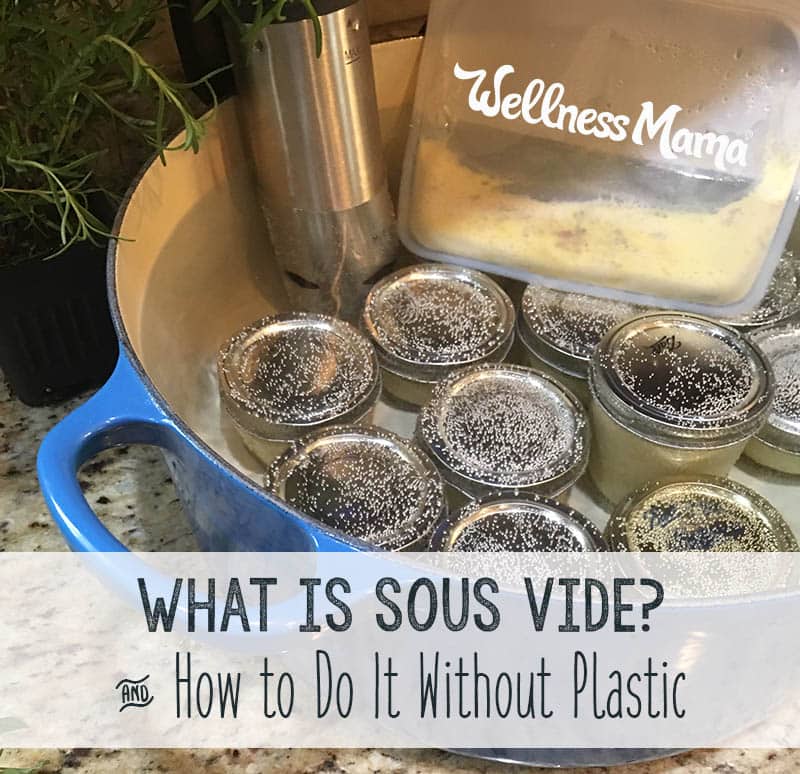
- Mason Jar Cooking – I’ve found that small (4-8 ounce size) mason jars are perfect for cooking foods like eggs, creme brûlée, and other space variable foods.
- Cooking in Silicone Bags – For meats and seafood that don’t fit well in jars, I’ve found that silicone food storage bags work really well without the need for plastic.
Supplies You’ll Need
There are dozens of ways you can try sous vide cooking at home. I use a bare-bones method with the least expensive equipment I could find and it works really well. This is the equipment I use:
- Sous Vide Immersion Circulator – This easy to store immersion circulator is the least expensive option I’ve found and it works really well. It can be used with the stainless steel insert from an Instant Pot or with any other adequately sized pot.
- Silicone Food Storage Bags – I use these silicone bags for smaller items and these for bigger items.
- Large pot that is deep enough to submerge the food you are cooking.
What to Do:
- Fill a pot with water and attach the immersion circulator to the side. Set the temperature for the food you want to cook (the manual has a reference chart for this).
- Let it come up to temperature. In the meantime, place the food you plan to cook in a glass jar or silicone food bag (preferred). If using a silicone bag, remove as much air as possible. To do this: slowly lower the bag with the top unsealed into the pot of heating water. Be careful not to let any spill into the bag. This pushes the air out and creates a similar air-tightness to vacuum sealing.
- Seal the bag with an airtight clip.
- When water comes up to temperature, place the bag with the food into the pot and leave for the correct amount of time.
- Once cooked, you can leave the food in the water for up to an hour at temperature without overcooking it.
- For meats and seafood, I like to create a sear on each side right before serving. I bring a cast iron skillet to high heat and sear for 1-2 minutes per side.
Sous Vide Recipes
Almost any recipe can be easily adapted for sous vide cooking. I find the most noticeable difference with meats, eggs, and seafood. These egg bites are one of our current favorites, but I’ll be posting more soon!
Sous Vide Cooking: Bottom Line
Do you need another kitchen appliance that gently cooks your food in a water bath? Nope.
Is it worth trying if you love restaurant quality food without eating out? Absolutely.
The original method had some problems like cost and plastic use. Newer models and silicone food bags make sous vide cooking at home healthier and easier.
I wouldn’t prioritize an immersion cooker as a must-have kitchen appliance. I received it as a gift and use it much more than I expected. It does make better food that we find in restaurants and may save us money over time. I’d put this on my wedding registry if I had it to do over again … but it won’t replace our blender or food processor as a core kitchen appliance.
Ever tried sous vide? How did you like it? Will you give it a shot?


Leave a Reply