Is doing an art project your worst nightmare? Are the supplies tossed all over the house making it difficult to even pull together the right supplies? Do you dream of a self-contained solution?
Having a few creative art supplies available anytime can keep that toddler busy, allow the budding artist to thrive, or the advanced artist to perfect their craft. Keep reading to learn about the art station system that has been working for our family (and add your own suggestions in the comments below!).
How to Organize a Family Art Station
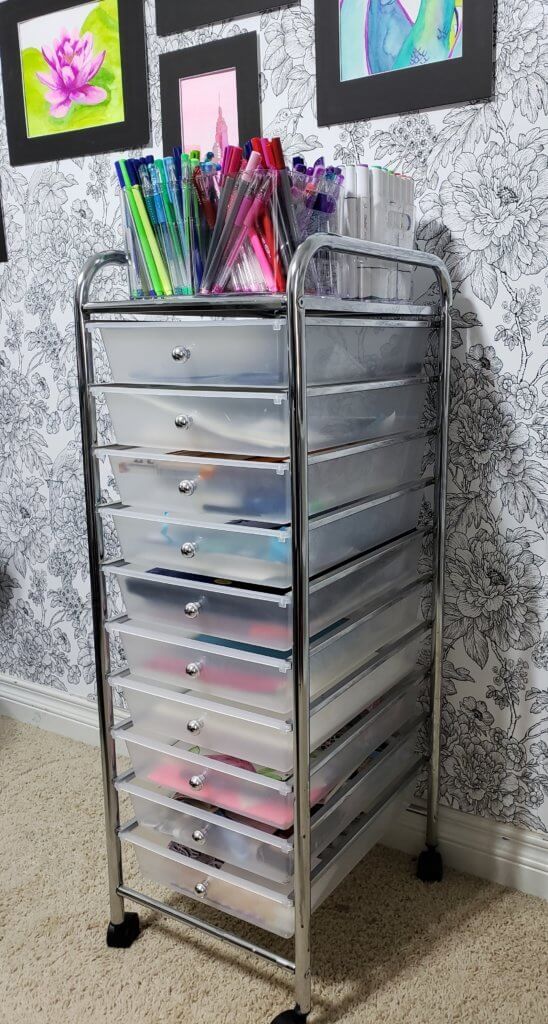
I’ve tried a million and one systems over the years, but this is the one that defies my children’s ability to strew art supplies all over the house in one minute flat! We keep this art station close by for creative projects at the kitchen table, or when we are doing something artistic in our homeschool day.
Family organization is always a work in progress, but this system works for our wide range of ages too. Try it and let me know what you think! What worked? What would you change?
Step 1: Get a 10-Drawer Rolling Cart
This is the biggest expense for this project, but also the most important. You need a 10 drawer rolling cart of good quality. Do not skimp on this! This cart will be rolled around and used often so we want something that will hold up.
I still use the Recollections Cart we bought at Michael’s Craft Stores years ago (bought with a coupon of course) and it is still holding up great! You can order a similar version on Amazon here.
Step 2: Choose Containers
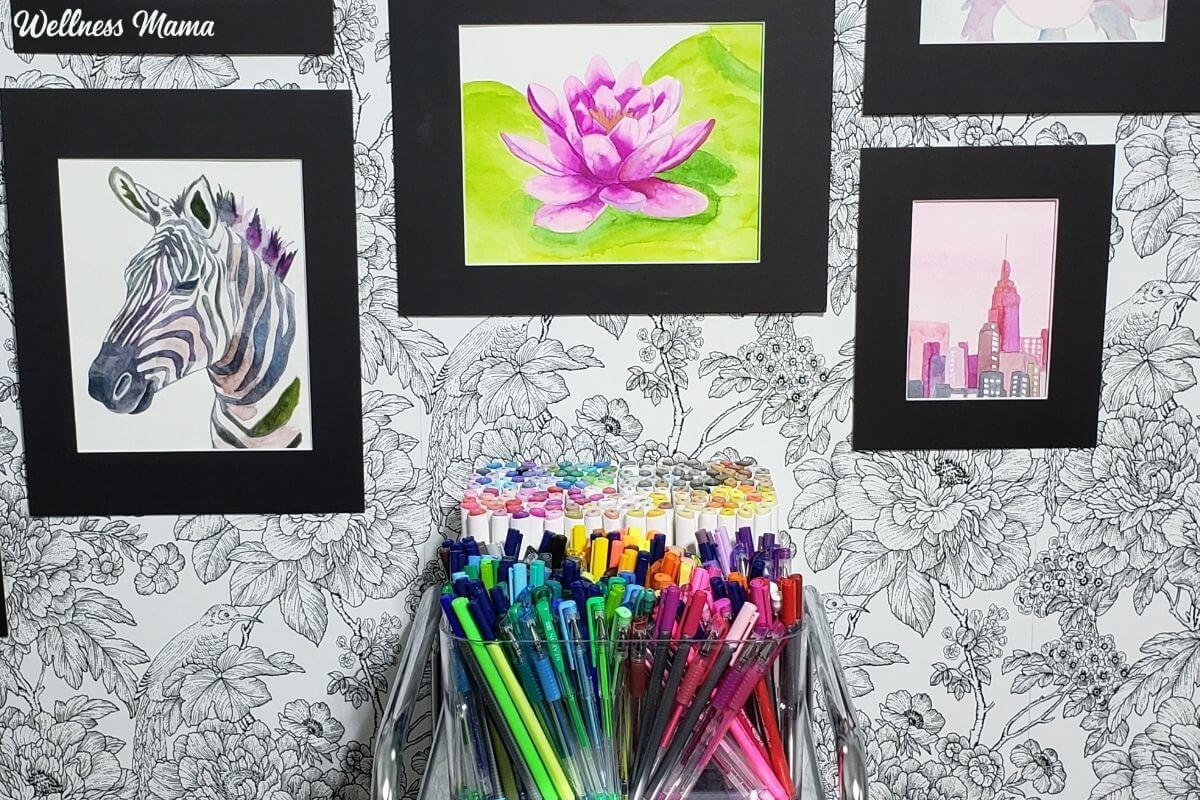
The cart is the perfect filing system for art supplies, but we need a couple of other tools to bring it all together. Since I wanted this art cart to be a colorful and inviting space I used clear divided containers to add another layer of organization to the cart. To add our color feature and make the most out of the small space we are using you will want two of these divided containers.
In these containers I can fit 100 plus markers/color pencils/crayons or gel pens. Thanks to the dividers you can even sort them by the rainbow, which makes it even more visually appealing. They also have handles — perfect for little hands.
The other containers I recommend are these little bins. They are adorable I know, but they also serve a great purpose! You’ll want one set to divide up your multimedia drawer allowing for each item to be in an exact spot within the drawer.
If it has a designated home, the chances of the kids putting it back right where it goes increases substantially!
Tip: Make sure you have your cart before ordering these to check the right fit.
Step 3: Gather Art Supplies
Time to gather art supplies! Chances are you already have tons around the house, if your kids like to do DIY craft projects for Valentine’s Day and other holidays. We rounded up the kids and had them hunt for every art supply in the house. We want all markers, crayons, colored pencils, water paints, pom poms, pipe cleaners, popsicle sticks, erasers, rulers…. everything.
We used the dining room table as a sorting station and separate them into piles and sub piles according to this list:
- Writing Utensils- subdivided into markers, crayons, colored pencils, gel pens, pens/pencils, and other
- Tools- subdivided into tools that cut, adhesives, stencils, and other
- Paper- subdivided by type of paper
- Books/Kits-subdivided by coloring books, drawing books, self-contained kits, and other
- All Things Sticky- subdivided into stickers, decorative tape, jewels, googly eyes, foam shapes, and other
- Paint Supplies- subdivided by acrylic, watercolors, brushes
- Everything else- subdivided by item
Important step: Go through and throw away any unusable items. Markers without lids, tiny bits of crayon or colored pencils, torn stickers, coloring books with no usable pages left, etc.
Now we build our creativity station of joy!
Step 4: Build Your System
Our goal is for each item to have a home of its own, making it easy for the kids to use, enjoy and then put away. Can I get a hallelujah!
Prep Writing Utensils
Start by placing all your writing utensils into the two divided containers. Based on the number of each subcategory you have, you have a couple of different ways to approach this.
- If you have a large number of markers place them all into one divided container sorting them by color.
- If you only have a handful of each subcategory you can do one subcategory per section.
- Or you can sort strictly by color.
Tip: For younger kids start with color sorting so they do not have to wonder which section something goes in. Subcategories make sense to us, but younger kids do not always understand the difference between a gel pen and a writing pen!
Now place these beautiful bins of color on top of the rolling cart.
Fill the Drawers
Next, we will begin to place the rest of our supplies into the drawers.
Tip: If you have more supplies then will fit in these drawers, I suggest purging down or creating a back stock bin. A back stock bin is simply a plastic or fabric storage crate/bin that is used to store any extra art supplies in a more out-of-the-way place. Once every few months you can check your art station and refill from this back stock bin. Having back-stock storage allows you to take advantage of any great deals you find throughout the year without needing to know your immediate needs. It also helps kids use up the old before seeing the new.
Label the drawers as follows:
- Tools
- Paper
- Ideas
- Sticky
- Mixed Media
- Paint
- Masterpieces
- Ask First
Drawer 1: Tools– This includes all items like scissors, hole/paper punchers, stencils, large erasers, rulers and glue sticks
Drawer 2: Paper– This is where you will store the art paper for the kids to use. You can have a variety, or I suggest sticking with a bulk multimedia paper that works across the board, or for budding artists cardstock works great, is inexpensive, and easy to find.
Drawer 3: Ideas-This drawer is an imagination spark. There should be a wide variety of guided activities in this draw in which kids can create and explore. Think about things like Finish this Picture, Wreck this Journal type prompts, step by step drawing tutorials, color by number, just add water painting pages, etc. Have 3-5 options for each type of activity and store the rest in the back stock bin. Too many options can be overwhelming and we want to keep it fresh and new by updating/rotating items in this drawer every 6-8 weeks.
Drawer 4: Tapes/Stickers/Self Adhesive Supplies– This one is pretty self-explanatory, it will hold washi tapes, stickers, the sticky back foam shapes, googly eyes, and anything already adhesive that can be added to their art. Make use of those baby bins in this drawer to ensure that it doesn’t become a jumbled mess.
Drawer 5: Mixed Media Supplies– Sort all those odds and ends craft supplies and put them into their own homes. Think pony beads, popsicle sticks, pom pops, pipe cleaners, feathers, bits of string or yarn, anything crafty. Give them each their own baby bin or space within the drawer. Note: Some families may need 2 mixed media drawers. Also for advanced artists, this drawer will look very different. It may include India inks, stamp pads, pastels, graphite, wooden objects, etc.
Drawer 6: Paints and Brushes– This one is pretty self-explanatory! If you buy your paints in bulk or have a large variety of different brands it may be helpful to move them all into the same containers, something similar to this. Use those baby bins for your paintbrushes here too. Tip: If you have younger kids, label this an “Ask First Drawer” as mentioned below.
Drawer 7: Masterpiece Storage– This is where all the finished and in progress masterpieces go after creating. Every so often plan a time to sit down and go through this drawer with your artist. Mail the masterpieces to friends and family, or use one of these ideas to preserve and display them for the family to enjoy!
Drawer 8: Ask First– This drawer is for the crafty stuff that tends to be a little on the messier side. I like to use the bottom drawer for these items as kids have a tendency to not see anything outside of their direct line of sight. This is the only drawer on the whole cart they need to ask an adult before using. Depending on the ages of your kids this drawer could hold water paints, glitter, glitter glue, slime making supplies, or any other variety of supplies they should only be using with supervision.
As you may have noticed, this leaves you with two drawers for backstock/overflow or other areas you find your family needs. Here are some other options:
- You may want 2 paper drawers, one for plain and one for printed and colored papers.
- If you have 2-3 kids using the same station often, have a Masterpiece drawer for each of them.
Of course flexibility is important in any system. As the kids grow their needs can change, so adjust this system as needed!
There you have it, your glorious art cart ready for your artists!

May your family have many creative ventures together!
Do you have an art station in your home? What do you do to organize art supplies?


Leave a Reply