• Skip to main content
  • Skip to header right navigation
  • Skip to after header navigation
  • Skip to site footer
Wellness Mama script logo

Wellness Mama®

Simple Answers for Healthier Families

  • About
  • Favorites
  • Podcast
  • Blog
  • Shop
  • Health
  • Natural Home
  • Motherhood
  • Mindset
  • Natural Remedies
  • Beauty
  • Organization
  • Travel
  • Reviews
  • Recipes
How to Grow Sprouts in Your Kitchen- and why you should
  • Natural Home

How to Grow Sprouts In Your Kitchen

Katie WellsMar 23, 2015Updated: Jul 30, 2019
Reading Time: 3 min

This post contains affiliate links.
Click here to read my affiliate policy.

Wellness Mama » Blog » Natural Home » How to Grow Sprouts In Your Kitchen

“A total hippie food”… that was what I thought as I looked down at the turkey, sprouts, and avocado sandwich on flax bread that my friend had insisted I “had to try.”

This was well before my transition to real food and I wasn’t enthralled with the rather dry sandwich, but I really liked the texture of the sprouts.

These days, if sprouts are hippie food, I must be a hippie because I have some growing on my counter right now.

Turns out, sprouts have a lot of health benefits and are an inexpensive and easy-to-grow local superfood.

Why Grow Sprouts at Home?

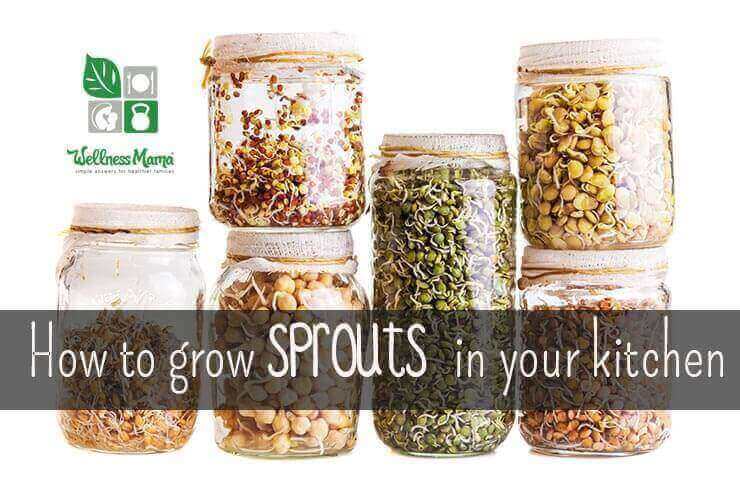
Sprouts are soaked and germinated seeds, nuts or grains that are full of beneficial enzymes, vitamins and amino acids. They are also incredibly easy to grow at home on a kitchen counter with plain water and minimal equipment.

I prefer to sprout any beans or grains that I consume to make the nutrients more bioavailable and to reduce lectins and phytic acid. I also like sprouting certain seeds and nuts for adding to salads and stir frys.

Sprouts are incredibly nutritious and inexpensive, and take only a few days to grow. Sprouting increases the nutrient content of seeds and legumes and makes them easier to digest. If you’ve never tried to grow sprouts at home, you are missing out on an easy way to have fresh food year round.

The most common seeds used to grow sprouts are:

  • Alfalfa
  • Broccoli Seeds
  • Red Clover Seeds
  • Lentils
  • Mung Beans
  • Pumpkin Seeds
  • Sunflower Seeds
  • Chia Seeds

Supplies to Grow Sprouts

There is equipment specifically designed for sprouting, like sprouting trays, which make sprouting easier and allow for more growth at once, but all that is really needed are:

  • A wide-mouth quart size or half gallon size mason jar
  • A Sprouting lid or a piece of cheesecloth and a rubber band
  • A bowl or box to help the jar stand upside-down at an angle
  • Organic Sprouting seeds (I buy mine in bulk here) – Make sure they are specifically labeled “sprouting seeds” and “organic”

How to Grow Sprouts
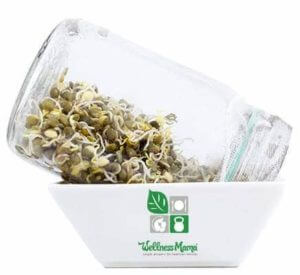
How to grow sprouts at home

  1. Wash hands well and make sure that all equipment is clean and sterile.
  2. Pour one type of seed into the jar. Use about 1 teaspoon of small seeds like alfalfa or broccoli or 1/4 cup of beans and lentils (for a quart size jar).
  3. Cover with 1 cup of filtered water and put lid or cheesecloth over the jar.
  4. Allow to soak for up to 12 hours. It is often easiest to do this at night and soak overnight.
  5. In the morning, strain off the water. This is easily done with a sprouting lid. If you are using a cheesecloth, strain through a fine strainer and return to jar.
  6. Rinse well with filtered water and drain again.
  7. Place upside down at a slight angle so that excess water can drain off and air can get in. I find a dish rack or medium size bowl is perfect for this.
  8. Re-rinse the sprouts several times a day with filtered water, returning to the tilted position each time.
  9. You should see sprouting in a day or two and most sprouts are ready to harvest in 3-7 days.
  10. When done sprouting, rinse thoroughly in cool, filtered water and store in a covered container in the fridge for up to a week.

There are some important notes about growing sprouts. Please read this article for cautions and specific instructions. Some seeds (like walnuts and pecans) do not sprout and some beans (like Kidney beans) are dangerous and should never be eaten sprouted. Also, special care should be taken to avoid bacteria growth in sprouts.

Ever eaten sprouts or made your own? Let me know below!

Category: Natural Home

Share this article

FacebookTweetPinLinkedIn
Print / PDF / Email

About Katie Wells

Katie Wells, CTNC, MCHC, Founder of Wellness Mama and Wellnesse, has a background in research, journalism, and nutrition. As a wife and mom of six, she turned to research and took health into her own hands to find answers to her health problems. WellnessMama.com is the culmination of her thousands of hours of research and all posts are medically reviewed and verified by the Wellness Mama research team. Katie is also the author of the bestselling books The Wellness Mama Cookbook and The Wellness Mama 5-Step Lifestyle Detox.

  • All Posts

You may also enjoy these posts…

broccoli sprouts

How to Grow Broccoli Sprouts (& Why We All Should)

how to ferment

How to Try Fermentation in Your Kitchen for Probiotics on the Cheap

How and why to grow microgreens in your kitchen

How to Grow Microgreens

7 Natural Beauty Tricks from your Kitchen

Seven Natural Beauty Tricks From Your Kitchen

Benefits of Onions- A Potent Home Remedy

Benefits of Onions: A Surefire Home Remedy in Your Kitchen

How to use a salt block for cooking and curing and serving

9 Ways to Use a Himalayan Salt Block in Your Kitchen

Reader Interactions

Discussion (29 Comments)

  1. Bobbie Pfeifer

    February 17, 2023 at 5:40 PM

    I am new to sprouting—in fact, I’m currently half way through my first batch of broccoli and kale mix, using jar method. I’m curious, do the sprouts maintain their nutrition if blended into smoothies using a Vitamix blender? If the answer is yes, does this hold true if the smoothie has fresh whole lemons added? Does the acidity affect/breakdown the nutritional value? I like adding leafy greens like kale or arugula to my fruit smoothies—but prefer the higher nutritional value of the sprouts—if that’s a sound thing to do.

    Reply
    • Jamie Larrison

      February 22, 2023 at 9:11 AM

      Yes, they can be added to smoothies. Katie explains how she adds them to smoothies at the bottom of this post. https://wellnessmama.com/health/broccoli-sprouts/

      Reply
  2. Kristin

    April 11, 2020 at 6:24 PM

    Where do you put your jar after the initial soak? In dark or on a counter is fine?

    Reply
    • Katie Wells

      April 12, 2020 at 10:39 AM

      I leave them on the counter…

      Reply
  3. Tatia

    January 26, 2019 at 3:00 PM

    Do you never cover them before they sprout? Maybe I need to try that. It seems like mine are always small but I have covered them for like the first three days and then give them light.

    Reply
  4. Crystal

    August 26, 2016 at 9:52 PM

    Thanks for this post, Katie! I just sprouted black beans for the first time. Now that they are cooked, is it safe to freeze them for later use? Thanks!

    Reply
  5. Elliott

    June 18, 2016 at 11:55 PM

    Ok for me to add liquid chlorophyll before putting in indirect sunlight?

    Reply
  6. Debbie

    June 1, 2016 at 3:13 PM

    Hi – I enjoyed the post! Could you tell me of a source for raw organic sunflower seeds. I clicked on the link above and they do not have the seeds. Thank you for the great info!

    Reply
    • Julie

      June 2, 2016 at 7:48 AM

      I bought mine at Mercola (dot) com.

      Reply
  7. Suzanne

    March 19, 2016 at 1:00 PM

    I have sprouted broccoli seeds and I was so excited to try it. A few days in it looked like mound in the jar. It did not smell bad so I tried it. It seemed to be the roots of the sprouts? I tried it again and sterilized everything. Made sure the house was free of mould and bought a new bag of sprouting seeds and the same thing happened. Is it just the roots of the broccoli I am seeing?

    Reply
    • Wellness Mama

      March 20, 2016 at 8:49 PM

      It is tough to tell without seeing it, but they do have very fine, hair-like parts of their roots

      Reply
      • Suzanne

        March 20, 2016 at 9:12 PM

        Thanks. I will sprout them again and take a pic and post it if I can.

        Reply
  8. Julie

    February 17, 2016 at 2:27 PM

    I recently bought a sprouting lid to try sprouting. Your post was perfect timing for me! Really dumb question….. when the seeds have sprouted and are ready to be harvested, do you need to individually clip off the seed part, or is there a trick to getting the seed part off? Also, how long to they stay fresh if stored in the refrigerator?

    Reply
    • Wellness Mama

      February 18, 2016 at 2:02 PM

      The seed part splits open and becomes soft, so you can eat the entire sprout.

      Reply
« Older Comments

Join the Conversation... Cancel reply

Your email address will not be published. Please read the comment policy.

Recipe Rating


The information on this website has not been evaluated by the FDA and is not intended to diagnose, treat, prevent, or cure any disease. By accessing or using this website, you agree to abide by the Terms of Service, Full Disclaimer, Privacy Policy, Affiliate Disclosure, and Comment Policy. Content may not be reproduced in any form. Ads provided by CafeMedia Family & Parenting Network. Displayed ads do not constitute endorsement or recommendation by Wellness Mama.


Content

  • Home
  • About
  • Blog
  • Podcast
  • Favorites
  • Wellnesse

Support

  • Newsletter
  • Podcast Application
  • Medical Review Board
  • My Books
  • Sitemap
  • Contact

Policies

  • Privacy Policy
  • Terms of Service
  • Full Disclaimer
  • Affiliate Disclosure
  • Promo Guidelines
  • Comment Policy

Join the
Wellness Mama Tribe!


Copyright © 2023 · Wellness Mama® · All Rights Reserved · Powered by BizBudding