,

How to Make Yogurt (Easy Homemade Recipe)

Katie Wells Avatar

Reading Time: 7 minutes

This post contains affiliate links.

Read my affiliate policy.

Wellness Mama » Blog » Recipes » How to Make Yogurt (Easy Homemade Recipe)

Update: Since the original writing of this post, I acquired an Instant Pot with a yogurt making function. It makes yogurt-making a breeze and I can do a whole gallon at a time. For the most part, the process is the same as what’s listed below. In step three I leave the warmed milk in the Instant Pot instead of dividing it into smaller jars and in step five I put the bowl back into the Instant Pot for the incubation period.

When I started experimenting with the GAPS diet I noticed right away that eating yogurt was a big part of the diet and the process of regaining gut health.

I was super intimidated by making my own yogurt but after some initial research, I decided that it didn’t seem too hard and that I should just jump in and give it a try. I’m so glad that I did because the process was so easy and the results were wonderful.

During my research, I found that like most things, there are a million different ways to make homemade yogurt. You can order a starter or use a commercial yogurt as your starter. You can use a dehydrator, heating pad, crockpot, yogurt maker, or oven to act as your incubator.

I opted for the oven because I didn’t own a dehydrator and why get the Crock-Pot dirty when I can just throw the jars in the oven (I’m all about whatever gives me fewer dishes to wash)? I found that when I was doing the GAPS diet I was using canning jars quite a bit to store things in the fridge (bone broth, soup, sauerkraut, kimchi, etc.) so I decided that since I would more than likely be using canning jars to store my yogurt, I might as well just make it in the jars (again, less washing).

How to Make Yogurt: the Basic Process

Making your own yogurt at home is relatively easy as long as you follow these steps:

Step 1: Choosing Your Milk

First, choose your milk. This can be any kind of milk, but the more healthy your milk is the more healthy your yogurt will be. Raw milk is best, especially if following the GAPS protocol, but I didn’t have access to raw milk at the time I started making this. Instead, I used milk locally produced using a low pasteurization process that is non-homogenized, which means that I had that yummy layer of cream on top. You can also use goat’s milk.

Whatever milk you decide to use, make sure it is not ultra-pasteurized (the label of the milk will say whether it is ultra-pasteurized or homogenized). In order to get the most nutrition, I also opted for whole milk.

I typically begin by using a ½ gallon of milk. I don’t quite fill the jars all the way, so I end up using 2-quart jars and 1-pint jar.

Step 2: Heating the Milk

Put your milk in a stainless steel pan on the stove and heat over medium heat until it reaches 180°F. The first time I made my yogurt I only had a basic candy thermometer, so I had to really stay with it to watch the temperature.

More recently, I’ve purchased a digital quick read thermometer. This makes the whole process so much easier because you can set the temperature alert to 180°F and the alarm will go off when it reaches that temperature. This is also helpful later, during the incubation period.

Step 3: Cooling the milk

Once the milk reaches 180°F, pour it into the canning jars. Using a stainless steel wide-mouthed funnel made this easy to do, but just pouring from the pan or using a glass measuring cup works too.

The milk then needs to cool to 115°F. You can do this by either putting the milk in a cool water bath or just letting it sit on the counter, keeping a really good eye on it. I place the lids loosely on top of the jars to keep dirt out.

With my first batch, I used the cool water bath technique and it cooled down much sooner than I thought it would. At the time, I didn’t have a thermometer with an alarm to warn me that it had reached 115°F. Before I knew it, the yogurt was at 110°F and dropping and I flew into panic mode.

The yogurt still worked out, which just shows that it’s really hard to mess this process up and it doesn’t all have to be exact. The other thing you have to be careful of with the cool water bath is that if it’s too cool then you risk cracking the jars.

The second time I made a batch I was more patient and let it cool on its own on the countertop. It took longer but I wasn’t so stressed out from the quick temperature drop of the cool water bath.

Step 4: Adding the Culture

Once the milk has reached 115°F, you will add 2 tablespoons of pre-made yogurt to each quart of milk. The yogurt can come from either a previous batch (if you’ve already made some) or from store-bought yogurt. You can also use a store-bought yogurt culture, but using pre-made yogurt is easier and less expensive.

Personally, I use organic plain Greek yogurt for my starter. Stir lightly, just to incorporate the yogurt into the warm milk. Then, put the lids on the jars.

Step 5: Incubating the Yogurt

Once the culture has been added, it is ready to go into the oven to incubate (with the lids on). You want a fairly consistent temperature.

The first couple of times I made my yogurt I just used the 40-watt appliance light bulb that was in the oven. I found that the temperature was dropping lower than I wanted it to, so I would have to turn the oven on to heat it back up every couple of hours. I incubated it overnight and didn’t wake up to check the temperature or turn the oven on, but when I woke up in the morning the temperature was reading 100°F which is less than optimal incubation temperature (115°F would have been better).

Interestingly, it didn’t ruin my yogurt and it still came out really well. Again, it just goes to show that this method is hard to mess up (even with all of the mishaps during my first experiment). I have since (ok, my husband has) replaced our 40-watt bulb with a 60-watt bulb and it now holds the temperature closer to the optimal 115.

If the temperature goes above 115°F you run the risk of killing your culture. You may need to do some testing with your oven light to see what temperature it holds at when the light is on for a period of time and try 40-watt and 60-watt bulbs. The optimal incubation range is 95-115°F.

The yogurt needs to incubate for at least 10-12 hours. The GAPS protocol calls for a 24 hour incubation period in order for the majority of lactose to be consumed by the bacteria (this article does a great job explaining all of that). The longer it incubates, the more tangy the finished yogurt will be.

Important note: Just make sure not to forget that you are incubating yogurt in the oven and accidentally turn the oven on. My new digital quick read thermometer makes this less likely to happen. The thermometer probe goes into the oven sitting in one of the jars, while the digital display portion of it sits on top of my stove so that I can easily monitor the temperature of the yogurt. Seeing the digital display sitting on my stovetop keeps me from forgetting about the yogurt incubating in the oven and accidentally turning it on.

Once the yogurt is done incubating, refrigerate it to set the yogurt and just pour off the extra whey. The whey can be saved to use for other recipes, especially if you are following the GAPS protocol.

If you want a thicker yogurt then you can always strain off the remaining whey using cheesecloth. Personally, I’ve never been a fan of super thick yogurt so I found that I really enjoyed it just the way it was once the whey was poured off after the yogurt was refrigerated and set.

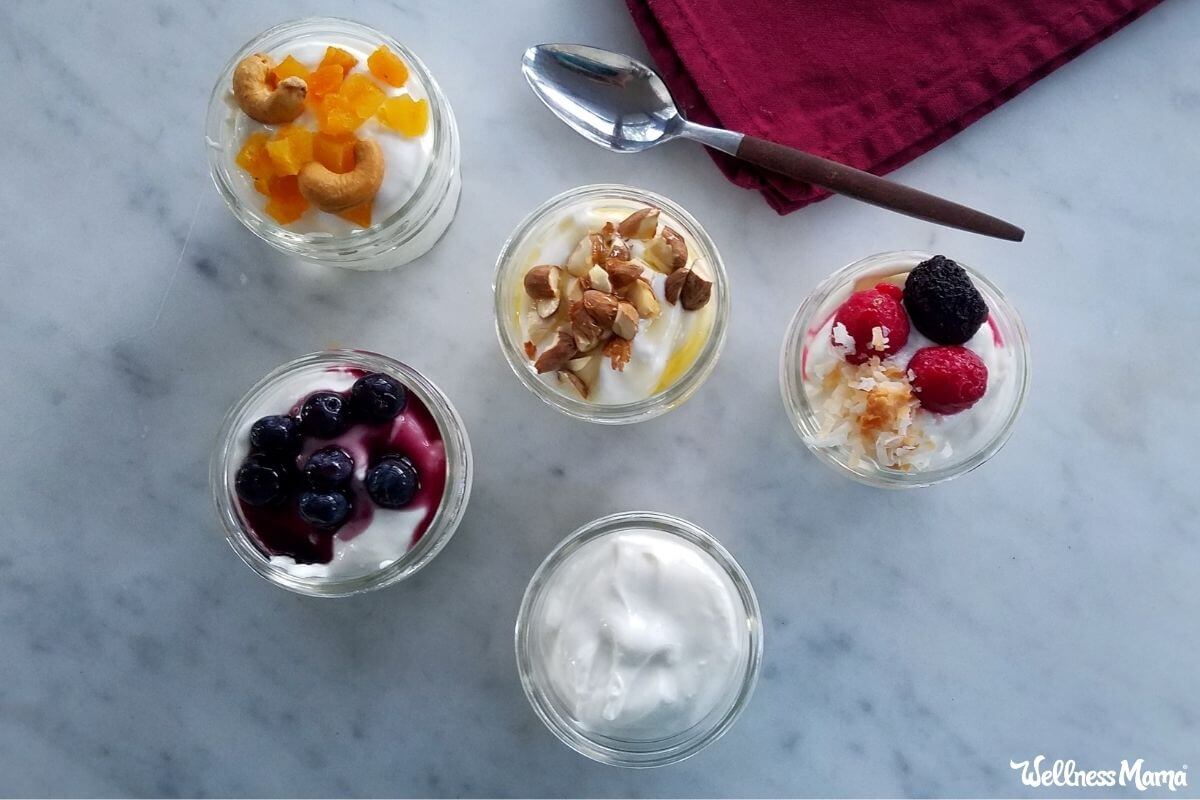
My favorite way to eat the yogurt is with local raw honey drizzled over it. It’s also really good in smoothies or added to soups.

How to Make Yogurt (Easy Homemade Recipe with or without Instant Pot)

An easy method for making your own yogurt that only requires milk, starter yogurt, a thermometer, and a couple canning jars and lids!
Prep Time 15 minutes
Incubation Time 12 hours
Total Time 1 day 1 hour 15 minutes
Calories 76kcal
Author Katie Wells

Servings

16 servings

Equipment

Ingredients

  • 8 cups milk (preferably raw whole milk)
  • 4 TBSP yogurt starter

Instructions

Oven Light Method

  • Heat the milk in a stainless steel pan on the stove over medium heat until it reaches 180°F.
  • Pour heated milk into clean canning jars and cool, either by sitting on the counter or in a cool water bath until the temperature drops to 115°F.
  • Use a clean whisk to mix the yogurt starter into the cooled milk.
  • Place the jars into the oven with the light on for 12-24 hours. The light should provide a consistent heat of about 110°F.
  • Put jars into the refrigerator until the yogurt is cold and set.
  • Once the yogurt is set you can pour off the liquid whey from the top or strain the yogurt using a cheesecloth for a thicker consistency.

Instant Pot Method

  • To heat the milk in the Instant Pot, press the yogurt button until the display reads boil.
  • When it beeps, check that the temperature is at least 180°F.
  • Cool the heated milk by either letting it sit on the counter or in a cool water bath in the sink until the temperature drops to 115°F.
  • Use a clean whisk to mix the yogurt starter into the cooled milk.
  • Return the inner pot to the Instant Pot and press the yogurt button until the display reads a number of hours.
  • Press the "+" or "-" button until the display reads the desired length of time. I like to incubate mine for at least 12 hours. Incubating for 24 hours will yield the tangiest yogurt with the least amount of lactose left. Do not incubate for longer than 24 hours or the probiotics will start to die off from lack of food.
  • Once the time is up, put the pot of yogurt into the refrigerator until the yogurt is cold and set.
  • Once the yogurt is set you can pour off the liquid whey from the top or strain the yogurt using a cheesecloth for a thicker consistency.
  • Enjoy!

Nutrition

Nutrition Facts
How to Make Yogurt (Easy Homemade Recipe with or without Instant Pot)
Amount Per Serving (0.5 cup)
Calories 76 Calories from Fat 36
% Daily Value*
Fat 4g6%
Saturated Fat 2g13%
Cholesterol 12mg4%
Sodium 54mg2%
Potassium 165mg5%
Carbohydrates 6g2%
Sugar 6g7%
Protein 4g8%
Vitamin A 198IU4%
Calcium 141mg14%
Iron 1mg6%
* Percent Daily Values are based on a 2000 calorie diet.

Notes

For the yogurt starter, just use any plain yogurt with live active cultures.
If you’d like to make a smaller batch just use a ratio of 2 TBSP starter for each quart of milk. 
If you’d like to make a larger batch (such as using the Instant Pot to make a gallon) just double the ingredients listed.

Like this recipe? Check out my new cookbook, or get all my recipes (over 500!) in a personalized weekly meal planner here!

Have you tried your hand at making your own yogurt? How did it turn out? What type of starter and milk did you use?

Katie Wells Avatar

About Katie Wells

Katie Wells, CTNC, MCHC, Founder of Wellness Mama and Co-founder of Wellnesse, has a background in research, journalism, and nutrition. As a mom of six, she turned to research and took health into her own hands to find answers to her health problems. WellnessMama.com is the culmination of her thousands of hours of research and all posts are medically reviewed and verified by the Wellness Mama research team. Katie is also the author of the bestselling books The Wellness Mama Cookbook and The Wellness Mama 5-Step Lifestyle Detox.

Comments

133 responses to “How to Make Yogurt (Easy Homemade Recipe)”

  1. Eric Lengvenis Avatar
    Eric Lengvenis

    4 stars
    I’ve finally made this and it was delicious, but I had to make a point. There is zero value in buying raw milk if you are going to pasteurize it yourself. Any temperature above about 130 will destroy or denature all the things that make raw milk so valuable. The dairy council lists 145 degrees as the low end of official pasteurization.

    Otherwise it was delicious and simple. Thank you.

  2. Kathleen Avatar

    Just wondering if anyone has used a yogurt maker that they sell on Amazon. Is it as healthy to use this?

    1. Bev Avatar

      4 stars
      Yes, I bought the Oster one. At first I thought it heated up too much, but the yogurt turned out lovely, so no worries. The strainer part is in regular use, too, for Greek Yogurt/Yogurt Cheese, and Kefir Cheese. Works great. I paid $35 Canadian for this from Amazon. My friend bought one from Cultures for Health for $150. It works well, too. But you can make it without any commercial maker, as you read on this page.

    2. Nora Avatar

      4 stars
      I have used a Salton yoghurt maker since the 1960s. It makes 5 perfect jars of yoghurt. You probably could find one on eBay. It comes with a measuring spoon with a thermometer in it that shows you when it’s cool enough to put the starter in. I always use some of the last batch or some dannon plain yoghurt as a starter. I use 2% or whole milk. Whole milk makes fabulous yoghurt.

  3. Louise Avatar

    I’m a little confused, I thought that heating raw milk to 180 degrees would kill all the enzymes and much of the goodness. Can anyone explain?

  4. Josie Avatar

    Hey yawl!
    I don’t drink milk, goats, cow or any animal. I do, however, drink coconut and almond milk, which I know is not really a milk…

    Have you tried it with nut milks? Anyone?

    Thanks!

  5. frances Avatar

    Thank you for sending me this blog that I lost when Google took a dip. Like Michelle, I too am a Kefir Milk Girl and loving it.
    Regards
    Frances from Sunny South Africa (but raining for the last 2 days.)

  6. Viktorya Avatar

    Hi All,

    I make yogurt too, regularly. But instead of putting in the oven I wrap the jar with towels and leave it for the night.

    It comes out perfect.

  7. Tara Roberts Avatar
    Tara Roberts

    4 stars
    This sounds pretty simple. Does the yogurt at the end resemble Greek yogurt or regular yogurt? Also, I see people saying you can use the whey in baking and for other things, but they never explain how you use it in baking (in place of milk?) or for what other things. I for one would like some advice on that. Thanks!

  8. Sherryl Avatar

    This may be a silly question but about how long will a batch last? Many times store bought products last longer than homemade. This will help me decide how much to make. Thanks!

    1. Michelle Avatar
      Michelle

      Read the labels on the store bought yoghurt. Store bought yoghurt is full of chemical additives. As is a lot of our food including your breakfast cereals and many other processed foods. Home anything is much healthier for you.

  9. Tia Avatar

    I have a Coleman cooler with a tight fitting lid that works great for incubating yogurt. Just set the jars in the cooler add 2 quarts of hot tap water, to help maintain incubation temperature, and snug on the lid. Fuss free!

  10. karen Avatar

    I do this too. You can set a washcloth in the bottom of the pan to keep the jars from chattering. Just be sure to use sturdy jars designed for canning, I have had mixed and messy results with pickle jars.

  11. Terry Avatar

    5 stars
    I make yogurt with coconut milk using a starter from Cultures for Health. It makes very good yogurt. The only negative thing is that it can’t be used over and over as your starter for the next batch of your yogurt. You need to use the purchased starter from time to time. But it is great for those who need to stay away from dairy.

  12. Nicole Avatar

    Yes! Just made some in Monday. Am going to try to make it every week! How long does it usually last?

    If I “kill” my culture, how will I know? Will the yoghurt still set? But I won’t know I’m missing the benefits?

  13. Carrie Avatar

    Great article! I’ve been making yogurt in mason jars for awhile now, but instead of heating up the milk in a pan, I just put the mason jars full of milk directly into a pan of water (only fill it about half way up the jars), basically like a hot water bath. Then once it reaches 180, I take the jars out and let them cool on the counter. It just makes for less handling and dishes!

  14. elizabeth Avatar

    5 stars
    if you have thermoses handy (the wide mouth, soup totting ones, then just fill those with HOT water while you’re making the yogurt and cooling it… then pour off the water and pour in the yogurt (after you have stirred in the starter) then cover quickly and place on the counter until morning. this is truly THE easiest way to make it in my opinion! (if you made it before lunch, then you can open the yogurt at night and put it in the fridge (in a different container), or if you made it at night, just take care of it the next morning.

    1. Ingr Avatar

      Interesting! I dont have oven with light bulb, I want to try this method. I want to know how hot the water that you pour to the thermos? Is it booling hot water? After you pour out, do you need to dry the inside?

  15. Julie Hays Avatar
    Julie Hays

    5 stars
    I make yogurt all the time. I use whole milk for thicker and creamier yogurt. I save a few tablespoons of my last batch in the freezer for starter for my next batch. I just get it out to thaw when I start heating up my milk. I leave mine in the pan to incubate and leave it sit out on the counter wrapped up in a few towels or blankets overnight to stay warm. In the morning, I put it in the fridge to cool completely before stirring or adding anything so it stays thicker. Sometimes I strain out extra whey so it is more like a Greek yogurt. Waaaay cheaper than buying at the store.

    1. mary Avatar

      Hi! Do you keep water in the pan while incubating with a towel wrapped around the whole thing?

  16. Michelle Avatar

    Just curious, why you don’t make kefir instead?
    So much easier, no need to heat the milk.
    And you get many more strains of bacteria, and also strains of yeast.

    1. Julia Avatar

      The truth is that you don’t need heat pasteurized milk either, t higher than in your room will just speed up fermentation. I inoculate my milk with 6 strains of bacteria. So the difference between yogurt and kefir is that they tastes differently. And you can make one you like more.

  17. kirsten Avatar

    I have been making my yogurt with Meadow Gold whole milk that is stamped pasteurized and homogenized and it works fine. Other than the health benefits of raw milk, why not use the MG whole milk?

  18. Brianna Avatar

    5 stars
    Hello, this sounds wonderful and I want to make some. I am confused about the oven light. I have a gas stove and its lowest temp is 170 degrees. When you talk about the light are you literally just turning the oven light on or the oven as well. Please help. Thank you!

    1. larissa Avatar
      larissa

      Hi, I am making my own yogurt for many years and I love it. I do not use an oven at all !
      I just cover the jar with layers of towels to keep the temperature on good level. If you do it at night, yogurt should be good at the next morning…..

    2. Lindie Kolver Avatar
      Lindie Kolver

      Larissa, Maybe I’m just stupid, but I was wondering the same thing. I either turn my Fan Forced oven on on 115° and if I want to SEE something in the oven, I turn on the light…duh (me …)

    3. Courtenay Avatar
      Courtenay

      5 stars
      With a gas oven you could just use an appropriate wattage Incandescent bulb droplight. You could also make an incubator from foam insulation panels and duct tape and experiment with different incandescent bulbs for the right heat.

  19. Elizabeth Avatar

    I love making yogurt! It took a lot of trial and error for me and I do it a little differently but that thermometer looks like a great idea!! I am always worried I will miss the right temp!

Leave a Reply

Your email address will not be published. Required fields are marked *

Recipe Rating