
I try to avoid using plastic in our home as much as possible, but I understand the convenience of plastic baggies for snacks on the go. When I am out and about with the kids I like to keep some healthy snacks in my purse for when hunger strikes.
There are a lot of great options for reducing plastic in your home and I love to use stainless steel lunch containers to pack healthy lunches for my kids when we go on field trips. But stainless steel and glass are not always practical for quick trips and tend to get quite heavy in my purse.
DIY Cloth Snack Bags
The simple answer for snacks on the go is to use cloth snack bags. Etsy is overflowing with beautiful options for reusable snack bags, most of them handmade by stay-at-home-moms.
If you have even a basic knowledge of sewing, you also have the option to make some yourself.
A few weeks ago I made a few baby bibs for a friend’s baby and I decided to make some coordinating reusable snack bags to go with the bibs.
We use these for popcorn, energy bars, Magic Spoon cereal, and more!
Fabric
Since I was coordinating the bags to the bibs I previously made, I used this organic cotton print (dyed with low-impact dyes) for the outer fabric and an organic cotton muslin for the inside lining. (I used this fabric for the bibs.)
Cotton is easy to work with, it is easily washable, and there are a lot of cute prints to choose from. The only drawback is that cotton snack bags are better suited to dry snacks such as trail mix, homemade jerky, wellness energy bars, and grain-free crackers, just to name a few.
A thicker fabric such as canvas or home decorator fabric would offer a thicker bag that would be good for foods like sliced carrots, grapes, or snap peas, but it still won’t be waterproof.
Supplies:
- sewing machine
- fabric
- 3/4″ wide hook and loop
- thread
- sewing pins
- ruler or measuring tape
- iron
Directions:
Use 1/4″ seam allowances. Finished bag will be 6″ w by 5.5″ h.
- Cut one rectangle 13.5″ by 6.5″ from both the outer fabric and the lining fabric. If you have a one way print you will want the long measurement to parallel the direction of the print.
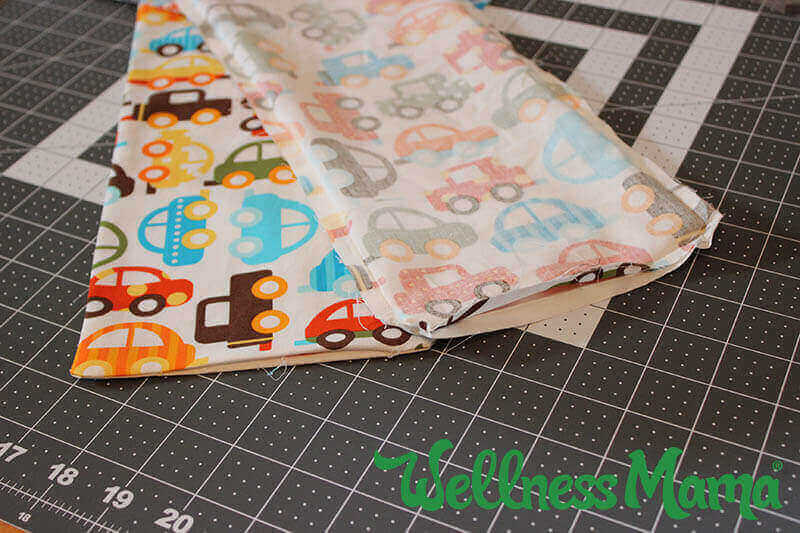
- Pin the two pieces together with right sides together.
- Leave a 3″ opening on one of the short ends so that you can turn the pieces right side out.
- Start on one of the short ends about 1.5″ from the corner. Sew toward that corner and continue all the way around the rectangle, stopping 1.5″ after the last corner. This will leave the 3″ opening.
- Clip the 4 corners.
- Turn the bag right side out by pulling it through the opening.
- Press seems flat around the edge, making sure to press the open section as well. That section will be closed when you top stitch.
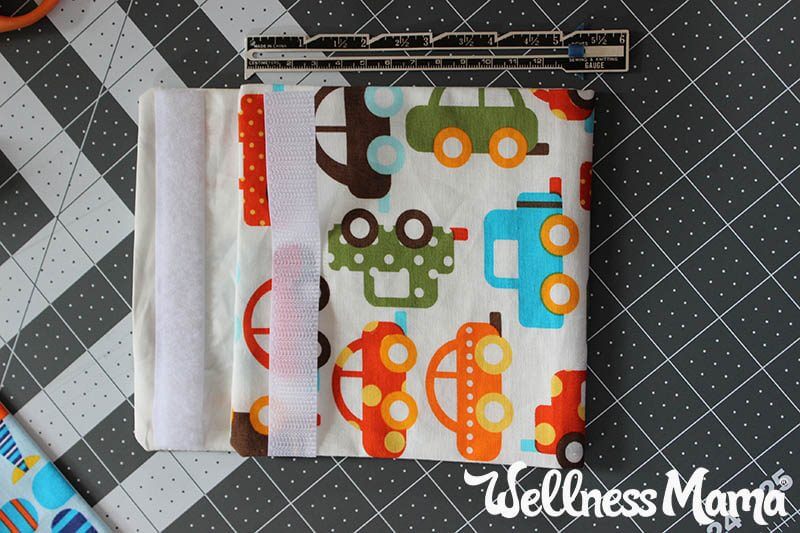
- Measure across the narrower width of the bag and cut both sides of the hook and loop to this measurement. Mine was about 5.75″ long.
- Lay the bag down on the table, outside fabric down. Take the short end that does not have the opening and fold it up about 5.5″
- Lay one side of the hook and loop (it doesn’t matter which side) 3/8″ down from the top of the bag (on the lining side). Lay the other side 5/8″ down from the edge you folded up (on the printed side). Pin both pieces in place.
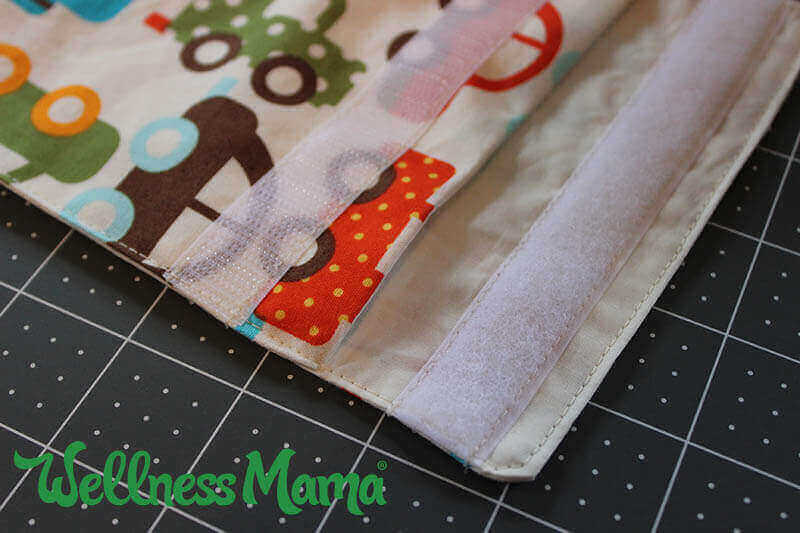
- Unfold the bag and sew the hook and loop to the bag by stitching along the long edges of each strip.
- Refold the bag like you did in step 9. Pin it in place.
- Beginning at one bottom corner, stitch up the side of the bag a scant 1/8″ from the edge.
- Sew all the way to the top corner, pivot at the corner, and continue across the top. This will give a nice top stitch and also close the opening.
- Pivot at the other corner and sew down the third side. It is not necessary to sew along the bottom edge but you could if you want the look of the top stitching.
If you enjoy making these bags, check out my tutorial for making your own produce bags!
Do you use reusable snack bags? Will you try to make your own?
Leave a Reply